KJ-01.02.Instruction Manual.REV.02.pdf - 第120页
5 − 24 (3) Chng (Change) W hen y ou select the [3/ Chng] com mand, the scr een shown in Figure 5.3.4. 6 appears. Figure 5.3. 4.7 [3/Chng] comm and pull-down menu 1) Changes to t he editing screen f or t he designat ed da…
5 − 23
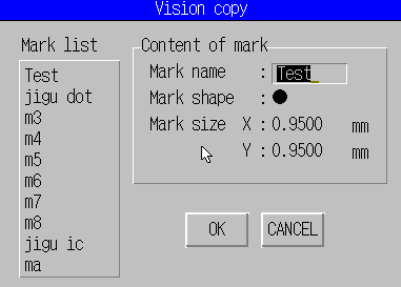
② [9/ Vision copy]
A screen appears as shown in Figure 5.3.4.6 when [Vision copy] is
selected.
Figure 5.3.4.6 Vision Copy screen
Select the data name to be copied, and click the <OK> button. Its
conditions data registered onto the database is copied.
When you click the <CANCEL> key, the machine quits the “Vision copy”
dialog box without copying any data.
3) Mark database
This command deletes/modifies data registered onto the mark database. See
Section 6.4 “Mark Database Management” for details.
5 − 24
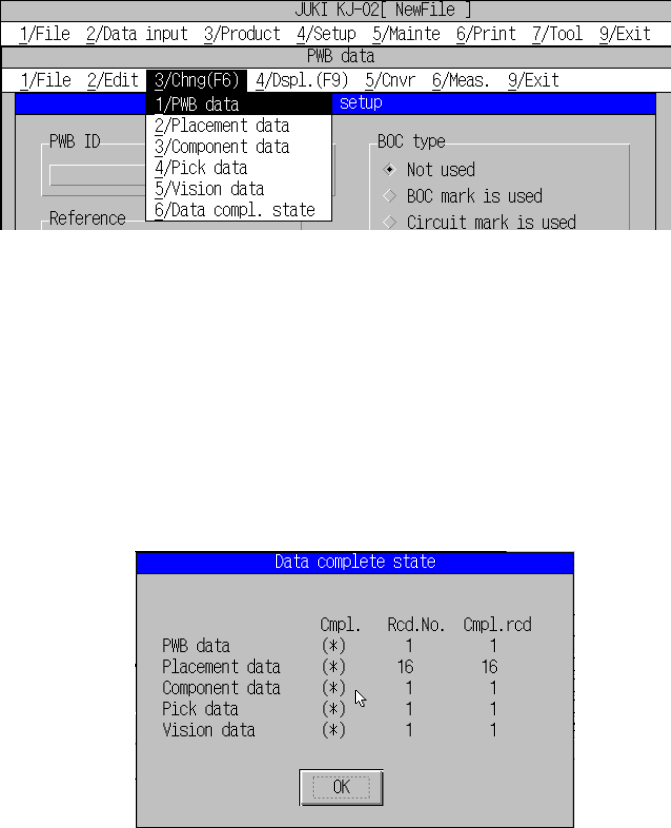
(3) Chng (Change)
When you select the [3/Chng] command, the screen shown in Figure 5.3.4.6
appears.
Figure 5.3.4.7 [3/Chng] command pull-down menu
1) Changes to the editing screen for the designated data.
2) Data comple. State (data completion state)
This command displays how far each type of data creation progresses.
“(*)” displayed at the “Cmpl.” column indicates that the corresponding type of
data is completely created, while “( )” indicates that it is not created
completely.
Figure 5.3.4.8 [3/Chng] Data creation progresses Dialog
Note: If PWB data is not created completely, you cannot switch the PWB data
screen to any other type of data screen (except for the “Data complete
state” screen).
Until at least one line of Placement data is created, you cannot move to
the Component data, Pick data, or Vision data screen.
(4) Dspl. (Display) menu
The PWB data does not support the “Display” function as it is not used.
5 − 25
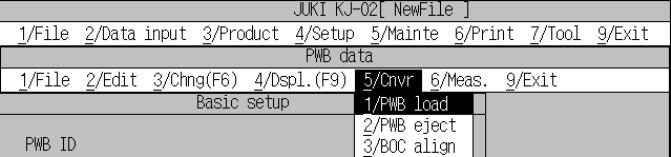
(5) Cnvr (Conveyor) menu
A screen as shown in Figure 5.3.4.8 appears when [5/ Cnvr] is selected.
The machine immediately functions when the corresponding command is
selected.
Figure 5.3.4.9 [5/Cnvr] command pull-down menu
1) PWB load
This command loads a board into the machine.
When you check the check box “Align placement position with BOC.” on the
Operation option screen invoked from the “Setup” menu, the machine
automatically detects a BOC mark and how much a board is shifted from the
regulated position on the PWB transport path (angle as well as position)
after setting the board. The machine refers to this board position and angle
errors during teaching of the component placement position.
2) PWB eject
This command ejects a board.
3) BOC align.
The machine uses its camera sensor to recognize the BOC mark on the
board loaded to obtain PWB alignment.
(6) Meas. (Measurement)
You cannot use this command on the PWB data seen.
(7) Exit
This command functions in the same way as the [Exit] command displayed on
the [1/File] menu does.