KJ-01.02.Instruction Manual.REV.02.pdf - 第73页
4 − 2 4.1 Unit Sy stem T able 4.1.1 Unit sy stem setting items No. Units of measure Description 1 Length Setting of unit of length, and decimal point 2 Pressure Setting of unit of pressure, and decimal point A scr een as…
4 − 1
CHAPTER 4 SETUP
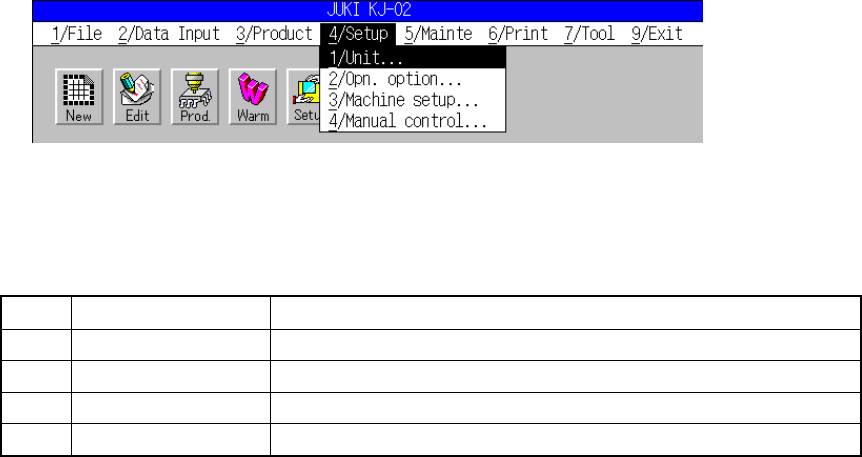
The setup menu screen, as shown in Figure 4.1, appears when [4/ Setup] is selected from
the menu bar.
Figure 4.1 Setup menu screen
Table 4.1 Setup commands
No. Command Characters displayed on the message line
1 Units of measure Sets the unit system for length and pressure.
2 Opn. option Sets the options for operation.
3 Machine setup Sets the machine setup status.
4 Manual control Carries out a test for devices in manual operation.
See CHAPTER 10 “MANUAL CONTROL” for [4/ Manual control].
* The data of the screen shown here are only for your reference and it is for the
machine which is front-reference and right-to-left-transportation type.
4 − 2
4.1 Unit System
Table 4.1.1 Unit system setting items
No. Units of measure Description
1 Length Setting of unit of length, and decimal point
2 Pressure Setting of unit of pressure, and decimal point
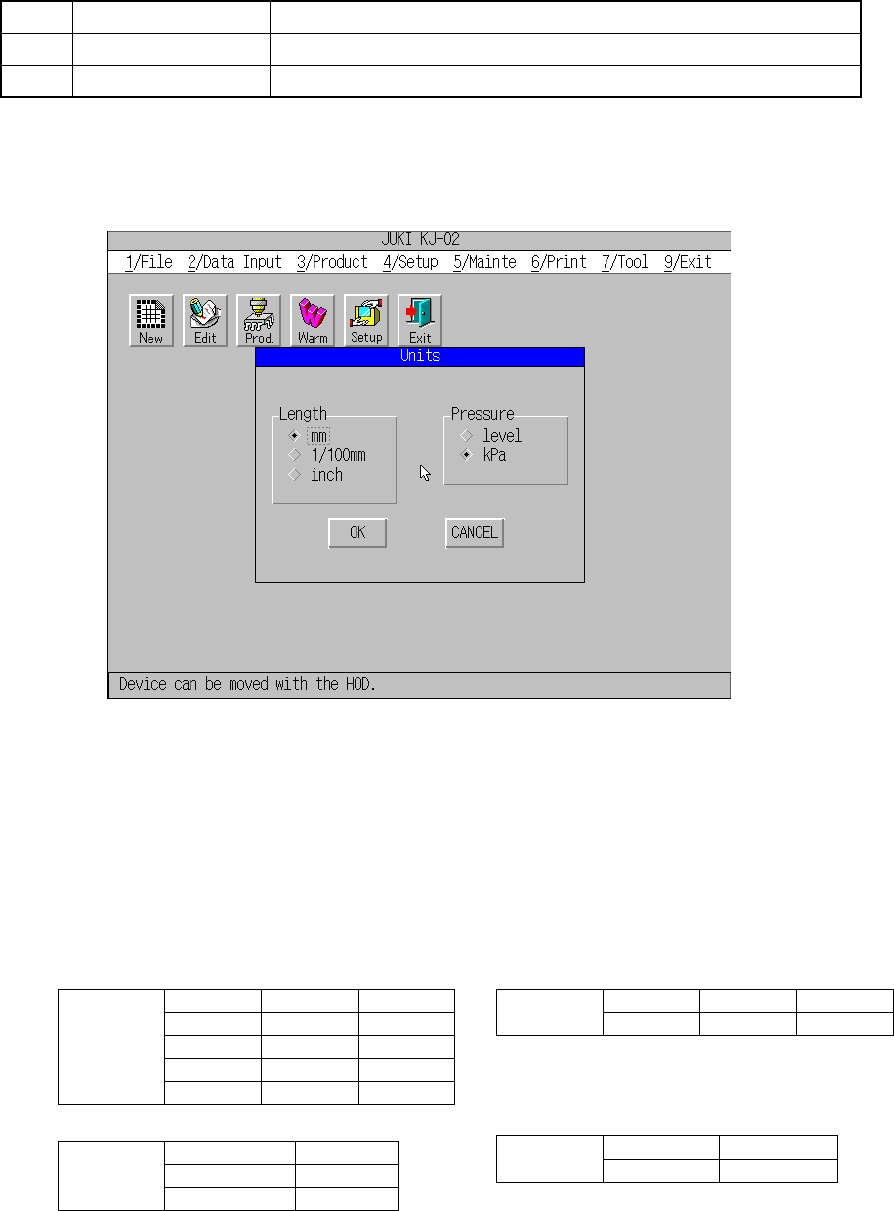
A screen as shown in Figure 4.1.1 appears when [1/ Units of measure] is
selected from [4/ Setup].
Figure 4.1.1 Units of measure screen
(1) Operation
Select the units of length and pressure with a radio button.
When the “OK” button is pressed after selections have been made, the settings
are stored in machine’s flash memory.
- Unit conversion table - Screen display (common to X, Y, Z)
mm 1/100mm inch
1 100 0.03937
0.01 1 0.0003937
25.4 2540 1
Length
0.0254 2.54 0.001
Level kPa
1 0.1333
Pressure
7.5 1
(2) Effects
All figures appear with the units set here.
Input values are also read with the units set here.
mm 1/100mm inch
Display
123.45 12345 12.123
mm 1/100mm
Display
123.12 12.123
4 − 3
4.2 Operation Option
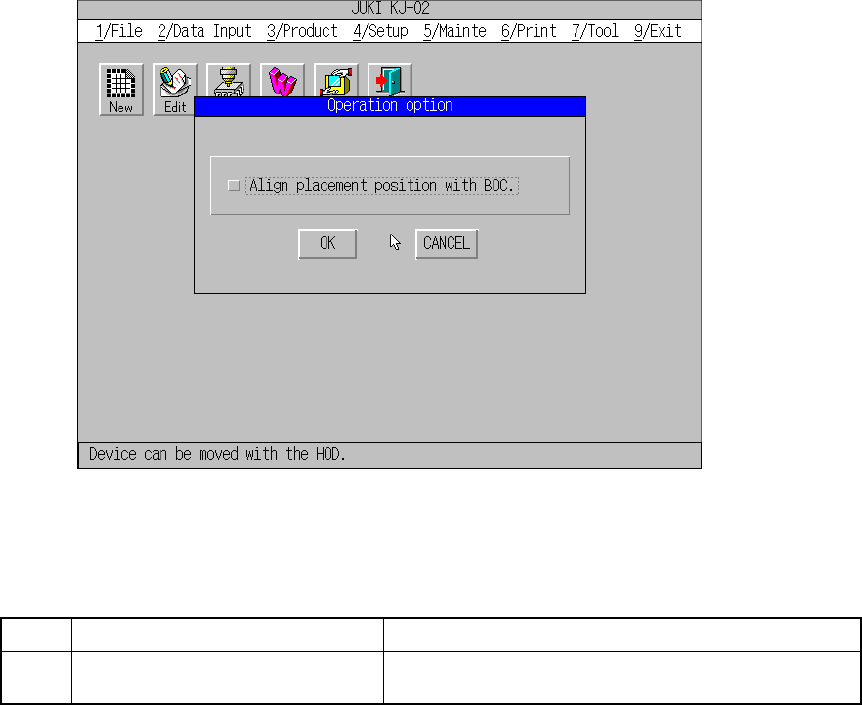
When you select the [2/Operation option] command from the [4/Set up] menu, the
“Operation option” dialog box appears on the screen as shown in Figure 4.2.1.
Figure 4.2.1 Operation option screen
(1) Setting Items
No.1 Item Description
1 Align placement position to BOC. Sets the BOC correction when the system is teaching
the placement position for editing data and so on.
(2) How to set each item
① Align placement position to BOC.
– Set whetter to align BOC or not with <Yes/No> in the check box to perform
teaching of placement point for editing, etc.
– When this option is turned ON, for placement point teaching, the placement
point is moved to the coordinate after BOC alignment. When importing the
placement point, alignment is performed reversely. So, the accurate
placement point to the PWB can be calculated for teaching.
Notes: – This alignment cannot be performed if the mark data of the PWB
data is incomplete.
– This alignment cannot be performed when not using the OCC for
machine setup.
– For the value of alignment, the latest result of mark recognition is
used. If BOC alignment is readjusted during data creation, the
result may be slightly different from the previous one.