KJ-01.02.Instruction Manual.REV.02.pdf - 第132页
5 − 36 8) Vision copy This is eff ect ive only w hen the cursor is positioned in the f ield with mark T1. Refer to “Editing the PW B data” f or how to operate. 9) Nozzle sort This com mand sort s Placement data in t he l…
5 − 35
Specify the line number you want to jump to, and click the <OK> button.
The cursor moves to the line you specified. If you click the <CANCEL>
button here, the machine returns to the condition you invoked this Jump
command. If the specified number of line is larger than the total number of
lines entered, the cursor moves to the last line of data.
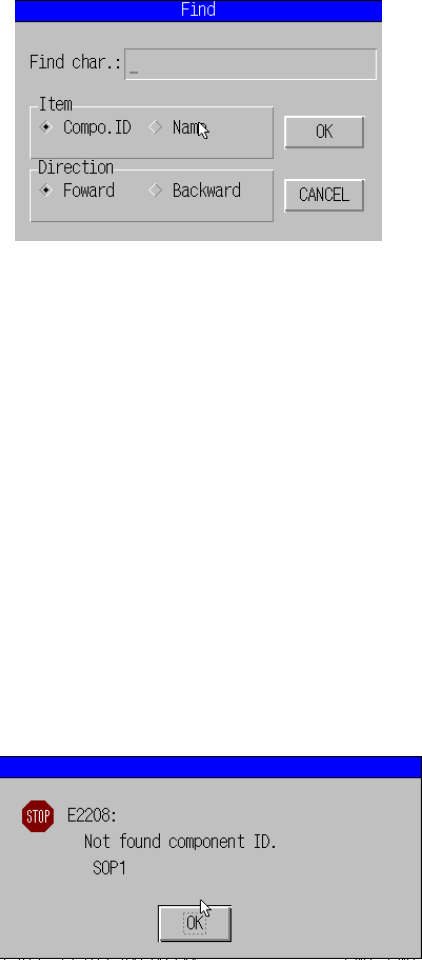
7) Find
This command allows you to search the data with using a component ID or
component name as a key. When you select the [7/Find] command on the
menu, the dialog box shown in Figure 5.3.3.9 appears on the screen.
Figure 5.4.3.9 “Find” dialog box
Enter the character string you want to search, and specify which item you
want to use to search data as a key, “Component ID” (Compo. ID) or
“Component name” (Name).
You can specify which direction the machine should search data also.
When you click the <OK> button, the machine starts finding the specified
character string. When you click the <CANCEL> key, the machine returns
to the condition before you select the [7/Find] command. If the machine
finds data of the specified component ID or component data, the cursor
moves to the data. Otherwise, the error dialog box shown in Figure
5.3.3.10 appears on the screen.
If you want to perform the find operation under the same condition, press the
F7 key (for searching forwards) or F8 key (for searching backwards). Note
that the machine does not distinguish a upper case letter from a lower case
letter for searching data.
Figure 5.4.3.10 Find error dialog
5 − 36
8) Vision copy
This is effective only when the cursor is positioned in the field with mark T1.
Refer to “Editing the PWB data” for how to operate.
9) Nozzle sort
This command sorts Placement data in the layer order, and then nozzle
number order.
Procedure for sorting data
− Sorts data in the layer order from the small layer.
− Sorts data of each layer in the nozzle number order.
Procedure for sorting data
If you have not created Placement data completely, you cannot obtain the
correct sorting result. Note that the machine sorts Placement data itself, so
you cannot restore the placement order to the previous one.
We recommend that you execute this command to produce PWBs
effectively.
10) Mark database
This command deletes/modifies data already registered on the mark
database. See Section 6.4 “Mark Database Management” for details.
(3) Chng (Change) menu
See the description of the “Chng” command displayed on the PWB data.
If at least one record of Placement data is created (this record does not have to
be created completely), you can move to the Component data screen.
(4) Dspl. (Display) menu
This command is disabled because the display function is not used on the
Placement data screen.
(5) Cnvr (Conveyor) menu
The operation is the same as that for [5/ Cnvr] of PWB data.
(6) Meas. (Measurement) menu
Not available with the placement data.
(7) Exit menu
See the description of the “Exit” command displayed on the PWB data.
5 − 37
5.5 Component Data
Set the dimensions of a component, component supply method, component centering
conditions, and placement conditions on the Component data screen.
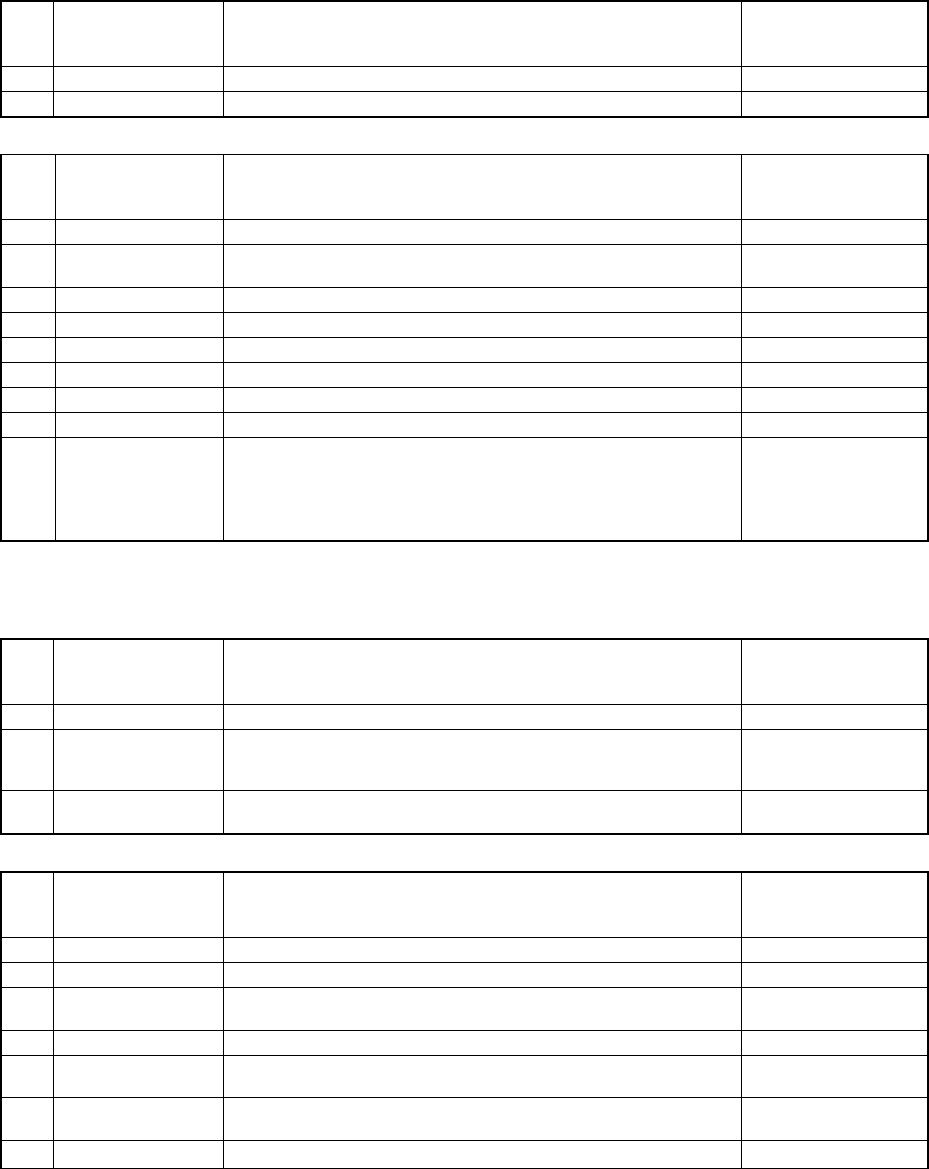
Table 5.5.1 shows the setting items on the Component data screen, and Tale 5.5.2
shows the allowable setting value range of each item.
Table 5.5.1 Component data setting items
(1) Basic component data setting items
① Items automatically set
Item
Description
Whether this item is
measured automatically
with the measurement
command:
1 No. Order each component data record is registered.
2 Component name Component name specified on the Placement data screen
② Items common to various components
Item
Description
Whether this item is
measured automatically
with the measurement
command:
1 Comment Comment for component
2 Component
packaging
Specify the packaging style of a component.
3 Component type Specify the packaging style of a component.
4 Centering method Specify the component centering method: laser or VCS.
5 Component width Specify the width (horizontal length) of a component. Yes
6 Component length Specify the length (vertical length) of a component Yes
7 Component height Specify the height of a component. Yes
8 Nozzle number Specify the nozzle number for picking a component.
9 Vacuum level
Specify the vacuum pressure obtained when the machine picks up a
component. The machine calculates the difference between the
vacuum level obtained when no component is picked up (see the
setting on the Machine setup menu) and the value specified here to
obtain the threshold value for judging whether a component is picked
with a nozzle.
Yes
(2) Component package style setting items
① Setting items for a tape component
Item
Description
Whether this item is
measured automatically
with the measurement
command:
1 Tape width Specify the tape width.
2 Feeding pitch Specify the tape feeding pitch of a feeder.
How many times a feeder knocks a tape is determined according to
the tape width and feeding pitch settings.
3 Direction Enter the direction of a component against the component feeding
direction of the tape feeder.
② Setting items for a tray component
Item
Description
Whether this item is
measured automatically
with the measurement
command:
1 First pos. X Specify the X coordinate of the first component position on a tray.
2 First pos. Y Specify the Y coordinate of the first component position on a tray.
3 Pitch width Specify the horizontal component pitch (distance between two
consecutive components) of a tray.
4 Pitch length Specify the vertical component pitch of a tray.
5 No. of row Specify the number of components located on a tray in the horizontal
direction.
6 No. of line Specify the number of components located on a tray in the vertical
direction.
7 Tray thick Specify thickness of a tray.