KJ-01.02.Instruction Manual.REV.02.pdf - 第53页
2 − 3 2.1.2 HOD: Hand-held operating device operation panel Figure 2.1. 2 HOD: Handheld operating dev ice operation panel WA RNING T o avoid a risk of injury , do not place your hand in t he machine, nor move your face o…
2 − 2
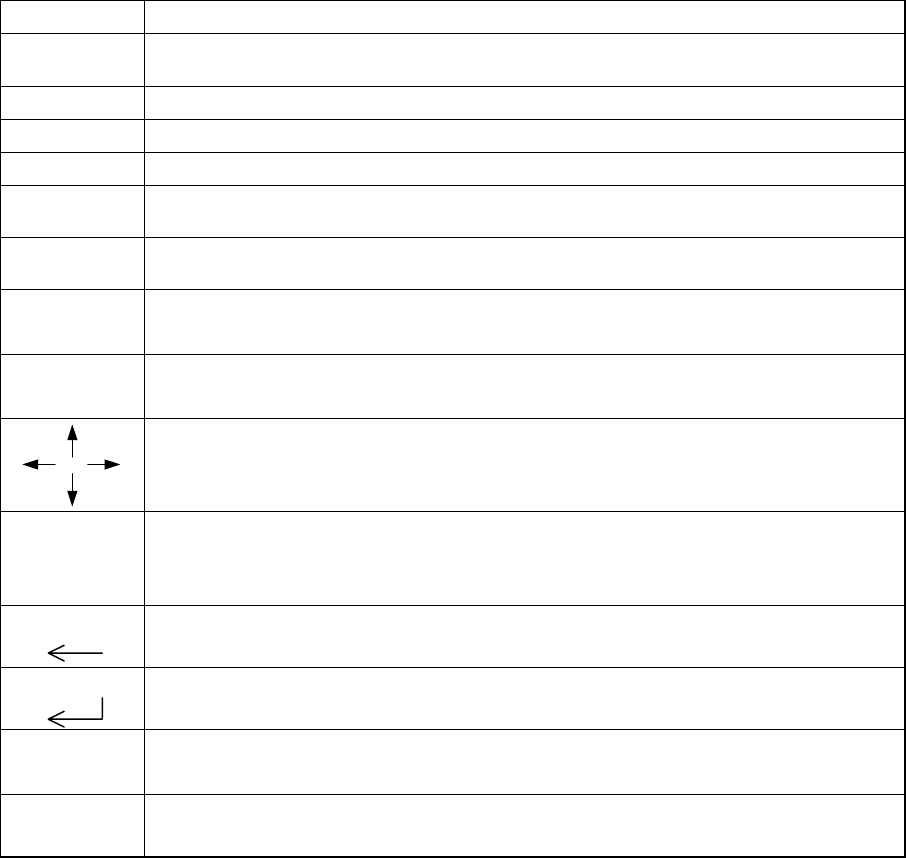
Key Function
INSERT
• Unused Use to select either the insert or overtype mode, the key toggling between the
two.
DELETE
• Unused Use to erase the character at the cursor.
HOME
• Unused Use to move the cursor to the beginning of the line.
END
• Unused Use to move the cursor to the end of the line.
PAGE
DOWN
• Unused Use to access the following page on the display.
PAGE
UP
• Unused Use to access the previous page on the display.
Tab
• Unused Use to move the window forward.
• Unused Use to move the cursor forward.
Shift + Tab
• Unused Use to move the window backward.
• Unused Use to move the cursor backward.
• Unused Use to move the cursor in the direction of the arrow.
0-9,
A-Z,
-, +,
other symbols
• Unused Used to generate and edit data.
Note: The mark is entered by ¥. (Japanese only)
ScrlL
• Unused Use to move the cursor backward and, at the same time, erase the character at
the cursor.
ENTER
• Unused Use to validate the data entered.
Caps Lock
• Unused Use to switch between uppercase and lowercase letters.
• Unused The LED lights up when this function is slelcted.
Num Lock Use to lock the numeric key functions.
The LED lights up when this function is slelcted.
2 − 3
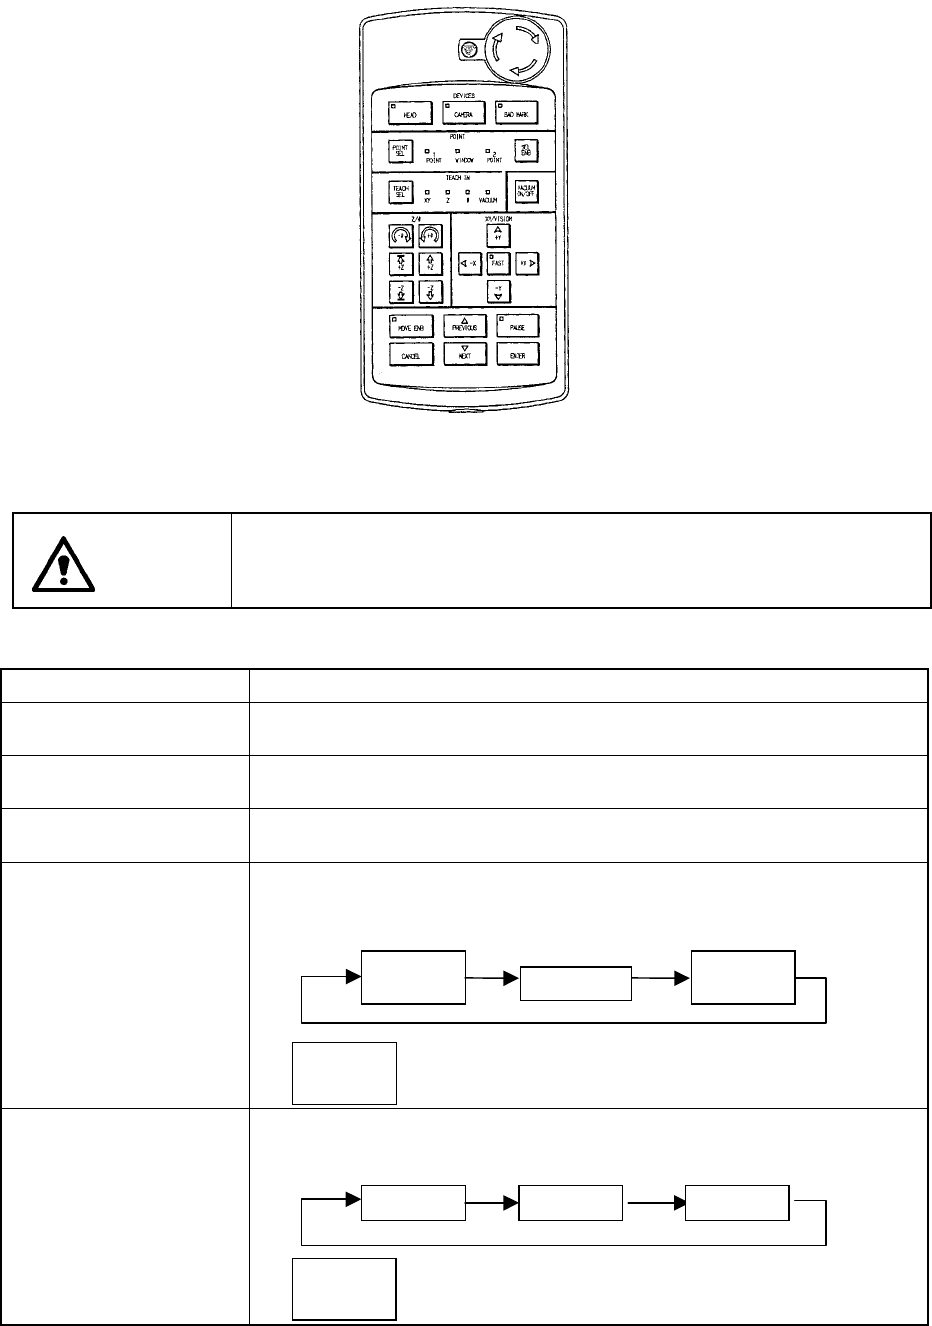
2.1.2 HOD: Hand-held operating device operation panel
Figure 2.1.2 HOD: Handheld operating device operation panel
WARNING
To avoid a risk of injury, do not place your hand in the machine, nor
move your face or head close to the machine during operations of the
HOD.
Table 2.1.2 List of HOD keys and their functions
Key name Function
HEAD
• Use this key to perform a teaching function with a head.
When selected, its LED lights.
CAMERA
• Use this key to perform a teaching function with the OCC.
When selected, its LED lights.
BAD MARK
• Use when a task is taught using the bad mark light beam (optional).
-The LED lights up when this function is selected.
POINT SEL
• Use this key to teach a XY-coordinate. When you press this key, the “1
POINT” LED flashes at first. Every time you press this key, the following LEDs
flash in the order shown below.
Press the <SEL ENB> key to confirm your selection of the
teaching method.
TEACH SEL
• Use this key to select a teaching item. When you press this key, the “XY” LED
flashes at first. Every time you press this key, the following LEDs flash in the
order shown below.
Press the <SEL ENB> key to confirm your selection of the
teaching item.
1
POINT
SEL
ENB
1
POINT
WINDOW
XY
SEL
ENB
Z
θ
2 − 4
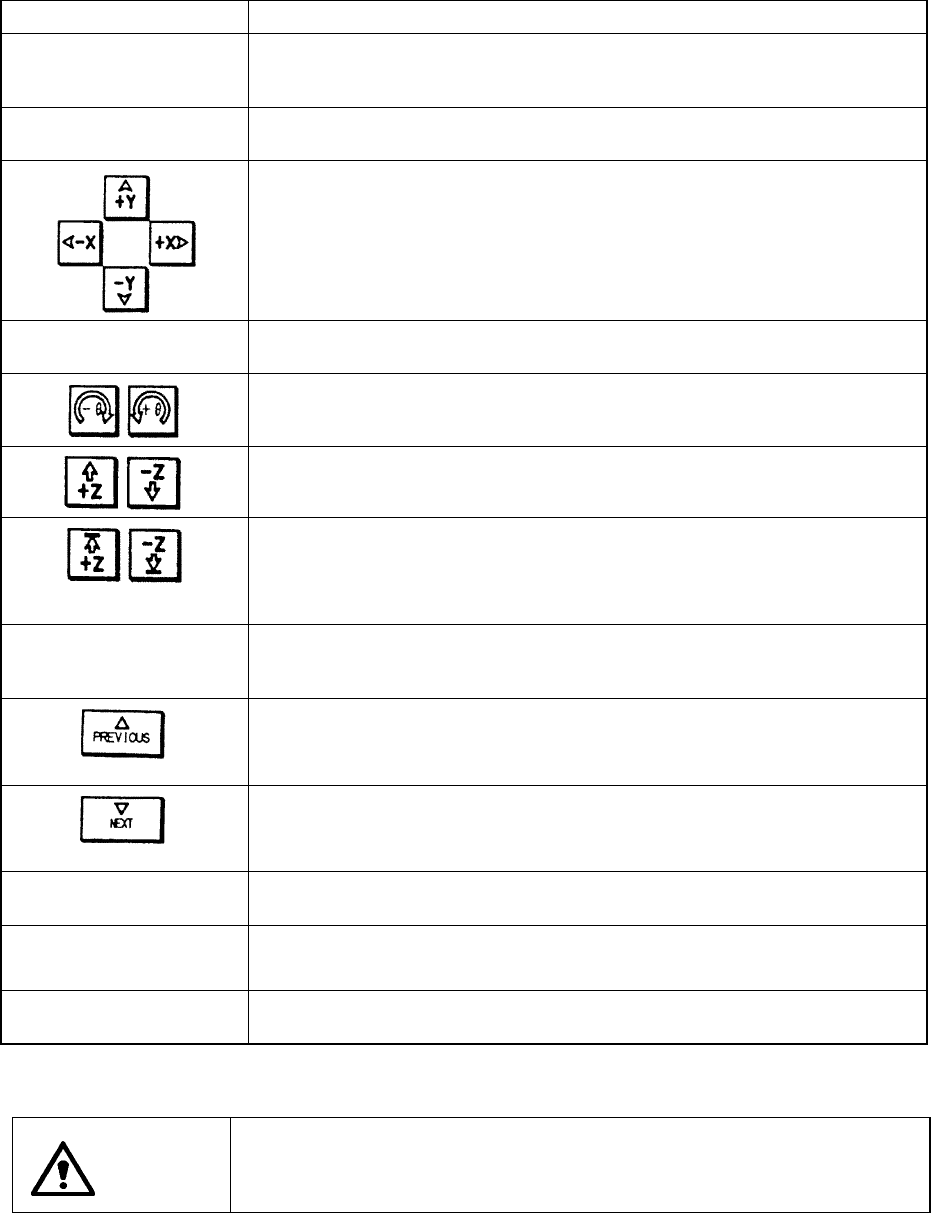
Key name Function
SEL ENB
• Use this key to confirm your selection: flashed item selected with the <POINT
SEL> or <TEACH SEL> key. When you press this key the flashing LED lights
up.
VACUUM
ON/OFF
• Use this key to turn on/off the vacuum condition of the head. This key
functions regardless of what device is currently selected.
• <X/Y selection>
Use to move X- or Y-axis in the direction of the arrow.
• <VISION selection>
Use to move the cursor in the direction of the arrow.
FAST
• Use this key to switch the XY-axis moving speed. The lighting LED indicates
that the XY-axis moves at high speed.
• Use to rotate the head clockwise or counterclockwise.
• Use to move the nozzle in the direction of the arrow.
• +Z is for upward movement, and -Z is for downward movement.
• Use these keys to move a nozzle up or down.
• The <↑+Z> key moves up a nozzle, while the <↓-Z> key moves down a
nozzle. However, do not use these keys for a component located at the high
position.
MOVE ENB
• Use this key to put the machine into Axis movement mode. When you press
this key, its LED lights up and it allows the XY-axis to move. When you press
this key again or press the <CANCEL> key, the machine quits this mode.
• During data editing, they key is equivalent with the <↑> key of a keyboard.
• During tracking of component placement, this key moves the cursor to the
previous component placement point.
• During data editing, this key is equivalent with the <↓> key of a keyboard.
• During tracking of component placement, this key moves the cursor to the next
component placement point.
PAUSE
• Use this key to temporarily stop the current production or tracking of component
placement. Its LED lights while the machine pauses.
CANCEL
• Use this key to finish teaching operation without loading the teaching result.
• When you press this key in Axis movement mode, the machine quits this mode.
ENTER
• Use this key to load the teaching result to the machine, and then finish the
teaching operation.
CAUTION
The magnet sheet is pasted on the rear of the HOD unit. Keep a floppy
disk away from the HOD because the data stored on the disk may be
erased.