KJ-01.02.Instruction Manual.REV.02.pdf - 第94页
4 − 23 Figure 4.3. 10.2 Floppy disk insertion di alog box W hen y ou click t he <OK> button on t he dialog box above, the machine searches t he necessary file thr ough t he inserted f loppy disk, and t hen automati…
4 − 22
4.3.10 Nozzle data installation
To enable the expanded nozzle, install the data on the nozzle to the machine. When
you install the data to the machine, you can select the nozzle whose data is installed
on the ATC nozzle setup screen or Component data screen.
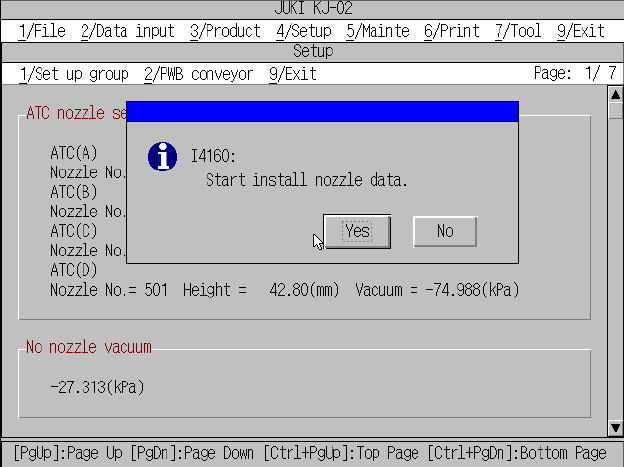
When you select the [B/Nozzle data installation] command, the message appears as
shown in Figure below.
If you do not install any nozzle data to the machine, click the <No> button to quit the
nozzle data installation process.
When you click the <Yes> button, the machine starts installing the nozzle data to the
machine.
Figure 4.3.10.1 Nozzle data installation dialog box
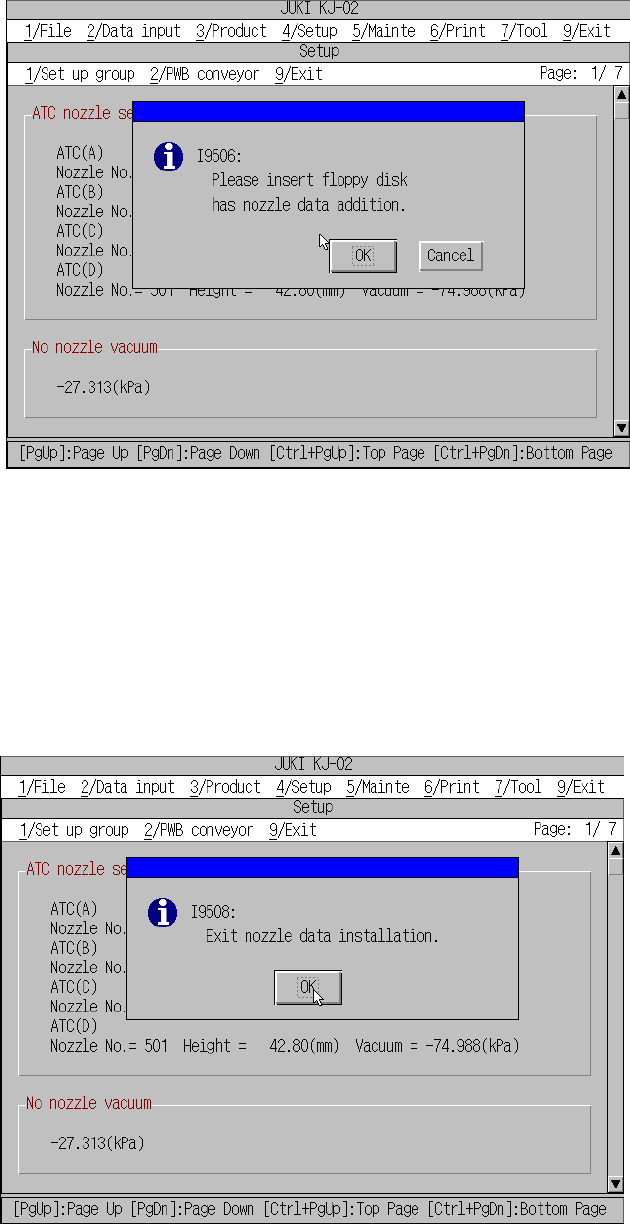
When the machine starts installing the nozzle data, the dialog box shown in Figure
4.3.10.2 appears on the screen.
Insert a floppy disk on which a nozzle data file is stored into the floppy disk drive, and
click the <OK> button.
4 − 23
Figure 4.3.10.2 Floppy disk insertion dialog box
When you click the <OK> button on the dialog box above, the machine searches the
necessary file through the inserted floppy disk, and then automatically installs it to
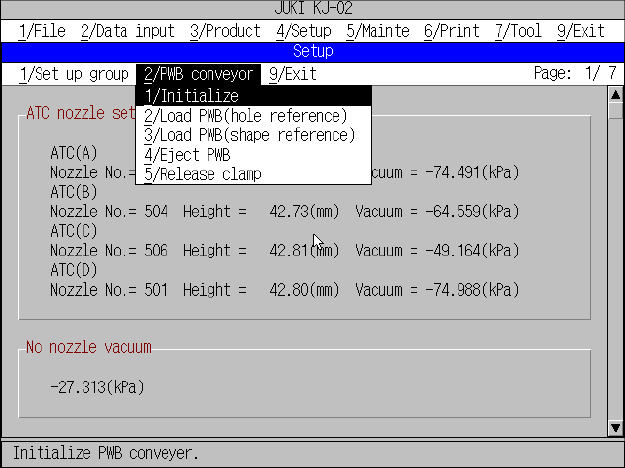
itself. After the machine finishes installing the file, the dialog box shown in Figure
4.3.10.3 appears on the screen.
Figure 4.3.10.3 End of nozzle data installation screen
4 − 24
When the machine finishes searching a nozzle data file through the inserted floppy
disk, the screen shown in Figure 4.3.10.4 appears on the screen.
Figure 4.3.10.4 Quit of nozzle data installation screen
You have finished installing nozzle data to the machine here. You can use the
installed nozzle data on the ATC nozzle setup screen or Component data screen.