KJ-01.02.Instruction Manual.REV.02.pdf - 第292页
8 − 25 <2> Pause condit ion T o tempor arily stop board product ion, press the STOP butt on on the operator panel. W hen the ST OP k ey is pressed in the Continuous execution mode, or when the production in the St …
8 − 24
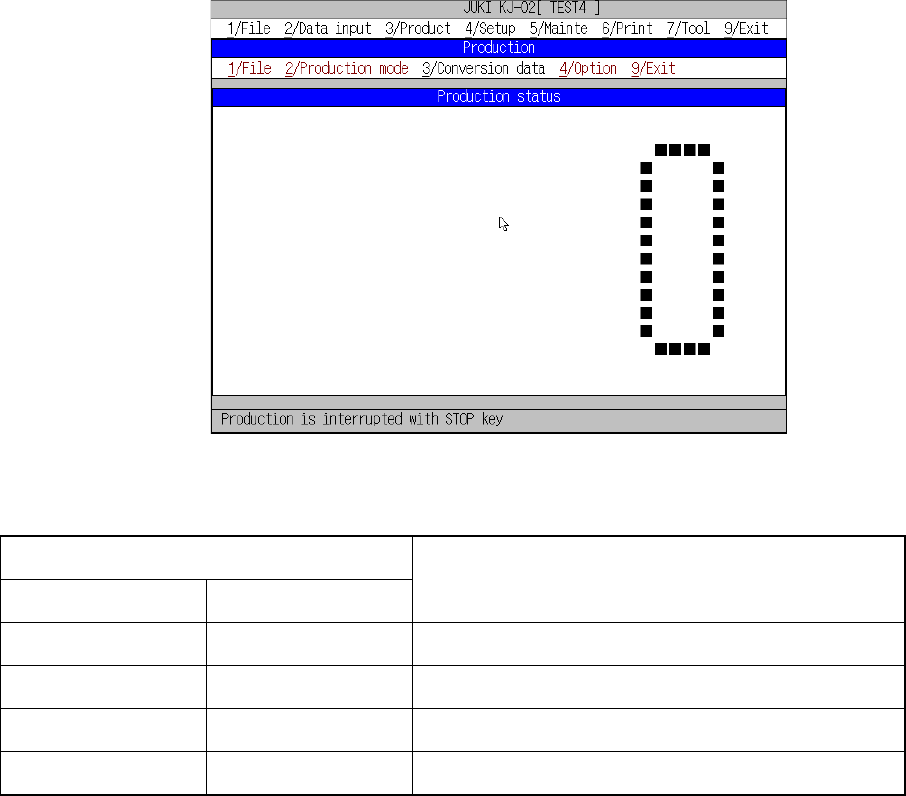
① PWB No.
This item displays the number of PWBs already produced.
(a)Produced: displays the number of PWBs already produced since you
pressed the START key.
(b)Remain: displays the number of PWBs to be produced hereinafter.
(c)Integrate: displays the total number of PWBs already produced since
the currently loaded production program set the number of
PWBs that was planned to be produced on the Production
Conditions screen. “Plan” displays the number of PWBs
that is planned to be produced.
② Circuit No.
Shows the number of a circuit on which a component is being placed
currently. When the machine is producing a single-plane board, this item
always shows “1.”
③ Place No.
Shows the Placement data number of a component that is being placed
currently.
When the check box “Display num. of PWBs produced in capital ltr.” is
checked on the Operation option menu
Figure 8.2.2.2 Production status screen (2)
① Values displayed on the Production status screen
Checking status of the check boxes on the
“Operation option” menu
Count down num. of
PWB produced.
Integrate num. of
PWB produced.
Description
OFF OFF
Produced: Number of PWBs that were already produced since
you pressed the <START> key.
OFF ON
Total: Number of PWBs that were produced by the
production program currently loaded
ON OFF
Number of PWBs calculated by subtracting the number shown in
“Produced” from the number of PWBs planned to be produced
ON ON
Number of PWBs calculated by subtracting he number shown in
“Total” from the number of PWBs planned to be produced.
When the machine finishes producing the number of PWBs you planned, it starts the
production end process.
8 − 25
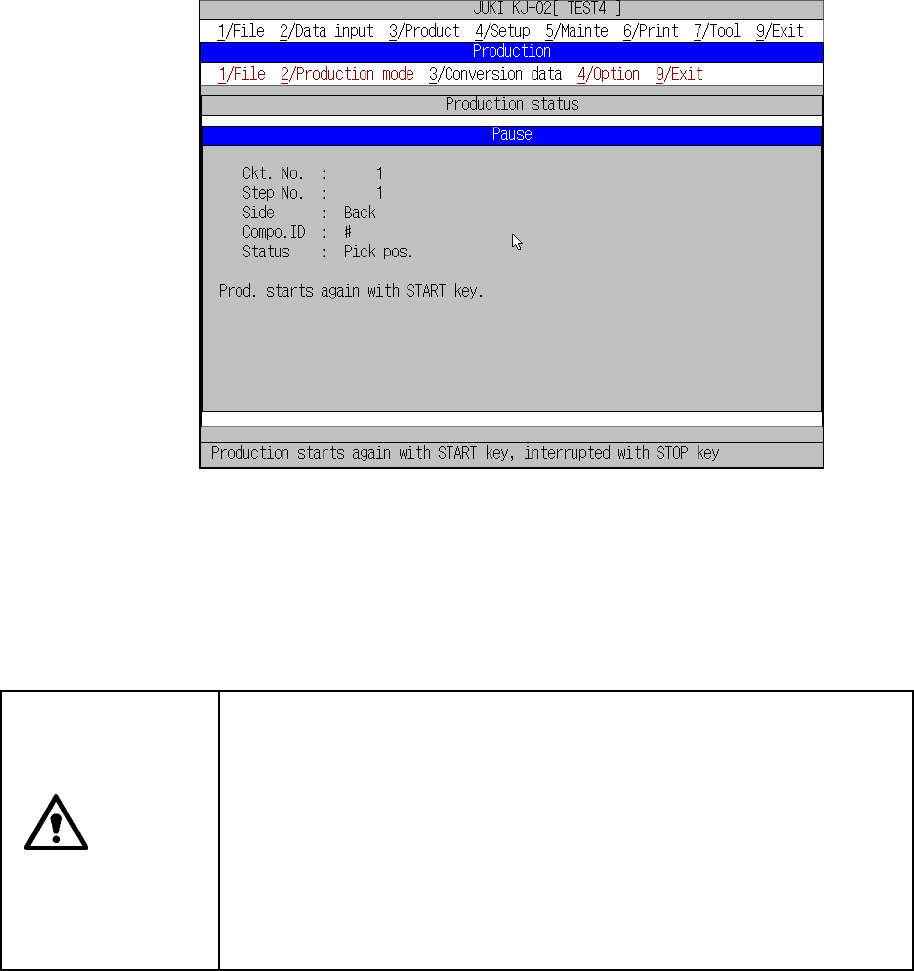
<2> Pause condition
To temporarily stop board production, press the STOP button on the operator
panel.
When the STOP key is pressed in the Continuous execution mode, or when the
production in the Step execution mode stops at a step position, the machine
enters the pause status.
Figure 8.2.2.3 shows the Pause status information box.
When the START key is pressed, the Pause information box disappears and the
machine exits the pause status. When the STOP button is pressed, the machine
goes to end processing.
CAUTION
The head starts to move immediately after the START key is pressed,
and then the machine starts PC board production.
To avoid a risk of injury, do not place your hand in the machine, nor
move your face or head close to the machine during operation.
Before pressing the START key, check that there is no one who is
working in the machine.
Before pressing the START key, check that there is no one who can be
injured when the head starts to move.
Before pressing the START key, check that there are no obstacles
(tools and jigs) left in the machine.
When the machine is in Pause condition, you can change coordinate data of the
component pick-up position or placement position specified in a production
program thorough teaching operation.
When the machine is put in the pause mode during production, the following data
can be taught according to the cause and position of the pause.
8 − 26
Pick data Placement data
Cause
Position
X, Y Z X, Y Z
Remarks
Pick point
○ ○
User request by the STOP key
Stop of the step operation
The cover is opened.
The area sensor is activated.
Placement
point
○
- Starts from XY teaching
- Effective HOD device keys are
[CAMERA],and [HEAD].
Only the head key is for the head
when put in the pause mode is
effective.
* 1. Teaching of pick point is set in the order of input, and only possible for
sequential pickup.
2. Teaching of pick point for tray components is impossible.
3. Teaching of placement point is possible only during reference circuit pattern
placement, and is not possible for the boards with which a bad mark of
reference circuit pattern is detected.
4. Only the data of TEACH IN item with the lit LED of the HOD immediately
before pressing the [ENTER] key of the HOD is to be set. If you want XY, Z,
and Vac be taught and set, teaching is to be performed separately.
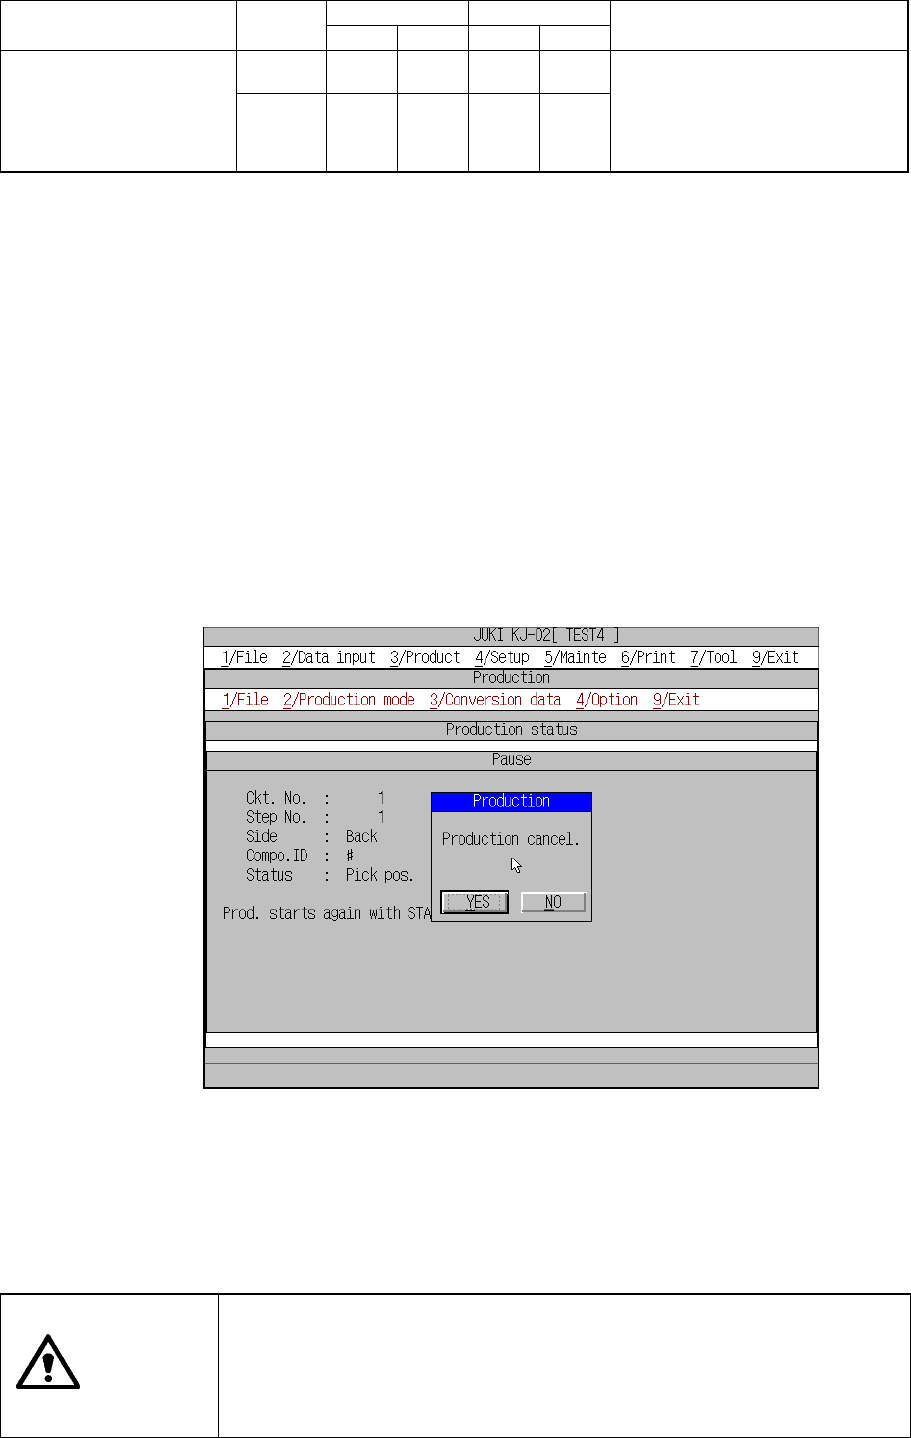
<3> Stop
The STOP button is used to stop board production before the preset number of
PC boards are processed. When the STOP button is pressed while the
production temporarily stops, the Figure 8.2.2.4 Stop dialog box appears.
Figure 8.2.2.4 Production stop confirmation dialog box
When you click the <YES> button, the clamped board is released, and the
machine allows you to set the production conditions. When you click the <NO>
button, the machine returns to the condition in which it was before you pressed
the STOP key; the machine enters Pause condition.
CAUTION
Even when the production is stopped, X and Y axes and the head
continue to move to carry out nozzle replacement.
To avoid a risk of injury, do not place your hand in the machine, nor
move your face or head close to the machine when stopping
theproduction.