KJ-01.02.Instruction Manual.REV.02.pdf - 第201页
5 − 105 Screen for con firming th at the IC trash b elt is full
5 − 104
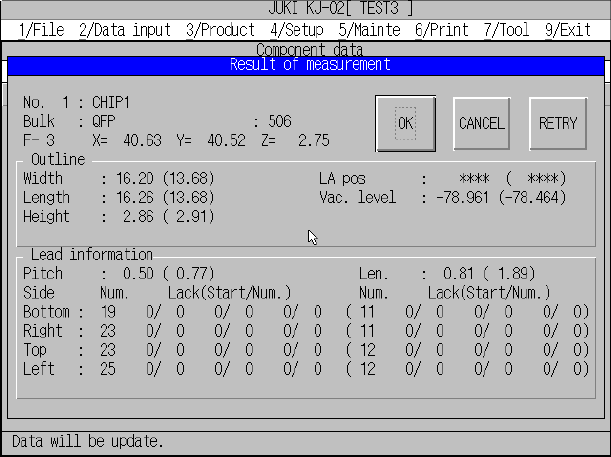
− Measurement result obtained if you have selected “Lead info.”
Measurement result obtained if you have selected “Lead info.” screen
(1) Operation buttons
① OK button:
Stores the displayed measurement results as the “Component data”, then
returns to the Measurement conditions screen.
② Cancel button:
Makes the displayed measurement results invalid, then returns to the
Measurement conditions screen.
③ Retry button:
Remeasures the pick component.
Notes: 1. Only the results corresponding to the selected measurement
items are displayed.
2. Since the values in parentheses indicate the “Component data”
before the Single measurement menu is selected, they are not
updated during single measurement operation.
3. When the Cancel button is selected, the “Component data”
indicate the results from the previous measurement if the OK
button was selected at that time. If the OK button was never
selected, the data in parentheses appears on the screen.
A component picked up from a tray holder will be returned to the pick position
regardless of the setting of the menu item “Component aband.” on the
Component data screen. A component picked up from other feeders will be
discarded onto the IC trash belt or into the Trash box.
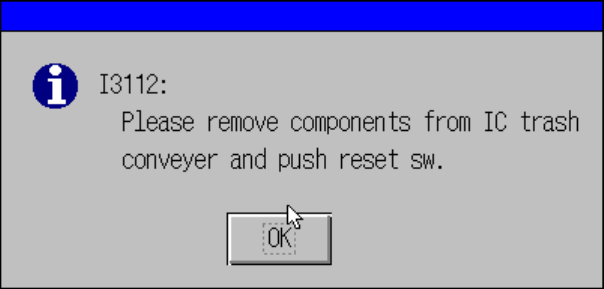
Note: If the IC trash belt is full of discarded components, the confirmation
message appears on the screen. Remove the discarded components
from the IC trash belt, and reset the belt. When you click the <OK>
button, the machine discards a component onto the IC trash belt. If the
IC trash belt is full of components even after you click the <OK> button,
the machine discards a component into the trash box.
5 − 105
Screen for confirming that the IC trash belt is full
5 − 106
5.7.2.5 Manual input
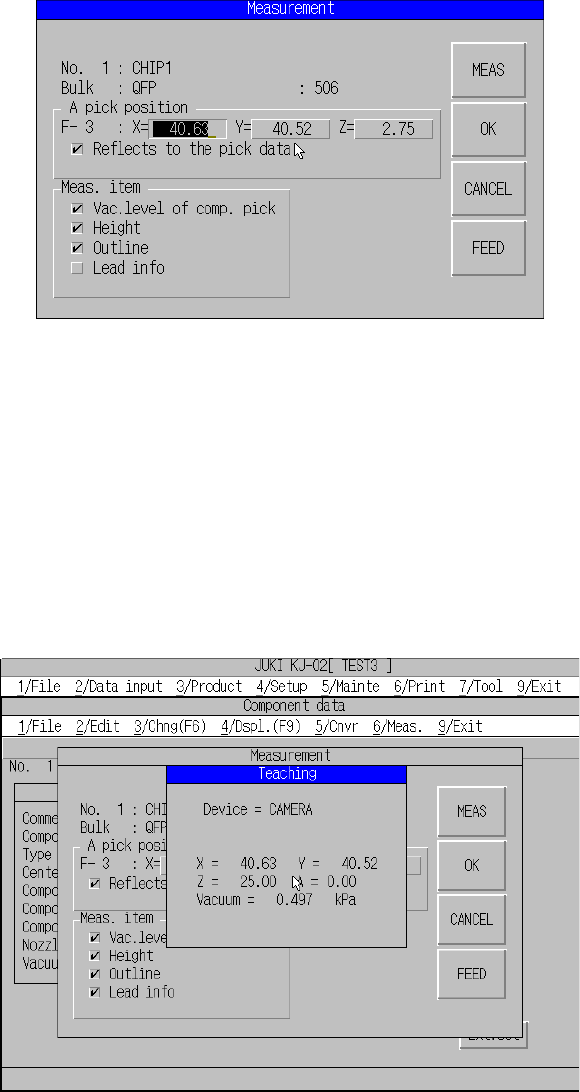
Measurement conditions screen.
The pick position can be input on the Measurement conditions screen.
When you press the Meas. button, measurement starts at the pick position set here. If
“Reflects to the pick data” is checked, the pick position can be stored as the Pick data.
Note: Any Pick data is not set if the component is supplied with the tray.
5.7.2.6 Teaching
Teaching of the pick position is possible on the Measurement conditions screen.
Figure of Teaching Screen
You cannot enter the XY and Z values at the same time.
To enter the XY values, set the input focus to X or Y.
To enter the Z value, set the input focus to Z.
When you press the Meas. button, measurement starts at the pick position set here. If
“Reflects to the pick data” is checked, the pick position can be stored as the Pick data.
Note: Any Pick data is not set if the component is supplied with the tray.