KJ-01.02.Instruction Manual.REV.02.pdf - 第124页
5 − 28 5.4.2 Data entry procedure Figure 5. 4.2.1 shows the initial screen of the placem ent data. Figure 5.4.2.1 Pl acement data initial screen (1) Component ID Ent er the com ponent ID using the f ormula bar . W hen th…
5 − 27
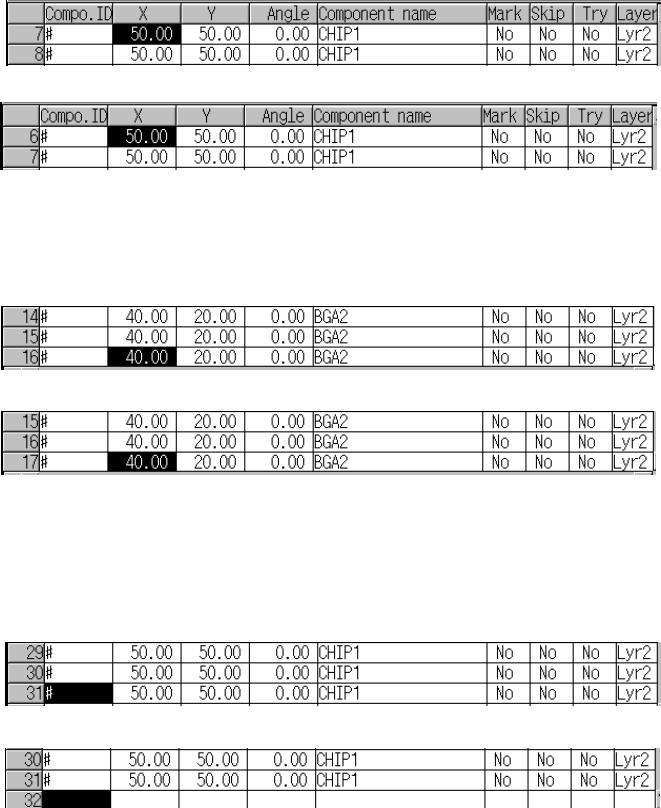
If the field is moved to the left in the “Mark 1X” field, the previous screen will be
restored.
(3) Up-down scroll
1) If the key is pressed when the cursor is located on the top line within the
data display area of a window, but not the first line, the screen scrolls down
one line.
Press the key.
2) If the key is pressed when the cursor is located on the bottom line within
the data display area of a window and when the component ID for the
following line has been entered, the screen scrolls up one line.
Press the key.
3) If the key is pressed when the cursor is located on the bottom line within
the data display area of a window and when the component ID for the
following line is not entered yet, the screen scrolls up one line and then the
cursor moves to the component ID cell.
Press the key.
(4) Moving to the line on which data is not be entered
If the component ID for the next line is not be entered yet, pressing the key will
move the cursor to the component ID cell on the next line regardless of which
cell it was located at.
(5) Moving to the beginning or end of the line
The Home key accesses the left-hand half screen of the listing and moves the
cursor to the component ID cell.
The End key accesses the right-hand half screen of the listing and moves the
cursor to the Mark 2 TI cell.
(6) Mutually exclusive entry (for the menu items: Mark, Skip, Try and Layer)
When you press the Edit key (F2), the pop-up menu appears on the screen.
Select an option on this pop-up menu.
5 − 28
5.4.2 Data entry procedure
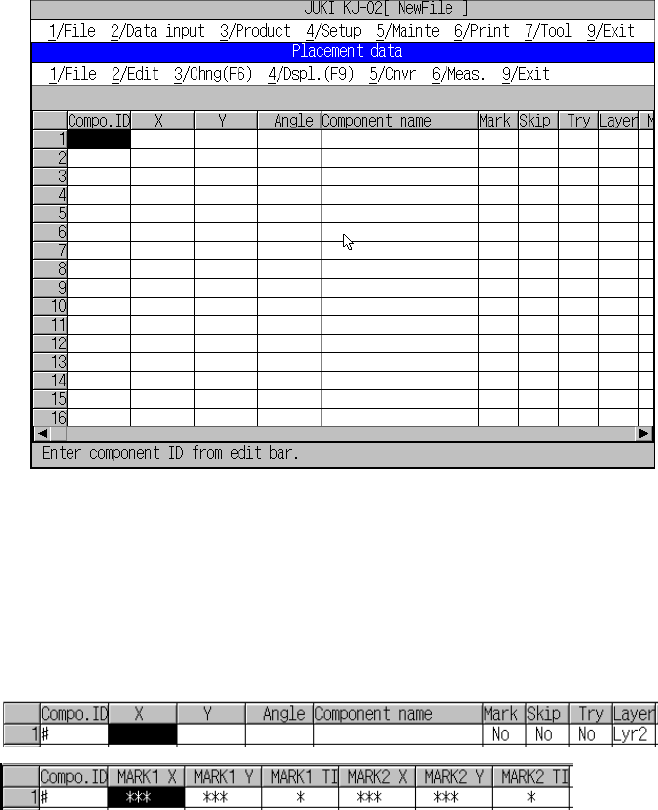
Figure 5.4.2.1 shows the initial screen of the placement data.
Figure 5.4.2.1 Placement data initial screen
(1) Component ID
Enter the component ID using the formula bar.
When this parameter is defined, the default values are shown and an asterisk (*)
appears where data entry is not necessary.
The first eight characters are accepted even though more than that is entered.
The default entry is #. Any entry other than # is checked for repetitive entry and
no identical component ID is accepted.
(2) X, Y
Using the formula bar, enter the component placement position.
For a single-plane PWB, set the coordinates viewed from the home position of a
PWB. For other type of PWBs, set the coordinates viewed from the home
position of a circuit.
You can use the HOD to teach the coordinates. See the section on teaching
operation for details.
(3) Angle
Enter the placement angle using the formula bar. The angles available are in the
range of 0 to 359.95 in 0.05 steps.
5 − 29
(4) Component name
Enter the component name using the formula bar. The area for Component
data, which is described later, is allocated with the name you specified here
(5) Mark
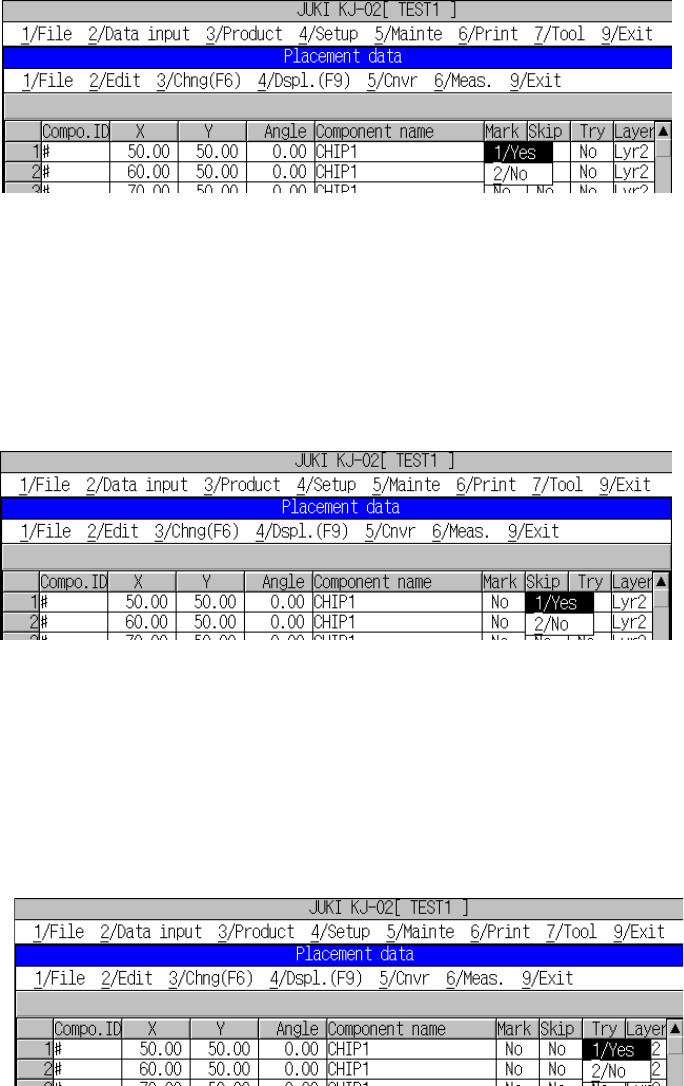
Select from the pop-up menu whether or not correction is made for placement
position using the fiducial mark.
For part ID input, “NO” (this means “not used”) appears as default for the mark.
To change the default setting, using the Edit key (F2), open the pop-up menu to
select the desired item.
Figure 5.4.2.2 “Mark” pop-up menu
(6) Skip
Specify whether the machine should skip this component placement point during
production on the displayed pop-up menu, Yes or No.
“No” (for “Not skipped”) is displayed as a default in the “Skip” field. To change the
setting of the “Skip” field, press the Edit key (F2) to open the pop-up menu and
select “1/Yes” or “2/No”.
Figure 5.4.2.3 Placement data, skip pop-up menu
(7) Try
Specify whether the machine should place a component on this position as trial
operation on the displayed pop-up menu, Yes or No.
“No” (for “Not to carry out a test run”) is displayed as a default in the “Test run”
field. To change the setting of the “Try” field, press the Edit key (F2) to call a
pop-up menu and select “1/Yes” or “No”.
Figure 5.4.2.4 Placement data, trial run pop-up menu