KJ-01.02.Instruction Manual.REV.02.pdf - 第55页
2 − 5 2.1.3 Powe r ① is the power lamp, and light s up when the power of the machine is t urned on. ② is the Power switch. ③ is the breaker , and cuts off t he power automatically if the overcurrent is supplied to the ma…
2 − 4
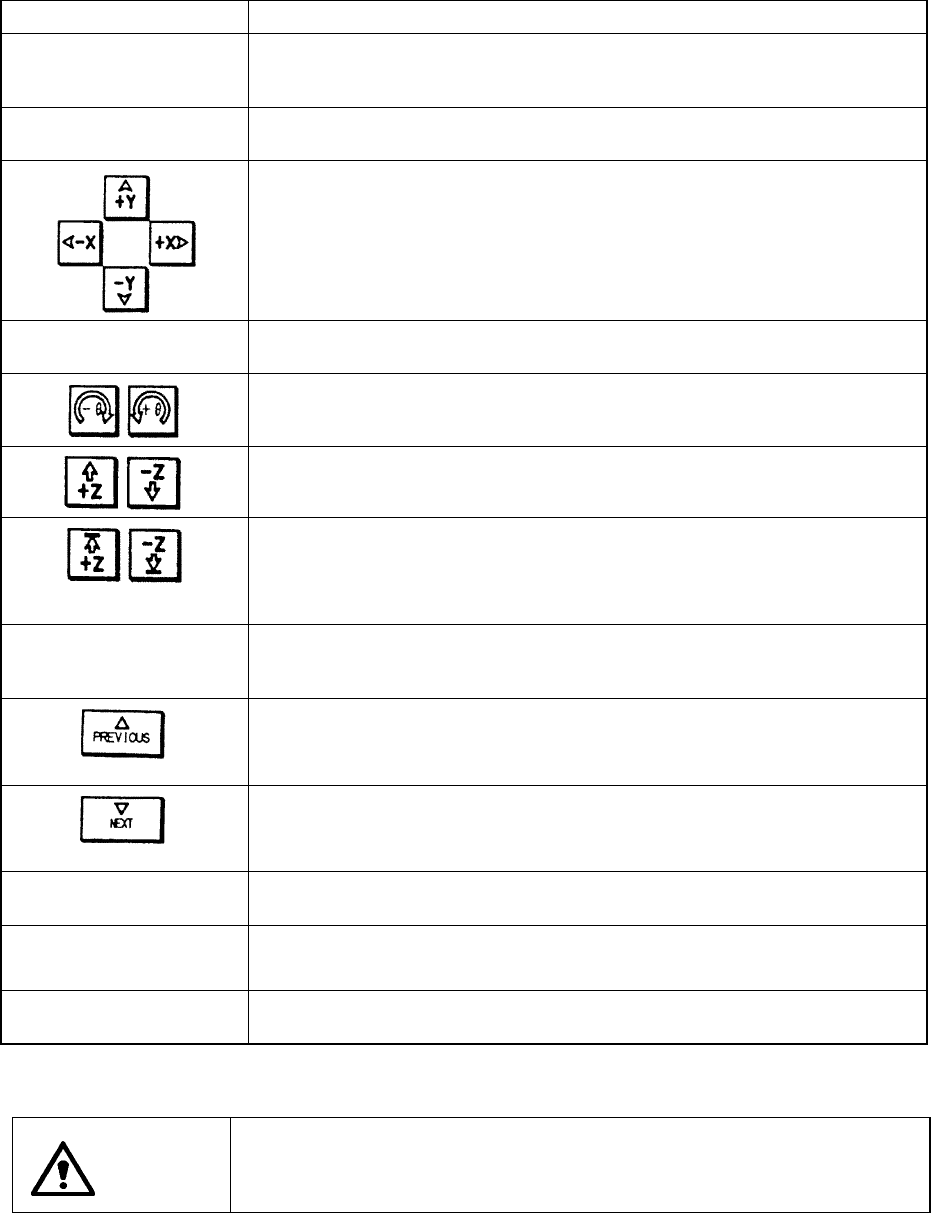
Key name Function
SEL ENB
• Use this key to confirm your selection: flashed item selected with the <POINT
SEL> or <TEACH SEL> key. When you press this key the flashing LED lights
up.
VACUUM
ON/OFF
• Use this key to turn on/off the vacuum condition of the head. This key
functions regardless of what device is currently selected.
• <X/Y selection>
Use to move X- or Y-axis in the direction of the arrow.
• <VISION selection>
Use to move the cursor in the direction of the arrow.
FAST
• Use this key to switch the XY-axis moving speed. The lighting LED indicates
that the XY-axis moves at high speed.
• Use to rotate the head clockwise or counterclockwise.
• Use to move the nozzle in the direction of the arrow.
• +Z is for upward movement, and -Z is for downward movement.
• Use these keys to move a nozzle up or down.
• The <↑+Z> key moves up a nozzle, while the <↓-Z> key moves down a
nozzle. However, do not use these keys for a component located at the high
position.
MOVE ENB
• Use this key to put the machine into Axis movement mode. When you press
this key, its LED lights up and it allows the XY-axis to move. When you press
this key again or press the <CANCEL> key, the machine quits this mode.
• During data editing, they key is equivalent with the <↑> key of a keyboard.
• During tracking of component placement, this key moves the cursor to the
previous component placement point.
• During data editing, this key is equivalent with the <↓> key of a keyboard.
• During tracking of component placement, this key moves the cursor to the next
component placement point.
PAUSE
• Use this key to temporarily stop the current production or tracking of component
placement. Its LED lights while the machine pauses.
CANCEL
• Use this key to finish teaching operation without loading the teaching result.
• When you press this key in Axis movement mode, the machine quits this mode.
ENTER
• Use this key to load the teaching result to the machine, and then finish the
teaching operation.
CAUTION
The magnet sheet is pasted on the rear of the HOD unit. Keep a floppy
disk away from the HOD because the data stored on the disk may be
erased.
2 − 5
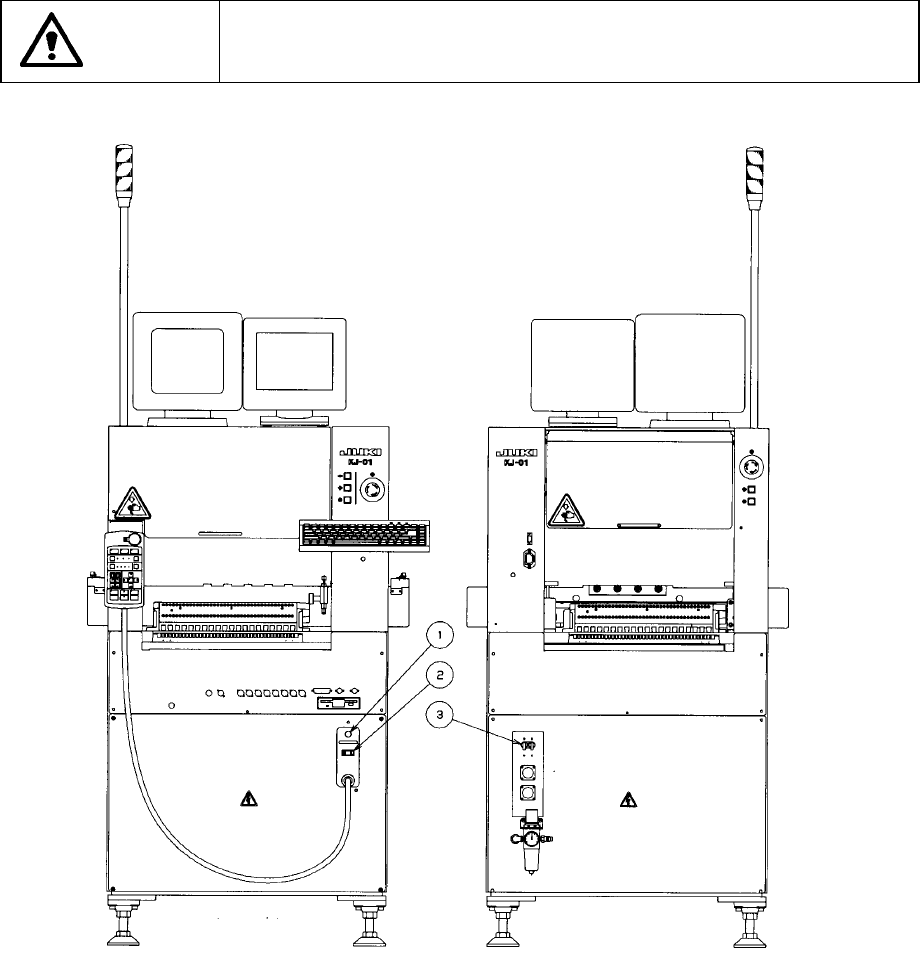
2.1.3 Power
① is the power lamp, and lights up when the power of the machine is turned on.
② is the Power switch.
③ is the breaker, and cuts off the power automatically if the overcurrent is supplied
to the machine.
CAUTION
Never use the machine with any voltage other than those specified for
the machine.
<Fornt> <Rear>
Figure 2.1.3
2 − 6
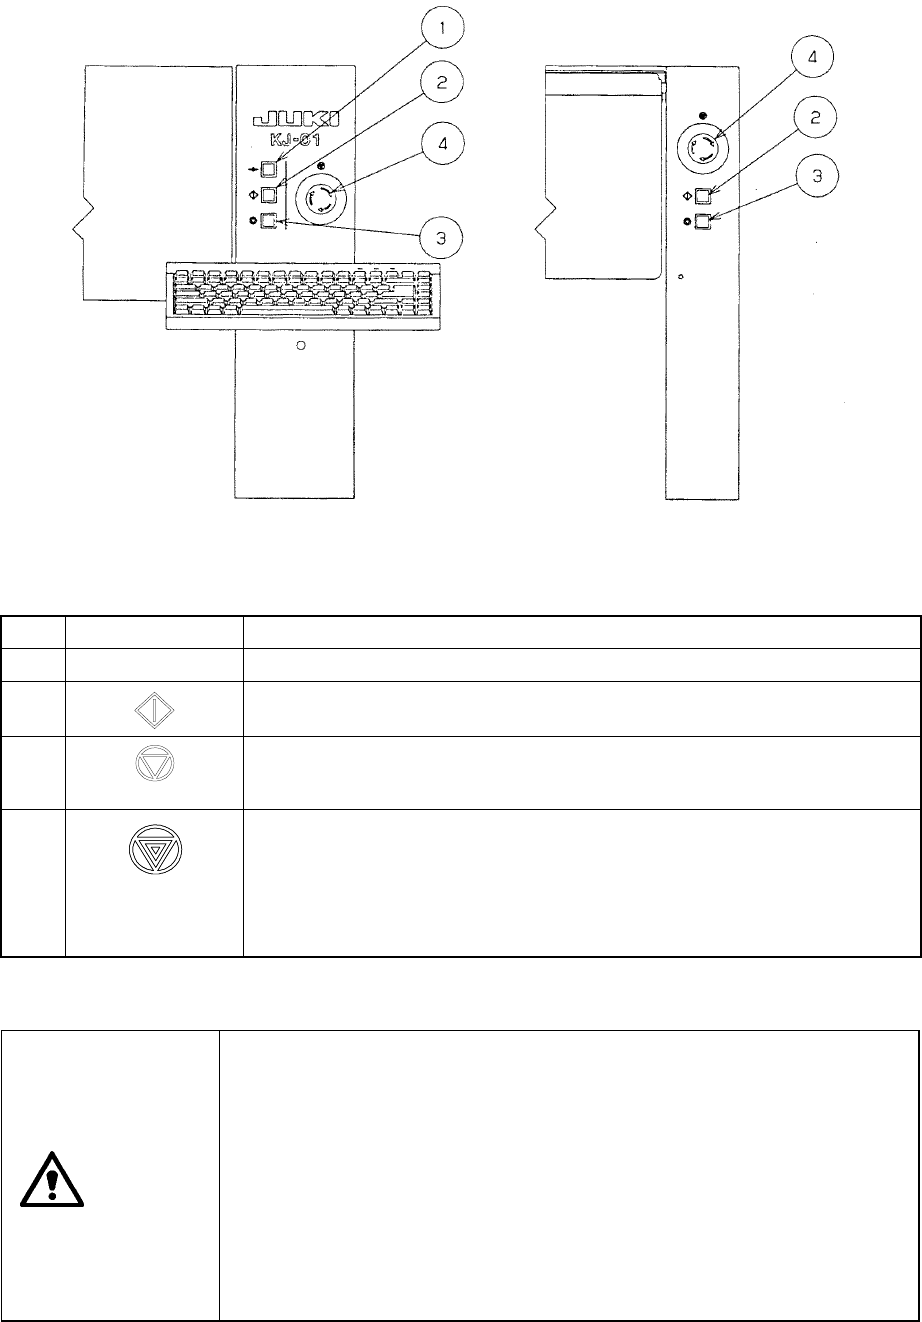
2.1.4 Other push button switches
Figure 2.1.4.1
No. Switch Function
1
Î
}
Í
• Use to zero all the axes.
2
• Use to start an actual or false production run
3
• Use to stop an actual or false production run. Press the switch once to put the
production run in a pause status. Press the switch the second time to stop the
production run.
4
• Use to bring the machine to an immediate stop if the machine malfunctions or
there could be an imminent personal injury.
When the switch is pressed, it brings the motor and other drive mechanisms to
an immediate stop and turns ON the red lamp of the signal tower.
To reset the switch, turn it in the direction of the arrow.
• Do not use this switch for the purposes other than emergency stops.
CAUTION
When pressing the START key, the message “During preparation for
production” appears on the screen, and the machine starts to move
immediately.
To avoid a risk of injury, do not place your hand in the machine nor
move your face or head close to the machine.
Before pressing the START key, check that no one is working in the
machine.
Before pressing the START key, check that no one who could be
injured is standing by the machine.
Before pressing the START key, check that no obstacles (tools or jigs)
are found in the machine.
<Front view> <Rear view>