KJ-01.02.Instruction Manual.REV.02.pdf - 第305页
8 − 38 CA UTION The head starts moving immediately after y ou click the <YES> or <NO> button. T o avoid risk of injury , do not place your hand in t he machine, nor move your face or head close to t he machin…
8 − 37
8.3.5 Production continues
This function allows the machine to reproduce a PWB that was not produced
completely and ejected duet to a production error or because you forcibly finished the
production. The following two methods are provided to reproduce an incomplete
PWB.
(1) Specifying the start position on the “Production conditions” screen
At the “Starting pos” column on the “Production conditions” screen, specify the
“Circuit No.” and “Step No.” that is entered on the PWB data screen. In this
case, an operator has to remember how the previous PWB production was
finished, and manually enter data on the “Production conditions” screen
according to this condition.
(2) Semi-automatic production restart by pressing the START key
When you press the START key, the machine checks how the previous PWB
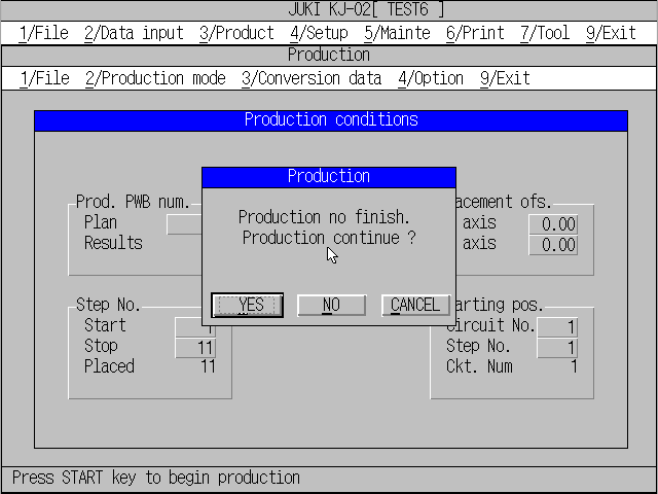
production was performed, and displays the following confirmation message if a
PWB was not completely produced. When you place an incomplete PWB on
the machine and click the <YES> button, the machine continues the previous
production form the point it was interrupted.
Continuous production confirmation message screen
When you click the <YES> button, the machine restarts the previous production from
the point where it was interrupted.
When you click the <NO> button, the machine starts production from the beginning
or the circuit No. and Step No. specified as the “Starting pos.” on the “Production
conditions” screen.
When you click the <CANCEL> button, the machine stops starting production, and
displays the “Production conditions” screen again.
8 − 38
CAUTION
The head starts moving immediately after you click the <YES> or
<NO> button.
To avoid risk of injury, do not place your hand in the machine, nor
move your face or head close to the machine while it is operating.
Before clicking the < YES> or <NO > button, check to see if there is no
one who is working the internal parts of the machine.
Before clicking the < YES> or <NO > button, check to see if there is no
one who is near the machine and can be injured when the machine
warms up.
Before clicking the < YES> or <NO > button, check to see there is no
obstacle (tools and jigs) attached or left in the machine that may
prevent any part inside the machine from operating.
8.4 Trial Run
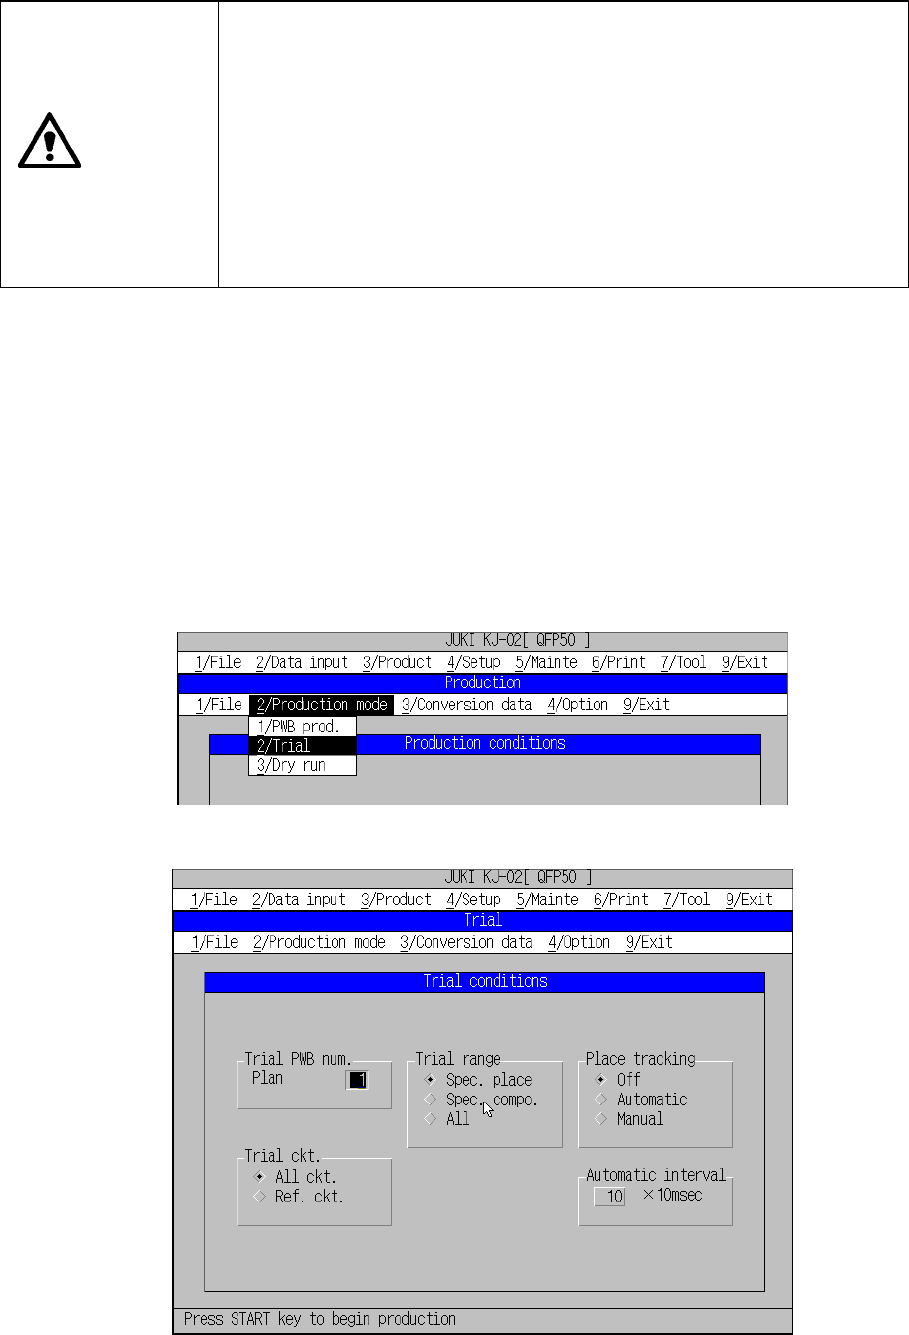
Select [2/ Production mode] in the Setting of producing conditions menu, then select
[2/ Trial] in the submenu box.
When you select this command, the machine actually places components on a board
according to the settings specified on the “Trial conditions” screen, and allows you to
check each operation of the PWB production process.
The machine does not place on a board as trial any component whose “Trial” item is
set to “No” on the Extension window invoked from the Component data screen or any
component whose “Try” item is set to “No” on the Placement data screen.
Figure 8.4.1 Calling “Trial run”
Figure 8.4.2 Initial trial run conditions menu box

8 − 39
(1) Setting items
No. Item Description
1 Trial PWB num. Set the number of boards for trial run.
2 Trial ckt. Set the circuit for trial run. This is not used for single circuit boards. The following setting can be
made.
① All ckt.: Components set for trial run are placed for all circuits.
② Ref. ckt.: Components set for trial run are placed for reference circuits only.
3 Trial range Set the range for trial run. The following setting can be made.
① Spec. place: Only for the placement positions set as Yes for the “trial” field of the placement
data.
② Spec. cmpnt: Only for the components set as Yes for the “trial” field of the component data.
③ All: For all placement positions.
4 Place tracking After trial run of the board, designate whether or not to perform placement tracking by the camera.
If performed, set whether it is manual or automatic.
① Off: Placement tracking is not performed.
② Automatic: Placement tracking is performed automatically.
③ Manual: Stops at a placement position, and then goes to the next placement position
through a key-in by the operator.
5 Automatic interval When tracking is performed automatically, designate the stop time duration at a stop position. (Unit
is in 10 ms, and 1 is equivalent to 10 ms.)
Note that the placement offset specified for production condition is also applied to
the trial run.
(2) Operation
Figure 8.4.2 shows the initial trial run conditions menu box.
① Trial PWB num.
Enter the number of boards to be produced as a trial.
② Trial ckt.
Select either “All ckt.” or “Ref. ckt.” for trial circuits by the radio button. When
the board has only one circuit, you can select any of the circuits.
When “All ckt.” is selected for the use of multi-circuit PC boards, parts
specified in the “Trial range” box are placed on all circuits of the PC boards.
When “Ref. ckt.” is selected, parts specified in the “Trial range” box are placed
on the reference circuits of the PC boards.
③ Trial range
Select a trial range by the radio button.
Spec. place: Places only components for which “YES” is specified in “Trial”
field of placement data.
Spec. cmpnt: Places only components for which “Yes” is selected in “Trial” field
of component data.
All: All placement positions entered are subject to operation.
④ Place tracking
Select whether the machine should use a camera to track a component
placement position after trial operation and specify the tacking operation type
with the radio buttons.
⑤ Automatic interval
Set the automatic feeding interval in increments of 10 ms (as 10 ms = 1).