Hanwha SM481 PLUS Series Administrator’s Guide Eng.pdf.pdf - 第162页
7-4 Fast Flexible Placer SM481(L) PLUS Administ r ator’s Guide <Update Part From DB:> list box If t he pa rt data h av i ng t he same part n ame as the part registered i n the PCB file already e xists in t he l o…
7-3
Part Registration
Select the group of component to be displayed. Available component groups are as
follows;
(CHIP-Circle, CHIP-Rect, Chip-Tantal, Chip-Aluminum, Melf, TR, TR2,
Trimmer, LED, Hemt, SOP, Small SOP/Connector, SOJ, SOP2, SOJ2, QFP,
PLCC, PLCC[body], Connector, User IC, BGA, Multi-BGA, Flip Chip)
<Part List> list box
Displays the component data list of the data selected in <Align Type> and
<Part Group>. The parts corresponding to the conditions selected from the
Standard Part DB and Local Part DB are indicated.
<Update Part> button
Used for adding to the local DB after registering a new part. Select the newly
registered part in the <1. PCB Part List> first, and copy it to the <Part List> box of
the corresponding part group by clicking on the button. Select the part
copied to the <Part List> list box and click on this button.
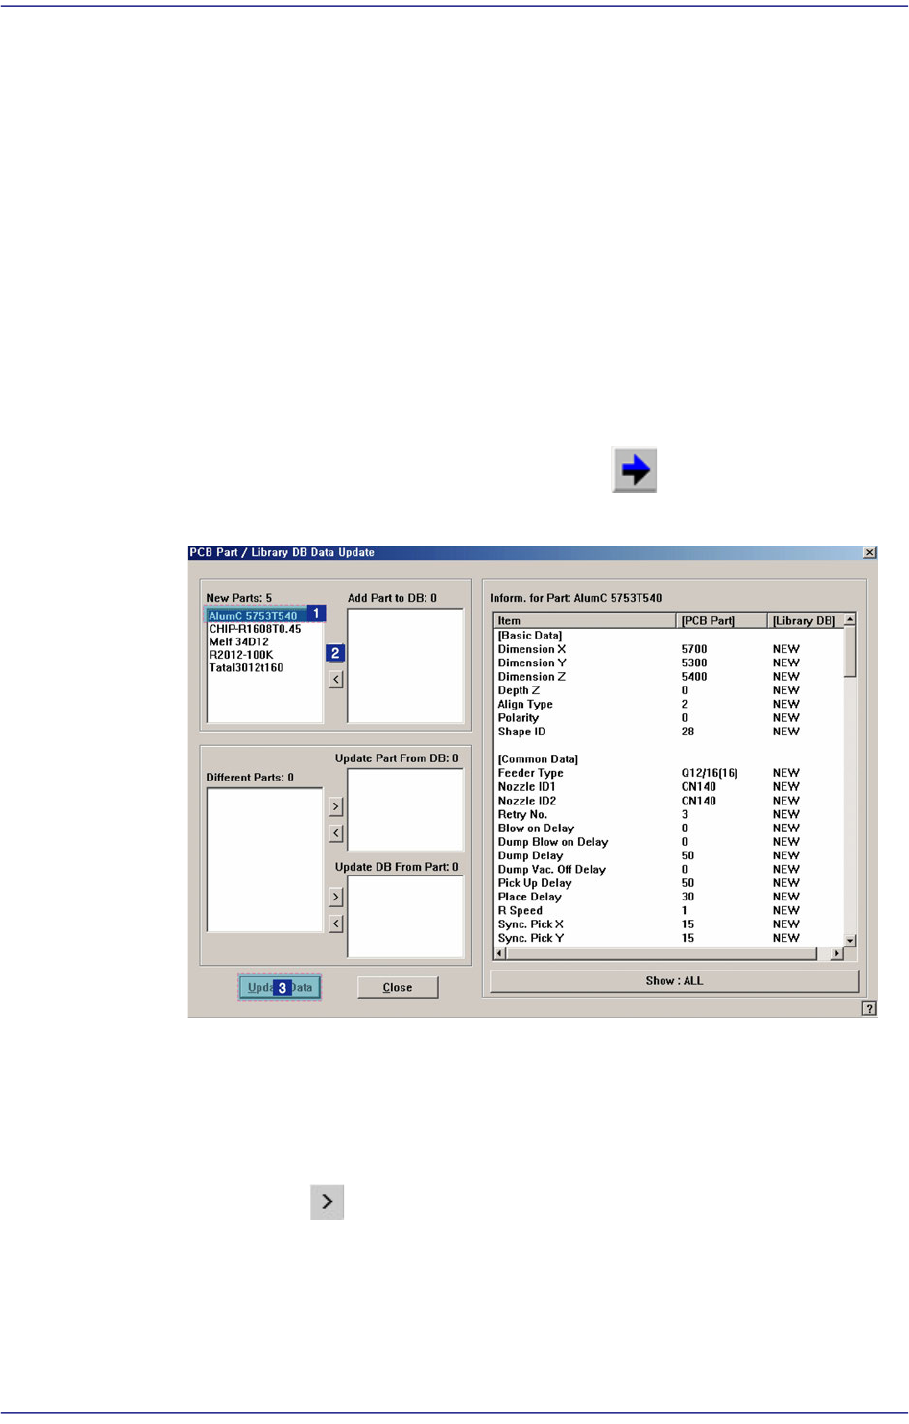
<New Parts:> list box
Indicates parts which are not registered in the local part DB among the parts
registered in the PCB file.
<Add Part to DB:> list box
Click the button and add to the list box the part to be registered in the
local part DB.
<Different Parts:> list box
Indicates parts with the same name as the parts registered in the PCB file
among the parts registered in the local part DB.
7-4
Fast Flexible Placer SM481(L) PLUS Administrator’s Guide
<Update Part From DB:> list box
If the part data having the same part name as the part registered in the PCB file
already exists in the local part DB, click the button and add to the list box
the part to be overwritten to the part data registered in the PCB file.
<Update DB From Part:> list box
Click the button and add to the list box the part to be overwritten in the
local part DB
[How to copy a PCB part to the local part DB]
Select the part to be registered in the local part DB from the <New Parts:> list box
or <Different Parts:> list box.
Click the button and add to the <Add Part to DB:> or <Update DB From
Part:> list box the item to be registered to the local part DB.
Click the <Update Data> button to register the corresponding part in the local part
DB.
<Change Group> button
Changes the group of the selected part from current part group to another group.
Select the part to change from the <Part List> list box and click on this button.
<Library Delete> button
Deletes the component data selected in <Part List> from the Local Part DB. Select
the part to delete from the <Part List> list box and click on this button.
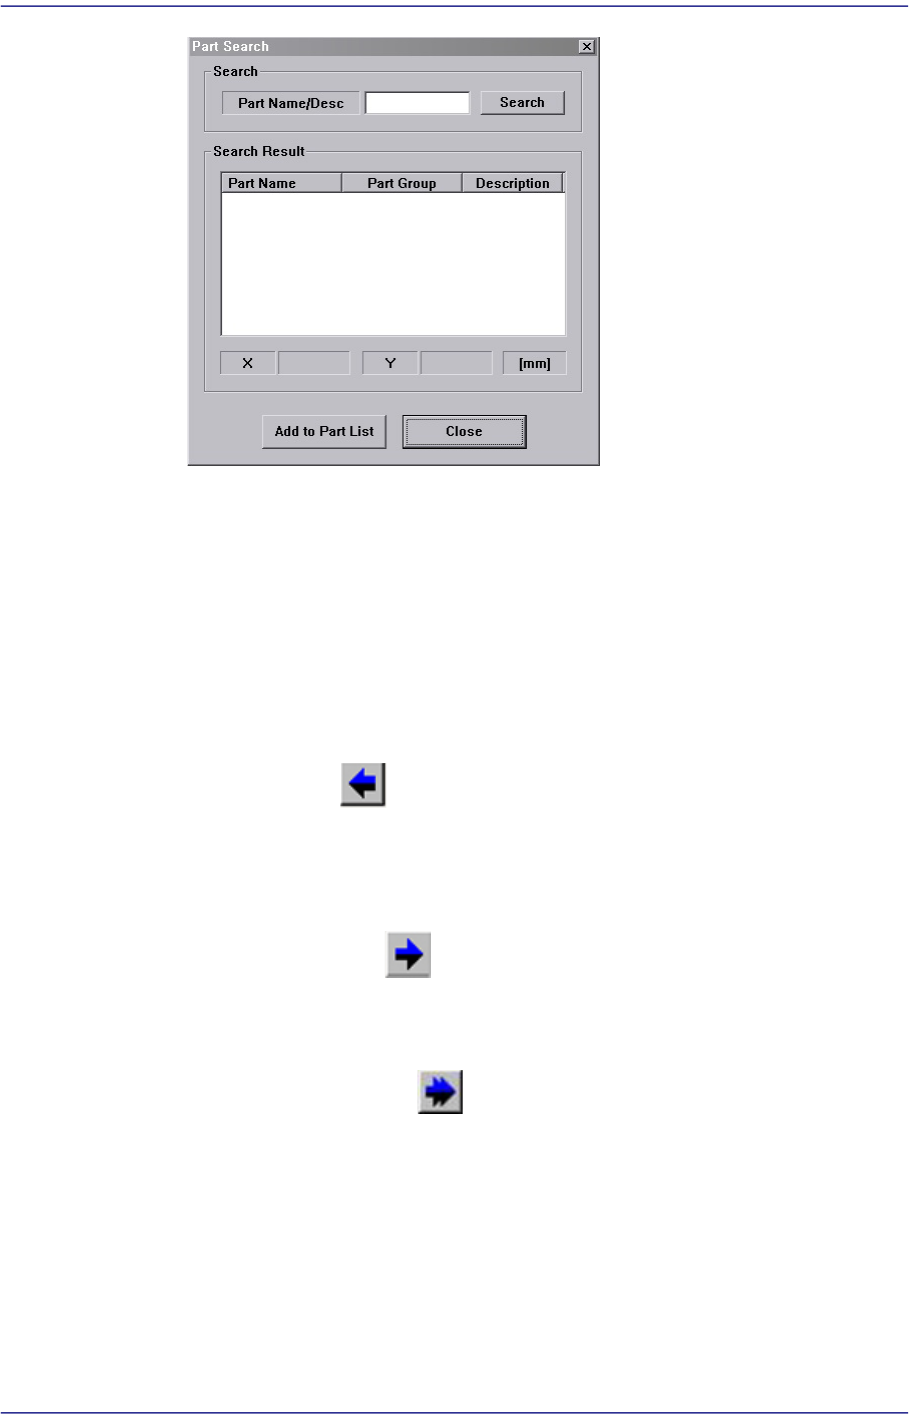
<Search> button
When this button is clicked on, the following dialog box is displayed.
7-5
Part Registration
<Search> / <Search Result> group
Clicking the <Search> button after inputting the name or description of the
part to be searched in the <Part Name> edit box will search the information of
the part DB and show the result in the <Search Result> group.
<Add to Part List> button
Adds the corresponding part to the PCB Part List when this button is clicked
after selecting the part displayed in the <Search Result> group as a search
result.
<Copy to PCB Part> button
Copies the component data selected in <Part List> of <2. Library> group to <1. PCB
Part List> group. That is, this means that the part in the Local Part DB is copied to the
PCB part.
<Copy to Local Part DB> button
Copies the component data selected in the <1. PCB Part List> group to the Local Part
DB. That is, this means that the part in the PCB Part is copied to the Local Part DB.
<Copy All to Local Part DB> button
Copies all component data in the <1. PCB Part List> group to the Local Part DB.
<New Part…> button
Registers new component. Please refer to “7.1 New Part Registration” for more
information.
<Edit…> button
Edits the selected component data.