Hanwha SM481 PLUS Series Administrator’s Guide Eng.pdf.pdf - 第202页
7-44 Fast Flexible Placer SM481(L) PLUS Administ r ator’s Guide possible to adjust the size of the selected object using the Edit & Adjust Key . Adjust Lead Pitch After pressing this button, sel ect an object whose…

7-43
Part Registration
Shape definition - Others (Polygon)
1: Basic Marker(Min Mark: 3)
2: Basic Marker
3: Basic Marker
4: Basic Marker
5: Additional Marker (Double clicking the line will add a marker / Double clicking a
marker will remove the marker)
6: Additional Marker
<X/ Y> edit box
Input the X and Y offsets between the vision window center and the center of
the selected object.
<Width> edit box
This input field is not enabled when the selected object is a dot, straight line,
triangle or polygon.
Input the width of an object to suit the image of an actual part. If the selected
object is round, input the diameter.
<Height> edit box
This input field is not enabled when the selected object is a dot, straight line,
triangle or polygon.
Input the height of an object to suit the image of the actual part.
Object Editing Icon button
Can be used when editing a shape object in the machine's panel monitor.
Move Object
After pressing this button, select an object to be moved. It is then possible to move
the selected object using the Edit & Adjust Key.
Adjust Object Size
After pressing this button, select an object whose size is to be adjusted. It is then
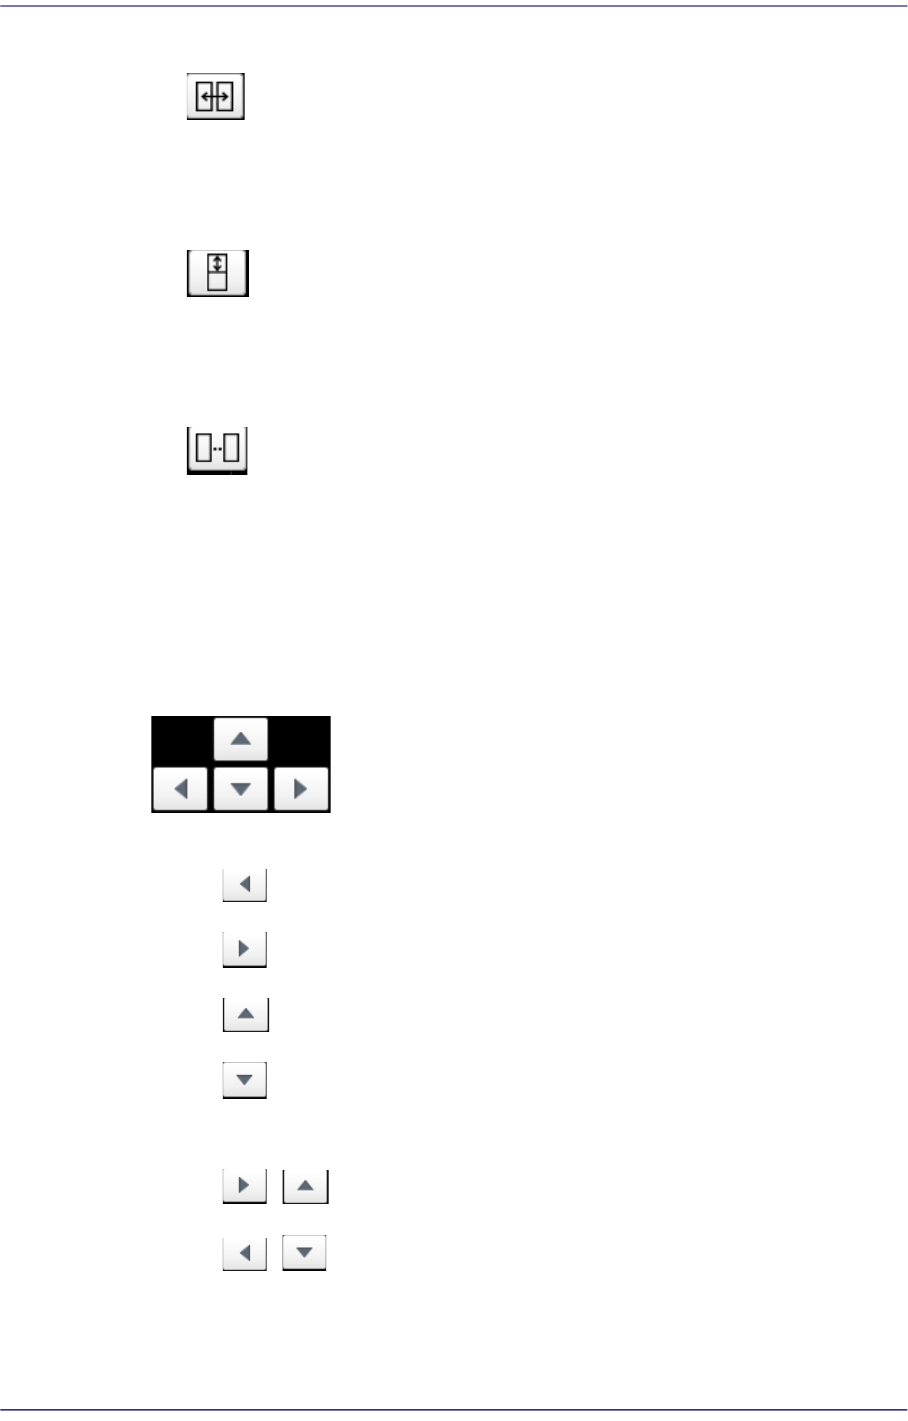
7-44
Fast Flexible Placer SM481(L) PLUS Administrator’s Guide
possible to adjust the size of the selected object using the Edit & Adjust Key.
Adjust Lead Pitch
After pressing this button, select an object whose lead pitch is to be adjusted. It is
then possible to adjust the lead pitch of the selected object using the Edit & Adjust
Key.
Adjust Lead Foot Length
After pressing this button, select an object whose lee foot size is to be adjusted. It
is then possible to adjust the lead foot size of the selected object using the Edit &
Adjust Key.
Adjust Lead Num
After pressing this button, select an object whose Lead Num (lead count) is to be
adjusted. It is then possible to adjust the Lead Num(lead count) of the selected
objects using the Edit & Adjust Key.
Edit Adjust Key
After selecting the Edit Object icon button, it is possible to move the corresponding
object and adjust the related properties of the object using the Edit Adjust Key.
Move Object
:Moves an object to the left
:Moves an object to the right
:Moves an object up
:Moves an object down
Object Size/ Pitch/ Foot Length
/ :Adjusts the value so that it will increase.
/ :Adjusts the value so that it will decrease.
Lead Num/ Corner Width and Length
7-45
Part Registration
/
Increases/ decreases the value when the leads are on or beneath the body.
Increases/ decrease the corner length.
/
Increases/ decreases the value when the leads are at the left or right of the
body
Increases/ decrease the corner width.
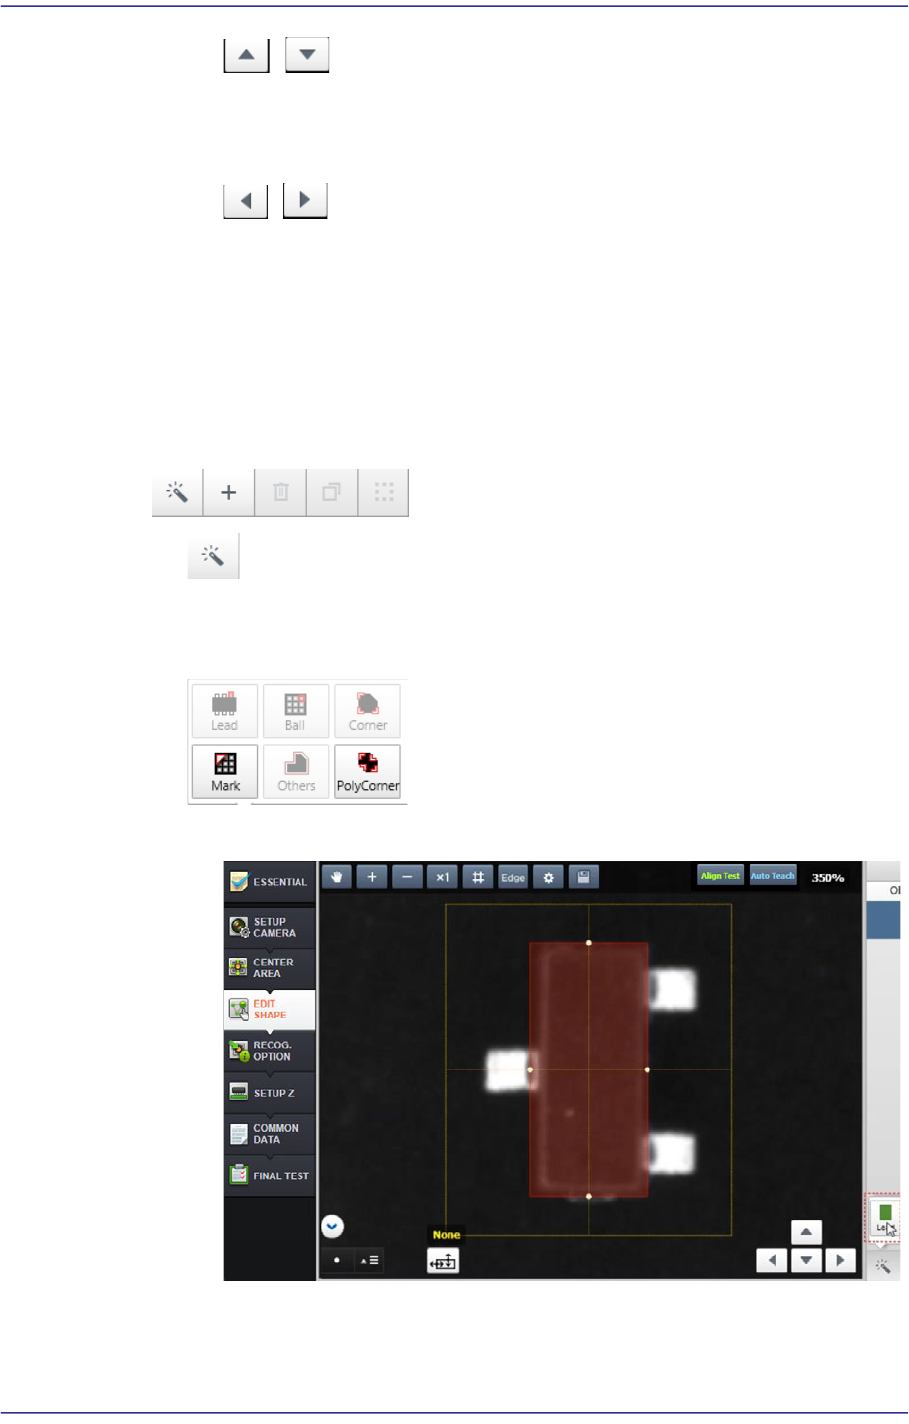
‘Button’ Menu
Performs partial automatic recognition, adds an object, copies and deletes an object,
and performs object grouping.
button
Automatically recognizes the part shape partially in the area selected by the user
from the vision window.
1) Select a shape object to be added (Lead)
2) Drag and select the area to be recognized partially using the mouse