Hanwha SM481 PLUS Series Administrator’s Guide Eng.pdf.pdf - 第165页
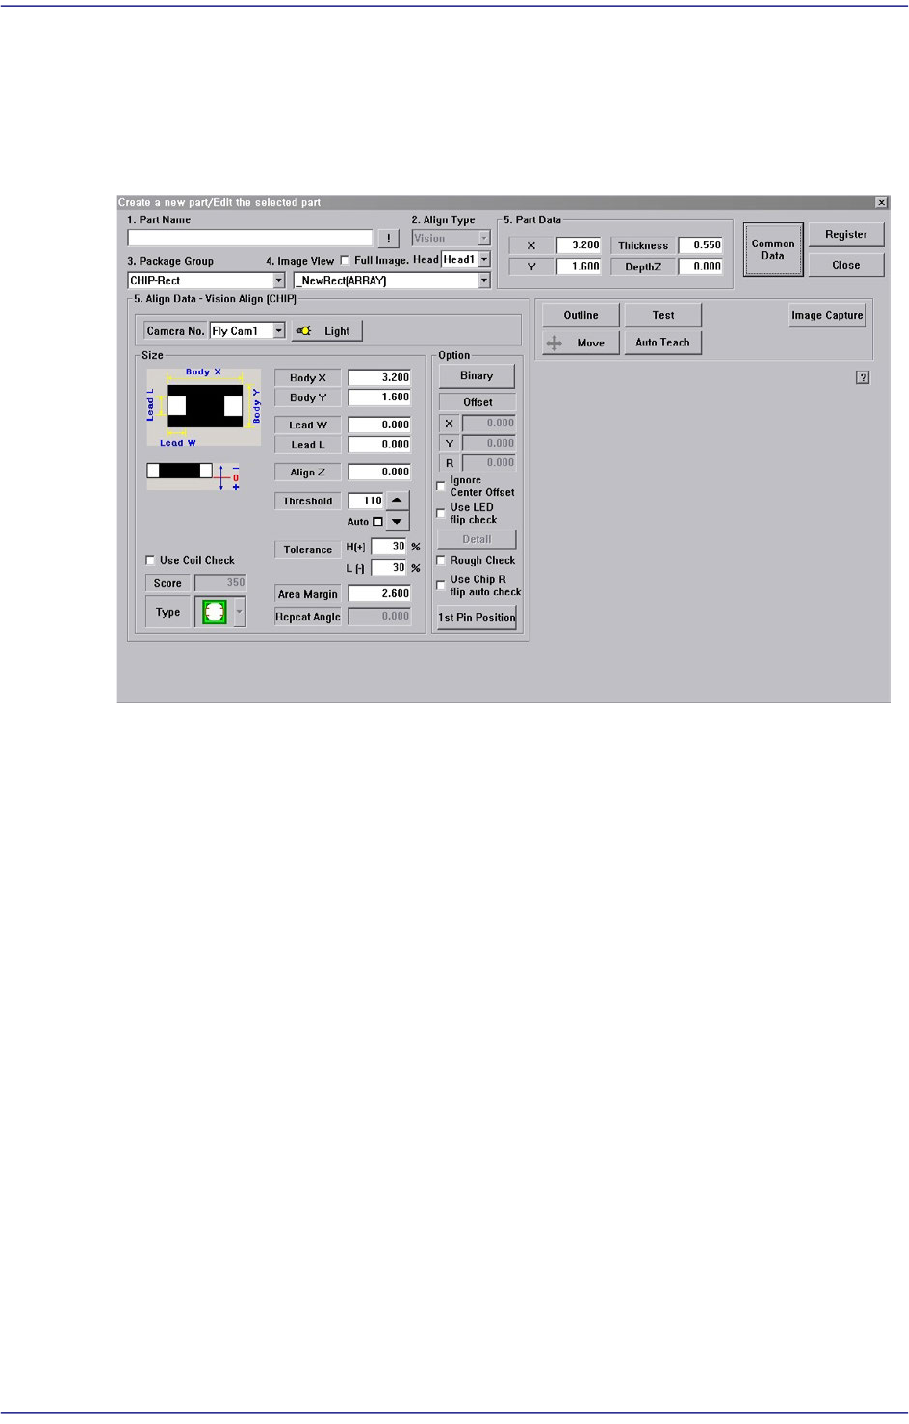
7-7 Part Registration 7.1. New Part Registration Registers new component. W hen this button is c l icked on, the following dialog box i s displayed. Figure7.3 ”Ed i t Profile / Part” dialog box <1. Part Name> e d…
7-6
Fast Flexible Placer SM481(L) PLUS Administrator’s Guide
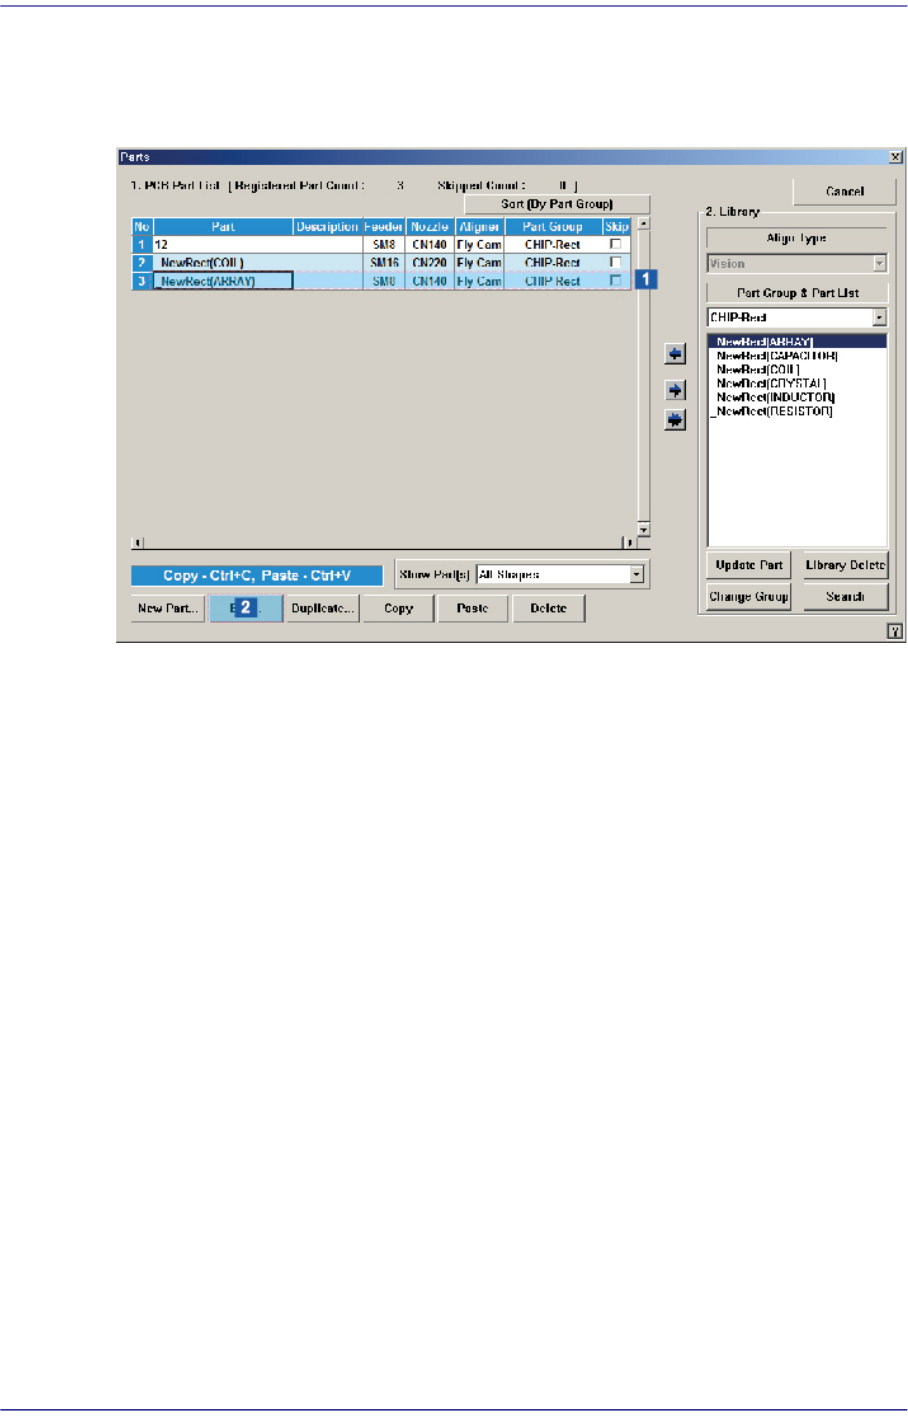
<Duplicate…> button
Copies the selected component data. At this time, new component name must be set.
<Copy> button
Copies the part data selected from the Part list box.
<Paste> button
Pastes the copied part data to the Part list box.
<Delete> button
Deletes the part selected in the Part list box.
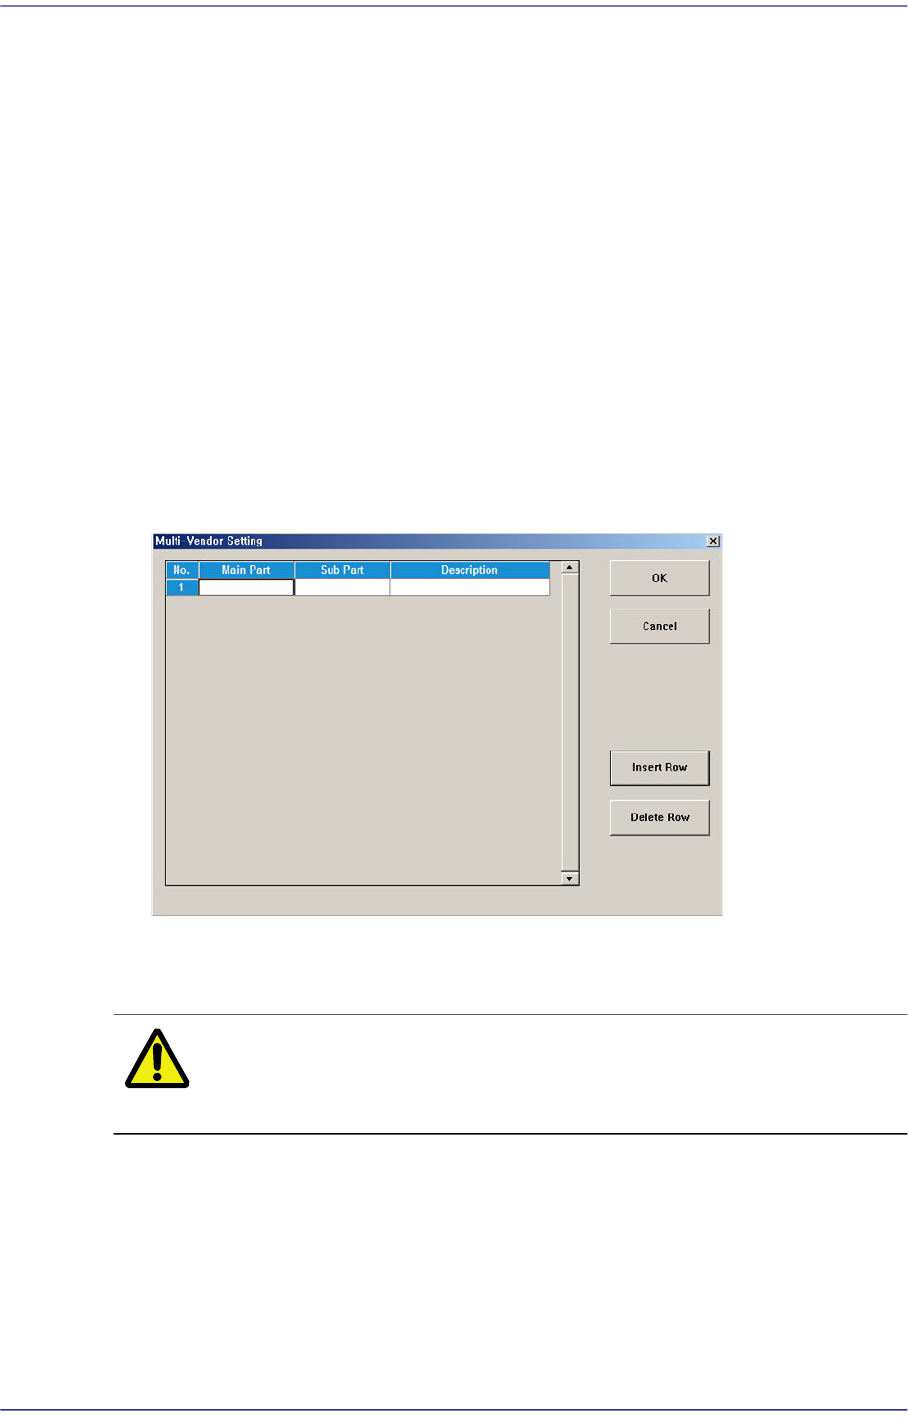
<Multi-Vendor> button
Refers to the function used to produce PCBs by using parts made by several
manufacturers for a part.
Allows work to be automatically performed using sub parts when placing them on a
PCB after registering them.
<Cancel> button
Cancels all edited data.
Caution If you move to another screen while editing the “Part” dialog
box, the edited data is saved automatically
7-7
Part Registration
7.1. New Part Registration
Registers new component. When this button is clicked on, the following dialog box is
displayed.
Figure7.3 ”Edit Profile / Part” dialog box
<1. Part Name> edit box
Set the component name. Ensure that the component name having more than 32
Alphabet characters (16 characters in Korean) is not entered.
(When using the “Duplicate” function or when importing component information
from another PCB file.)
<2. Align Type> combo box
Select the align type. Automatically setup to “Vision”.
<3. Package Group> combo box
Select the component group.
<Package List> combo box
Displays the component data list selected in <2. Align Type> and <3. Package
Group>. From the list, select the part most similar to the part to be registered.
<Register> button
Adds the set component data to the PCB part list.
<Close> button
Closes this dialog box.
7-8
Fast Flexible Placer SM481(L) PLUS Administrator’s Guide
7.2. Standard part editing and registration
The part is registered by editing the standard part in the following manner. Select the part
to be edited in the <1. PCB Part List> and click the <Edit> button.