Hanwha SM481 PLUS Series Administrator’s Guide Eng.pdf.pdf - 第393页
14-41 Machine Calibration 14.3.6. ANC Pos. Scan T each the 2 fiducial marks on the top surface of the ANC. Compensate the relative coordinate system of the front and rear ANCs. Refer to “6. 3 Fiducial Mark Setup” f or mo…

14-40
Fast Flexible Placer SM481(L) PLUS Administrator’s Guide
<Axis> combo box
Select the axis to be compensated. Compensation can be made only for the X axis.
<Light> button
It is used to adjust the illumination so that the mark may be viewed clearly when
recognizing the fiducial mark of the calibration tool.
<Move / Get> button
It is used to teach fiducial mark #0 of the calibration tool.
<Start X / Start Y> edit box
Input the coordinate of fiducial mark #0 of the calibration tool. After selecting the edit
box, move the fiducial camera to the corresponding position by using the teaching box
and teach the corresponding mark correctly. Then click the <Get> button and input the
coordinate value here.
<Cur Temp> edit box
Input the current temperature at the time that the calibration is performed.
<Move Rail> button
Input the conveyor width in the <Conv. Width> edit box and click this button to adjust
the conveyor width.
<Import…> button
It is used to import the scale file for calibration.
<Start> button
It is used to start calibration after teaching fiducial mark #0 accurately.
<Finish> button
It is used to exit the work after the calibration is completed.
<Clear Result> button
Initializes the measurement result.
<Print to File…> button
It is used to output the result in text file format after completing calibration.
<Update> button
Apply the compensation value according to the calibration.
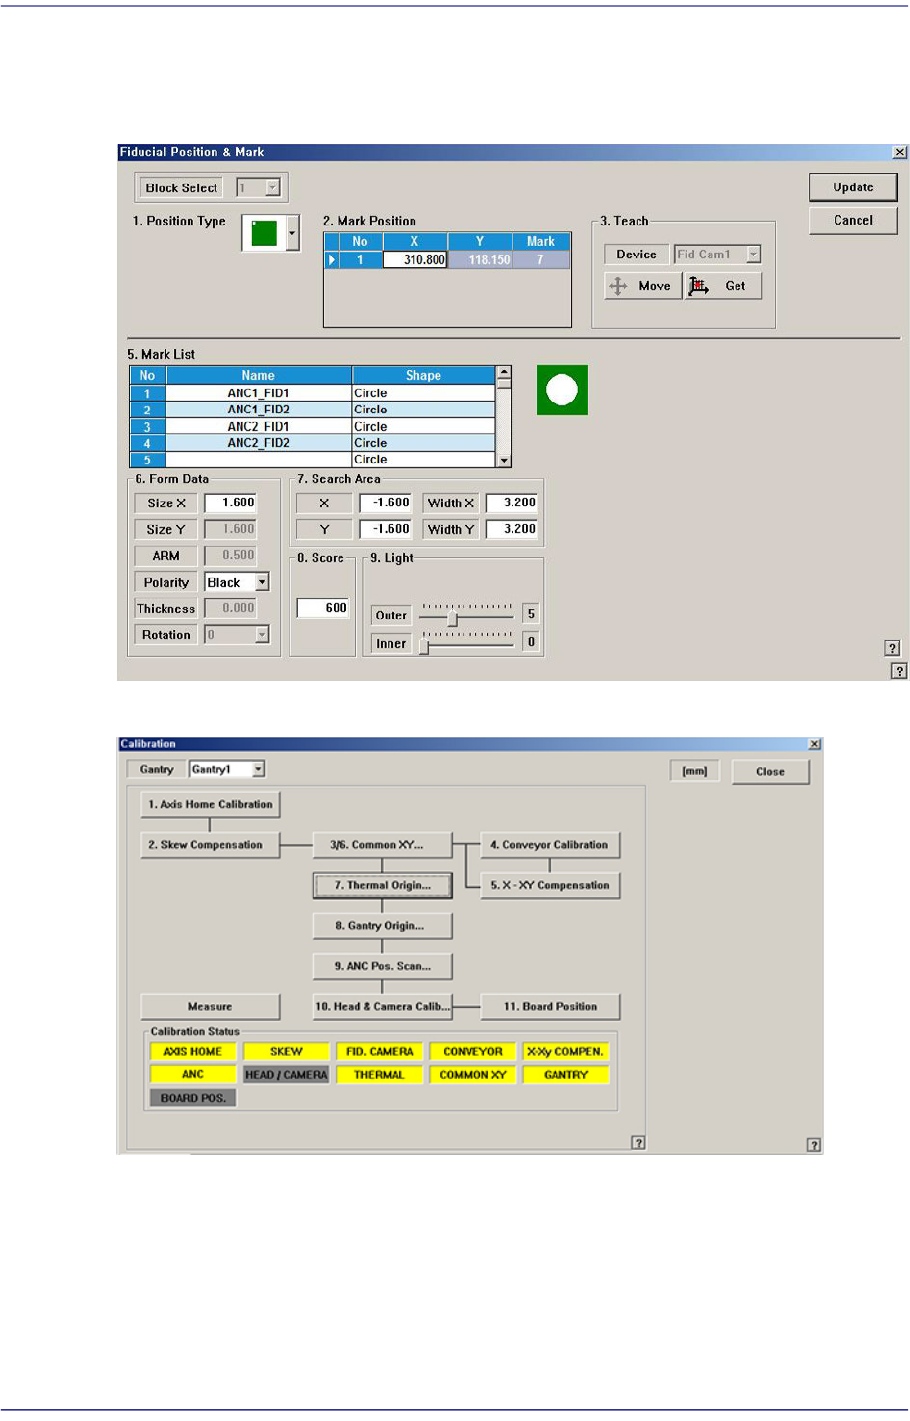
14-41
Machine Calibration
14.3.6. ANC Pos. Scan
Teach the 2 fiducial marks on the top surface of the ANC. Compensate the relative
coordinate system of the front and rear ANCs.
Refer to “6.3 Fiducial Mark Setup” for more information.
14-42
Fast Flexible Placer SM481(L) PLUS Administrator’s Guide
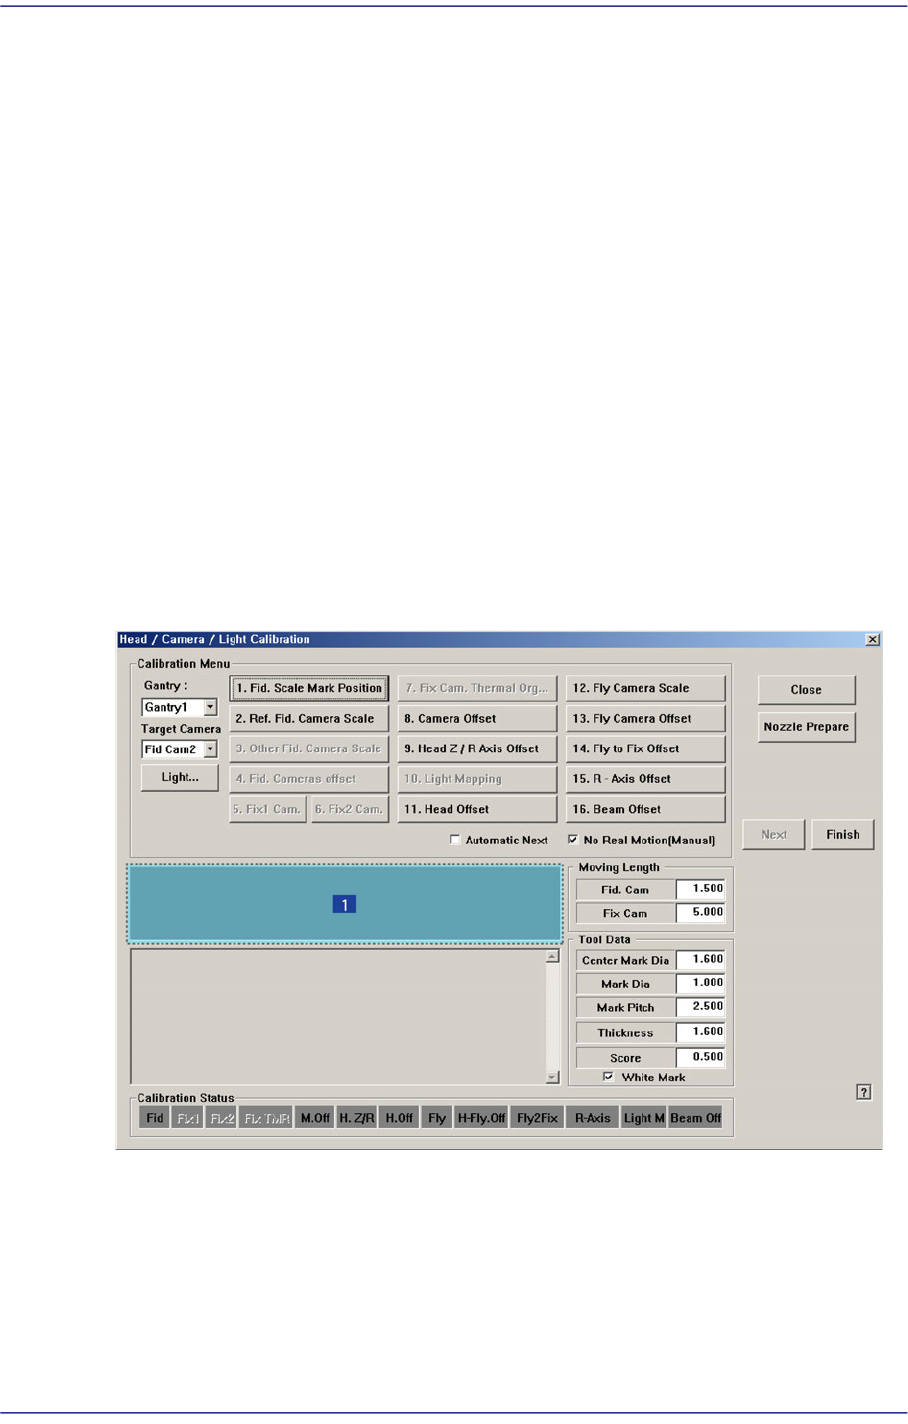
14.3.7. Head & Camera Calibration
Perform the camera calibration function. The calibration sequence and tools necessary for
calibration are as follows.
Fix Camera Scale Calibration (CNT20 Nozzle)
Fix Camera Thermal Origin
Fiducial Cameras Offset Calibration (Calibration Tool)
Cameras Offset Calibration (Calibration Glass)
Head Z & R Offset Calibration (CN040 Nozzle)
Light Mapping (Light Fly Nozzle)
Head Offset Calibration
Fly Camera Scale & Rotation Calibration
Fly Camera Offset Calibration
Fly To Fix Offset Calibration
R-Axis Offset Calibration
Figure14.13 “Head/ Camera/ Light Calibration” dialog box
1: Head/ Camera/ Light Calibration” dialog box
<Calibration Menu> group
Select an item to be calibrated. If you click the button of a specific item, the
description on the works to be performed are displayed in the message box in order.
Follow the instructions to complete the calibration.