Hanwha SM481 PLUS Series Administrator’s Guide Eng.pdf.pdf - 第169页
7-11 Part Registration Refers to the part that has been used for PCB production. Refers to t he pa rt that passed the part recognition test in the mach i ne MMI a nd T -ELITE . Refers to the part temporarily regist…
7-10
Fast Flexible Placer SM481(L) PLUS Administrator’s Guide
Shows the unit system for the currently set items.
button
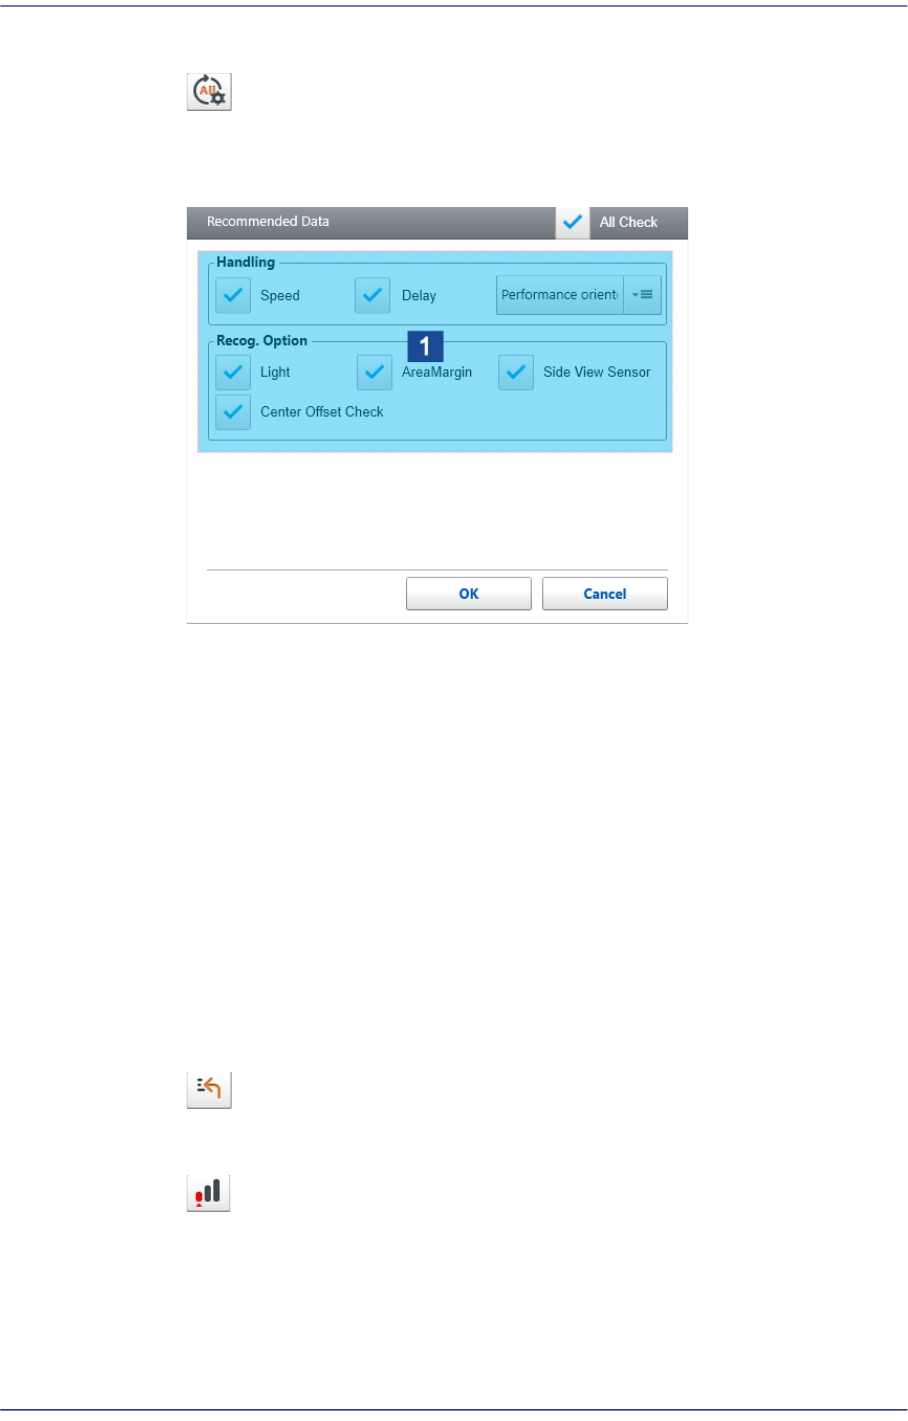
Initializes the part data according to the item selected from the <Load Default
Data Level> selection box.
1: Check Box
<Load Default Data Level> combo box
Select the vision algorithm to be applied in advance when placing a part.
High-Performance
Selected when initializing parameters of the part by giving priority to
productivity.
Safety-Mounting
Selected when initializing parameters of the part in order to prevent the
pickup and placement errors to the maximum extent.
‘Check Box' group
Selects the parameter to be initialized as a default value.
button
Restores the modified part data to the data before modification.
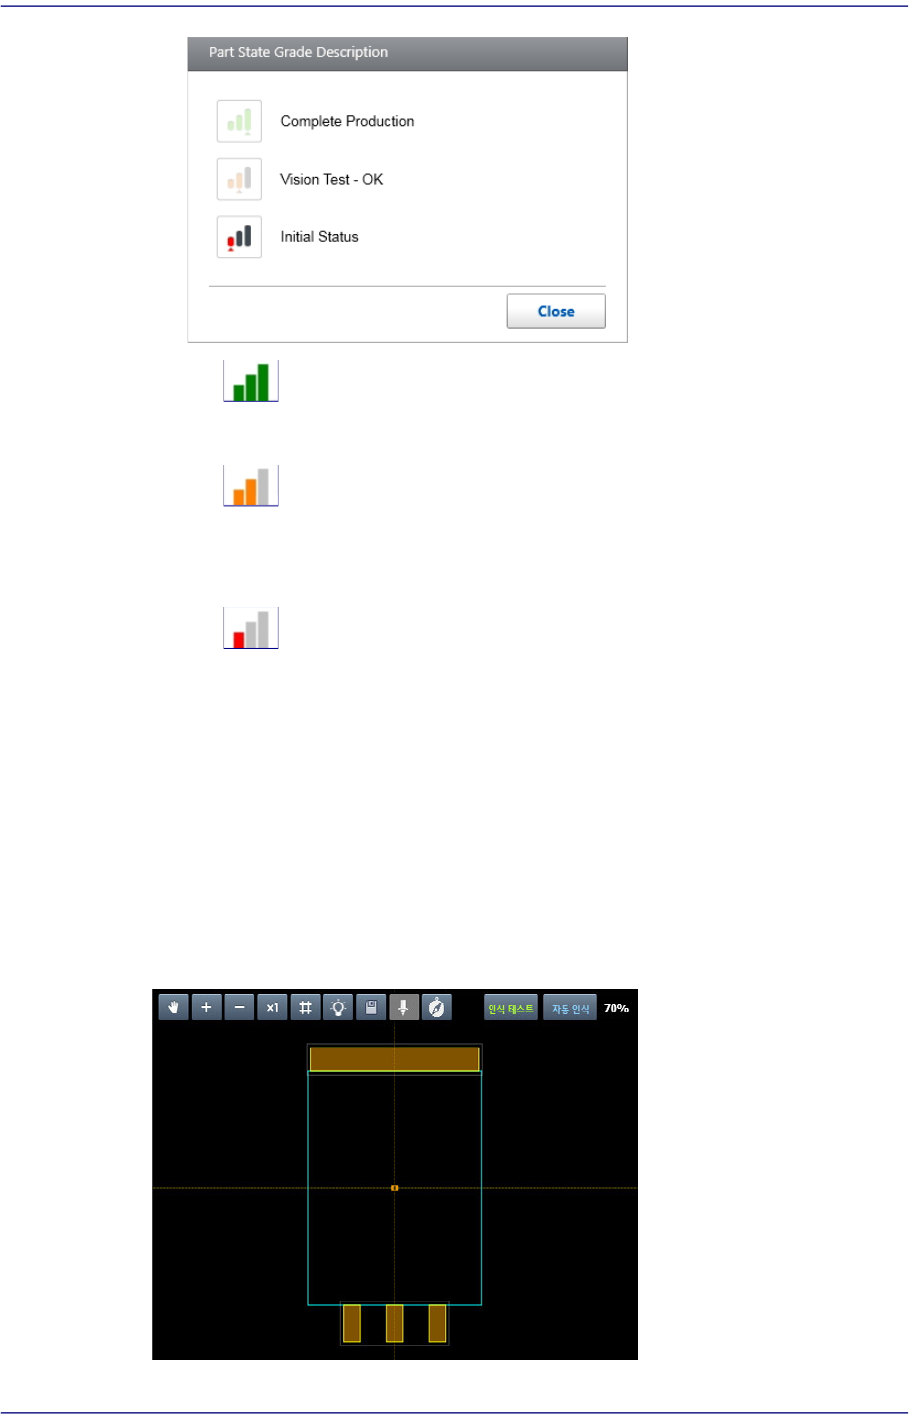
button
Displays the part registration status as a grade.
7-11
Part Registration
Refers to the part that has been used for PCB production.
Refers to the part that passed the part recognition test in the machine MMI and
T-ELITE .
Refers to the part temporarily registered when creating a PCB program in the
T-Solution. It is copied from the standard part DB.
<Save> button
Saves the edited part data and closes the dialog box.
<Cancel> button
Closes the dialog box without saving the edited part data.
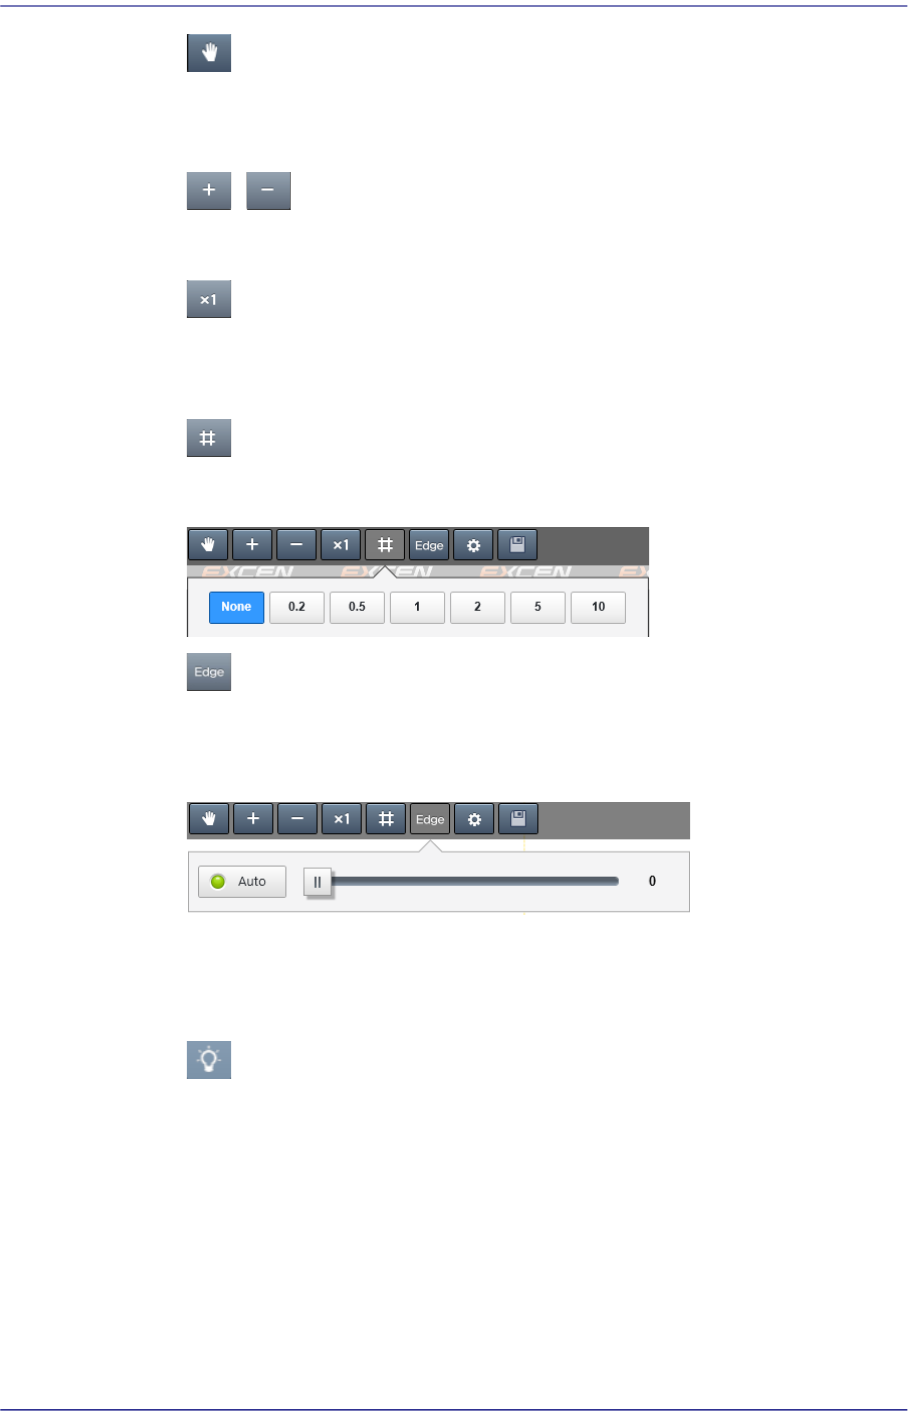
‘Vision Window’ area
Displays the part image and part shape.
7-12
Fast Flexible Placer SM481(L) PLUS Administrator’s Guide
button
When this button is selected, it is possible to move the vision image using the
mouse.
/ button
Zooms in/out the vision image.
button
Shows the vision image at 100% in size. The image size is indicated as a
percentage(%) at the top right of the vision window.
button
Sets the grid interval in the vision window. The unit of the set value is mm.
button
Clicking this button will show the vision image in the following order:
Actual Image → Black and Image → Edge Image → Actual Image
<Auto> switch button
Selected in cases to automatically set the threshold to be applied when
displaying a black and image.
button
Executes the dialog box that can set the lighting value of the camera recognizing a
part.