Hanwha SM481 PLUS Series Administrator’s Guide Eng.pdf.pdf - 第531页
19-5 PM Manager 19.4.2.3. Viewing Weekly Check Items If the <W eekly> option button from th e <Period Search Condition> gro up is clicked, weekly check items can be checked. 19.4.2.4. Viewing Monthly Check It…
19-4
Fast Flexible Placer SM481(L) PLUS Administrator’s Guide
19.4. Main Screen
19.4.1. Viewing Check Items
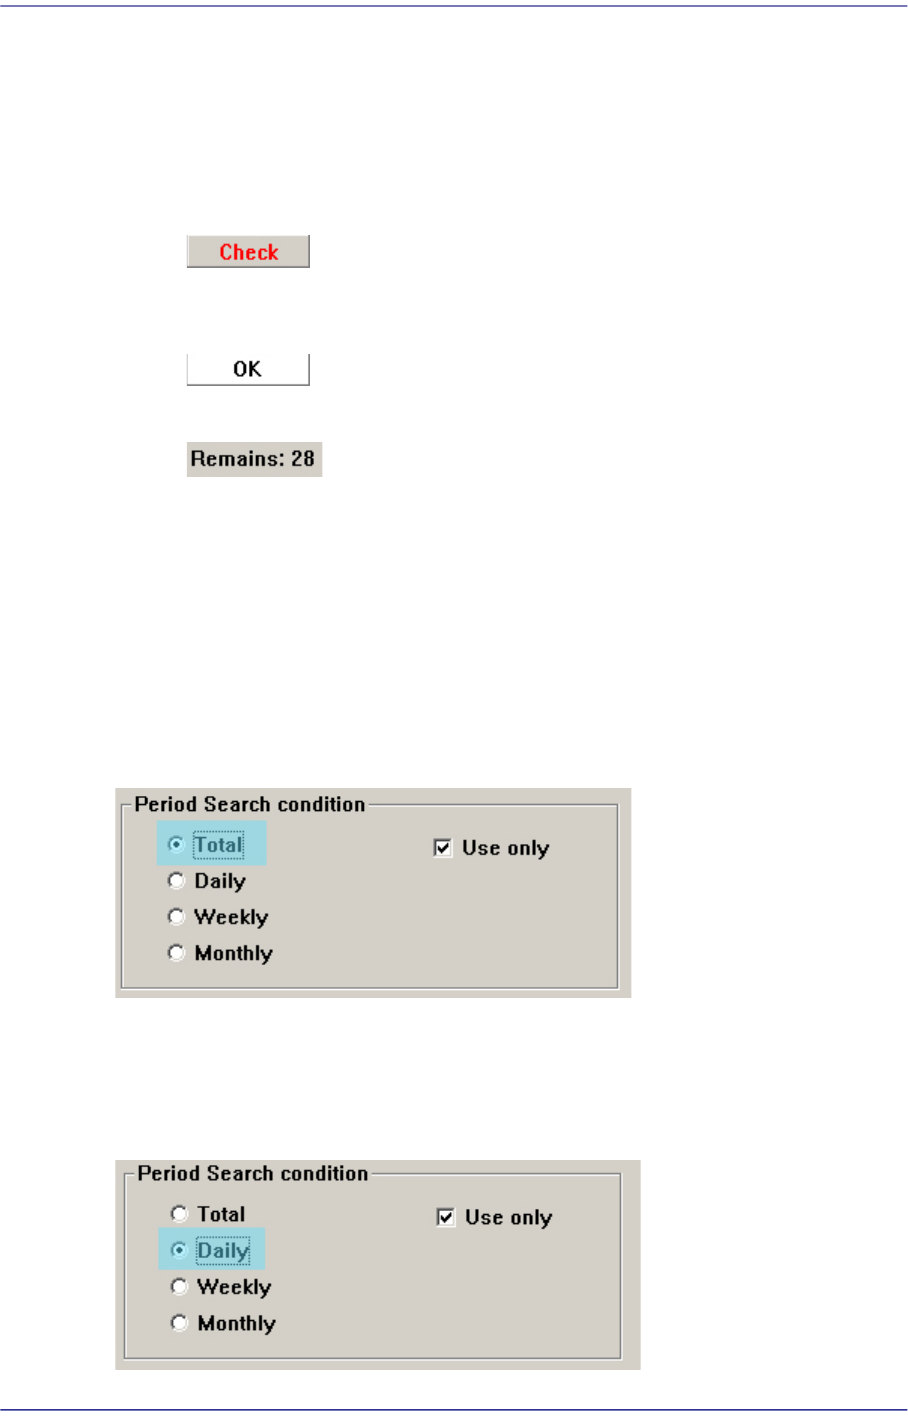
Today’s Check Item View
For the items to be inspected today, the <Check> button is indicated in red in the
<Status> column.
For the items that do not need to be inspected today, the <OK> button is indicated
in black in the <Status> column.
The number of items to be inspected today is indicated on the “Remains”.
19.4.2. Viewing Check Items by Check Period
In the main screen, the check items of the machine can be checked by check periods (daily,
weekly and monthly).
19.4.2.1. Viewing All Daily, Weekly and Monthly Check Items
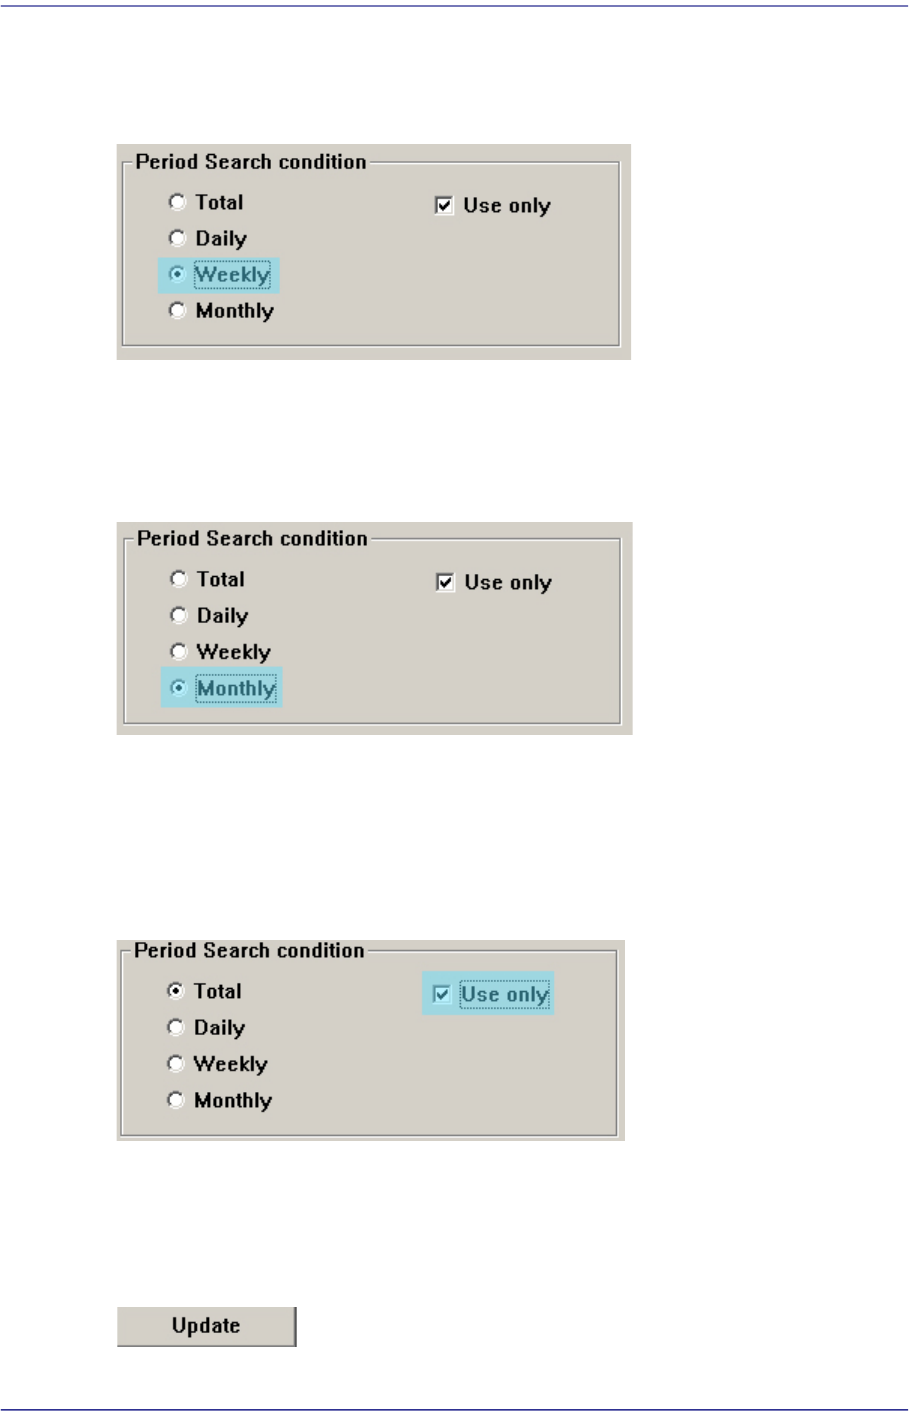
If the <Total> option button from the <Period Search Condition> group is clicked, all
daily, weekly and monthly check items can be checked.
19.4.2.2. Viewing Daily Check Items
If the <Daily> option button from the <Period Search Condition> group is clicked, daily
check items can be checked.
19-5
PM Manager
19.4.2.3. Viewing Weekly Check Items
If the <Weekly> option button from the <Period Search Condition> group is clicked,
weekly check items can be checked.
19.4.2.4. Viewing Monthly Check Items
If the <Monthly> option button from the <Period Search Condition> group is clicked,
monthly check items can be checked.
19.4.3. Viewing Only Items in Use
After the check items are registered, setup can be performed so that they are not to be used.
If the <Use only> option button from the <Period Search Condition> group is clicked,
only the check items in use can be checked.
19.4.4. Updating Screens
If the contents of the DB are different from those displayed in the main screen, press the
<Update> button to update the screen output.
19-6
Fast Flexible Placer SM481(L) PLUS Administrator’s Guide
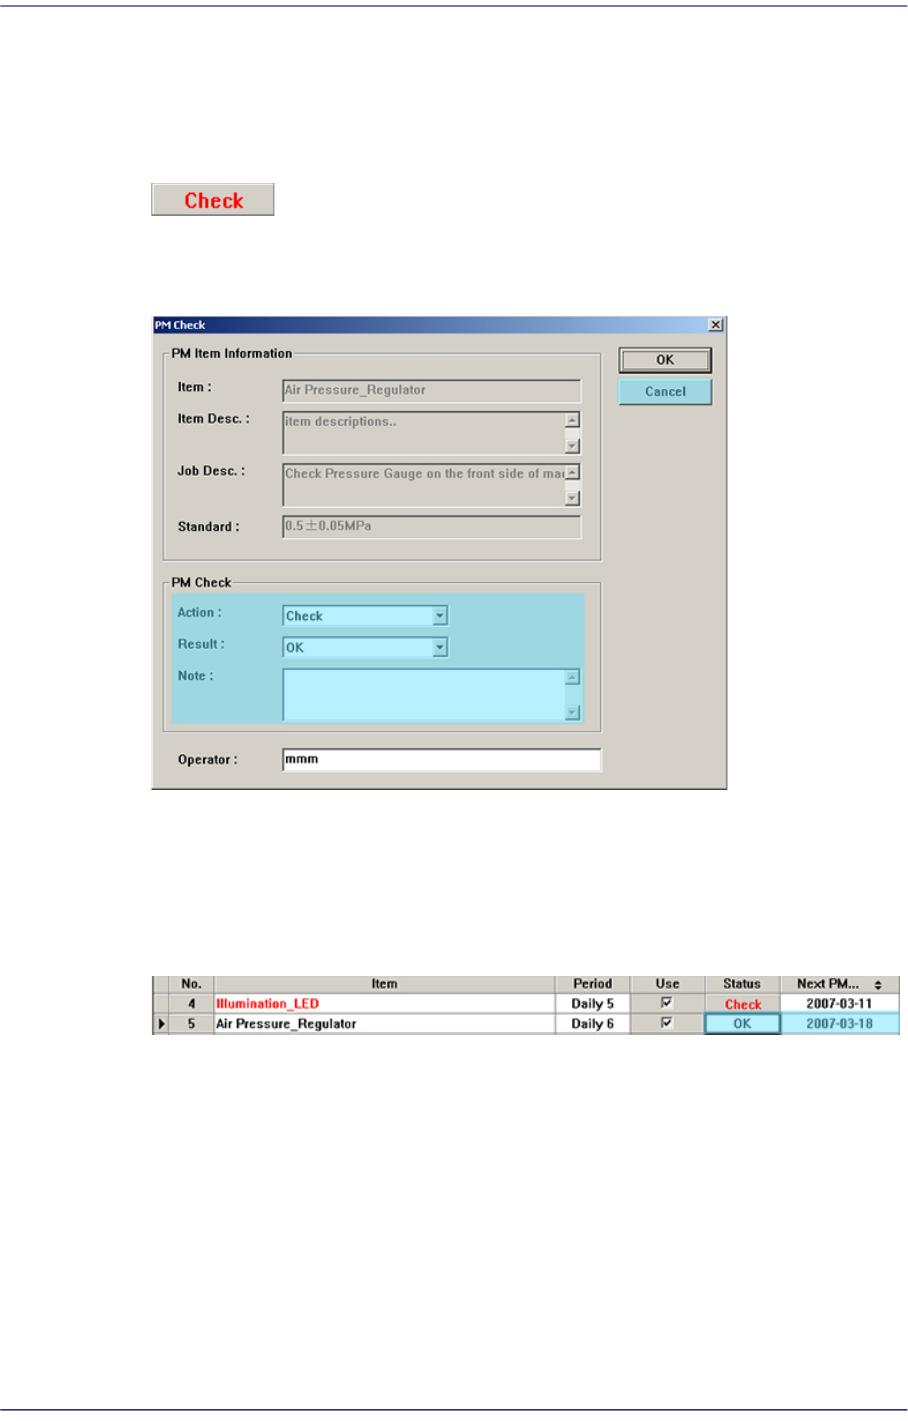
19.4.5. Recording Check Results
Record and store the check results in the “PM Check”. This can be performed in the
following manner.
Click <Check> button.
Execute ‘PM Check’ Dialog Box
Figure19.5 ‘PM Check’ Dialog Box of PM Manager
Record the measures taken during check (action, result and note) and click the <OK>
button.
For the items for which actions were taken in the <PM Check> group, the <Status>
column is changed from “Check” to “OK” and the date is updated to the PM Check
date in the <Next PM> column as shown below.
The recorded actions can be checked from the History Screen.