Operating Instructions_VF335_en.pdf - 第108页
5|Commissioning f) In the [Switch functions] frame, click on the button to laterally fix the board. Then, click on the button to fix the board above / below. ð Once the board has been fixed, the buttons turn yellow. g)…
5|Commissioning
5.3.10.8 Check stoppers and board fixation
We explain this process using the example of a soldering unit. Check all the stop-
pers available on the machine in the same way.
ü First set the width adjustment and insert the board into the infeed of the ma-
chine.
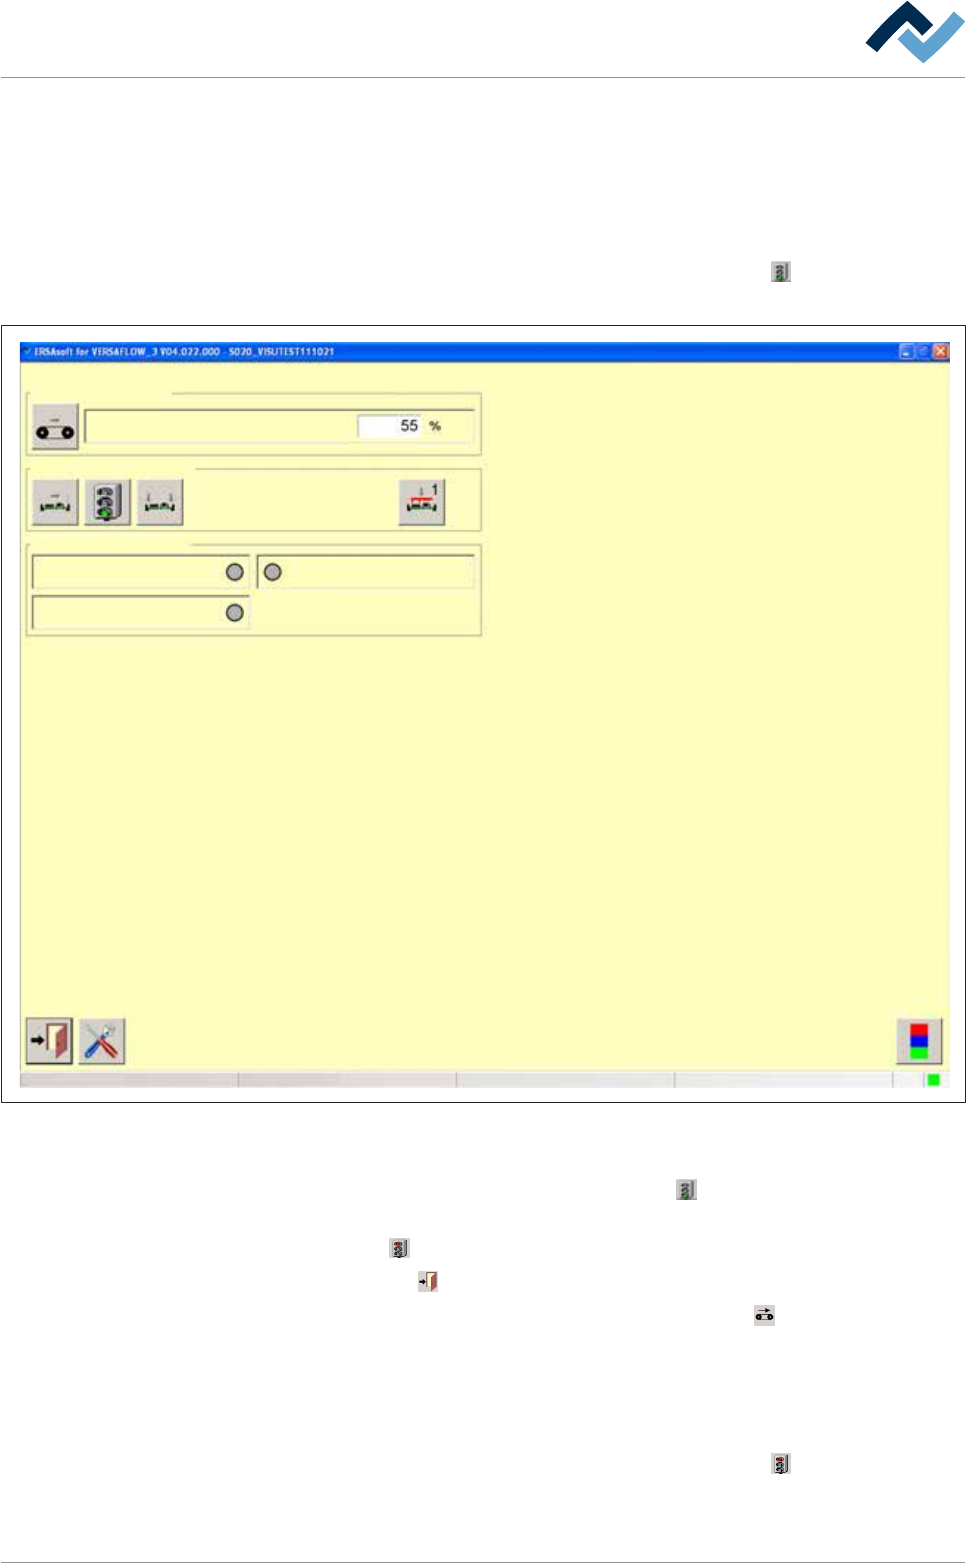
a) In the start dialog, in the [Soldering] frame, click on the
button. The [Solder-
ing module] input dialog is displayed:
Edit dialog Soldering module
Conveyor speed
Conveyor
Switch functions
PCB in moduleSensors
Hardware signal
Module not empty
Software signal
user:
none
Maintenance mode
Fig.18: The input dialog
ü To check the stopper and board fixation:
a) In the [Switch functions] frame, click on the
button.
ð In doing so, the stopper is closed on the soldering unit. The button changes
into
.
b) Click on the
button to close the dialog.
c) In the start dialog, in the bottom toolbar, click on the
button to start all con-
veyors together
ð The board is then transported to the soldering unit and halted there by the
stopper.
d) Stopping the conveyor.
e) In the start dialog, in the [Soldering] frame, click on the
button. The [Solder-
ing module] input dialog appears.
Ersa GmbH Operating Instructions_VF335_en|Rev. 14|30/11/2017 107/695

5|Commissioning
f) In the [Switch functions] frame, click on the button to laterally fix the board.
Then, click on the
button to fix the board above / below.
ð Once the board has been fixed, the buttons turn yellow.
g) After guaranteeing all the functions, you can disable the stoppers and fixations,
and move the board out of the machine.
Ersa GmbH Operating Instructions_VF335_en|Rev. 14|30/11/2017 108/695
5|Commissioning
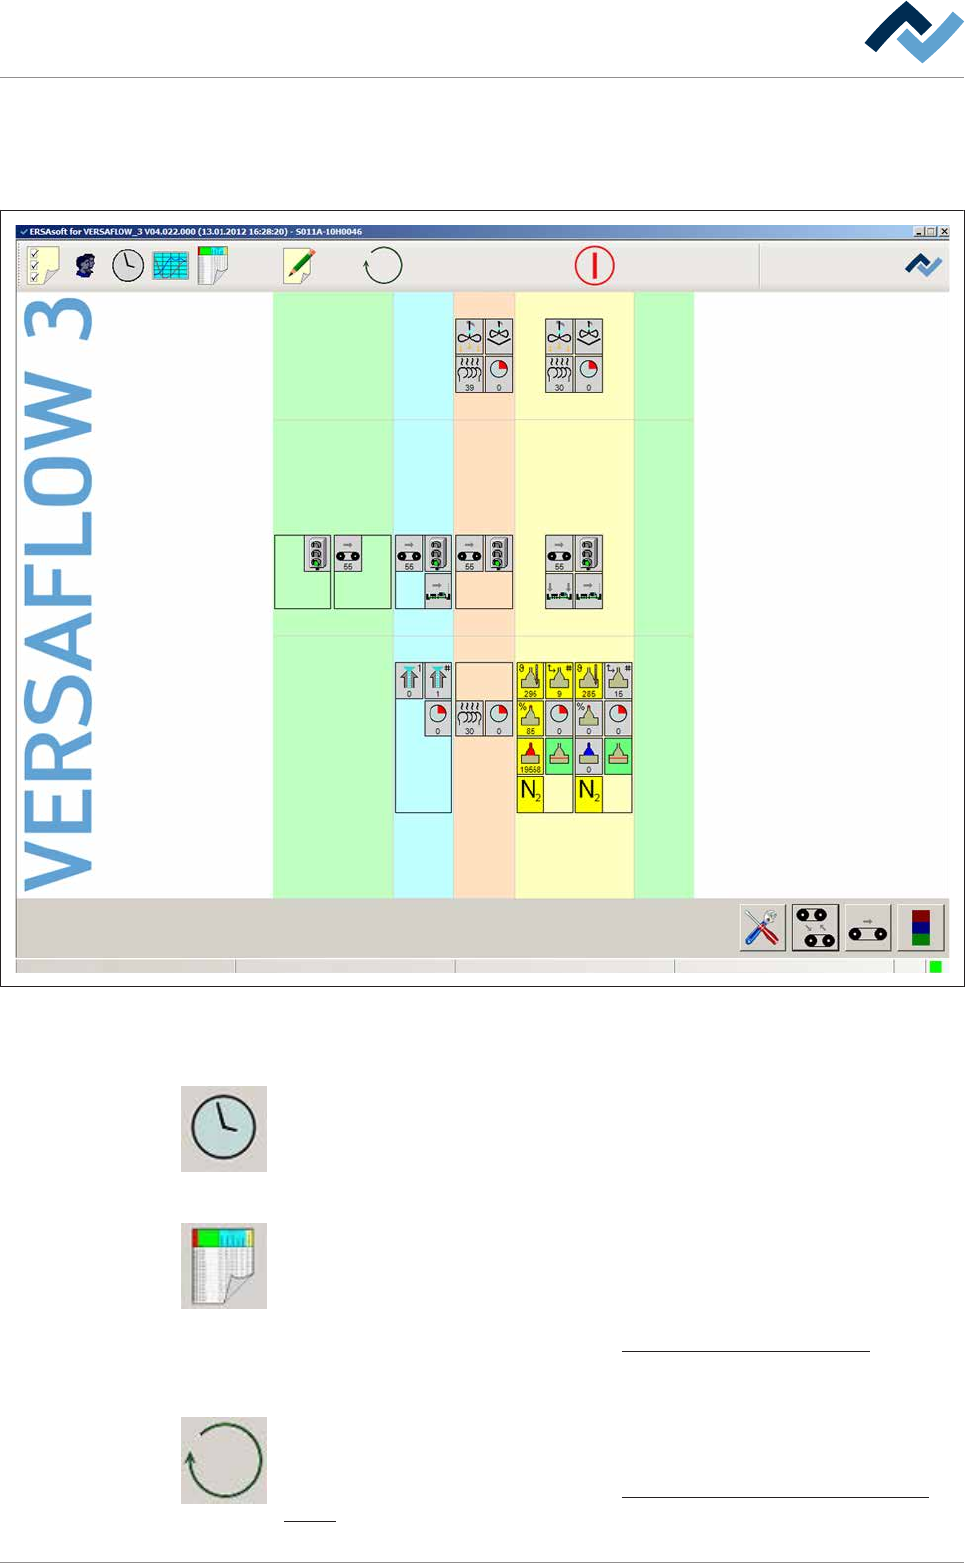
5.4 Preparing the machine for operation
After checking all the functions, you can prepare the machine for operation. For
this purpose, open the start dialog:
Preheating Soldering module ExitInfeed Infeed unit
Solder pot
user: none
Flux unit
Maintenance mode
Fig.19: The start dialog
Fixing the switch-on and switch-off times
Weekly timer. Click on this button to open the [Weekly timer] dialog. In this dialog,
you can determine the current time as well as the switch-on and switch-off times
for the machine.
Searching for and editing a soldering program
Edit soldering program. Click on this button to open the [Edit soldering program]
dialog. In this dialog, you can create soldering programs or edit and change existing
soldering programs. Several soldering programs can be combined into a library to
improve clarity.
With respect to this, please read Chapter The soldering program editor [
}164].
Change the operation mode, start a soldering program
Click on this button to change the operating mode of the machine or select a sol-
dering program.
With respect to this, please read Chapter Selecting and starting a soldering pro-
gram [}215].
Ersa GmbH Operating Instructions_VF335_en|Rev. 14|30/11/2017 109/695