Operating Instructions_VF335_en.pdf - 第255页
6|Function description 6.15.4 Tutorial: Installing a new solder nozzle 6.15.4.1 Entering a new nozzle into the nozzle table ü To install a new solder nozzle in the nozzle table: a) Open the start dialog. Preheating Sol…

6|Function description
6.15.3 Prerequisites for installing a nozzle
If you want to install a new nozzle in the Data table solder nozzle, the following
prerequisites must be met:
– The machine is in the [Maintenance mode] operating mode
– The solder pump has reached the operating condition [warm]
– The solder has reached the required set temperature
– The needle for the solder wave height test must be free of contamination
– The test position of the nozzle must be set correctly; the needle for the solder
wave height test must be located above the centre of the nozzle and show the
[Test distance [mm]] set in the nozzle table.
– The new nozzle must be clean and wettable
– The new nozzle must be used and warm
Ersa GmbH Operating Instructions_VF335_en|Rev. 14|30/11/2017 254/695
6|Function description
6.15.4 Tutorial: Installing a new solder nozzle
6.15.4.1 Entering a new nozzle into the nozzle table
ü To install a new solder nozzle in the nozzle table:
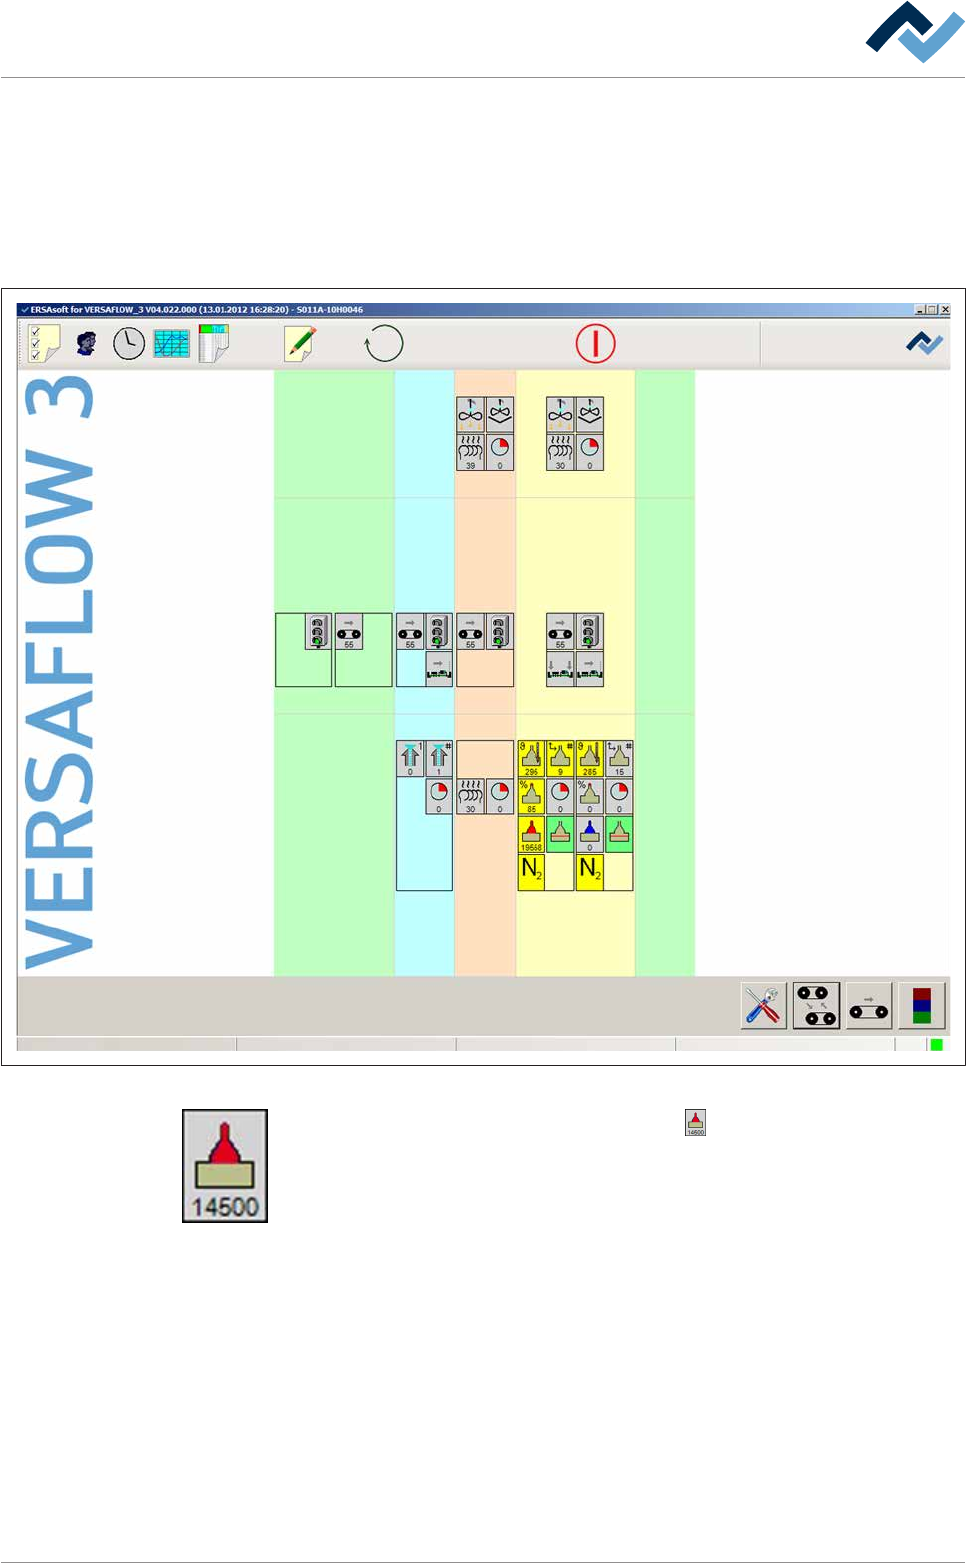
a) Open the start dialog.
Preheating Soldering module ExitInfeed Infeed unit
Solder pot
user: none
Flux unit
Maintenance mode
Fig.68: The start dialog of the control software:
b) In the [Soldering module] frame, click on the button.
ð If the machine is equipped with more than one solder pot, this button can
also be present more than once.
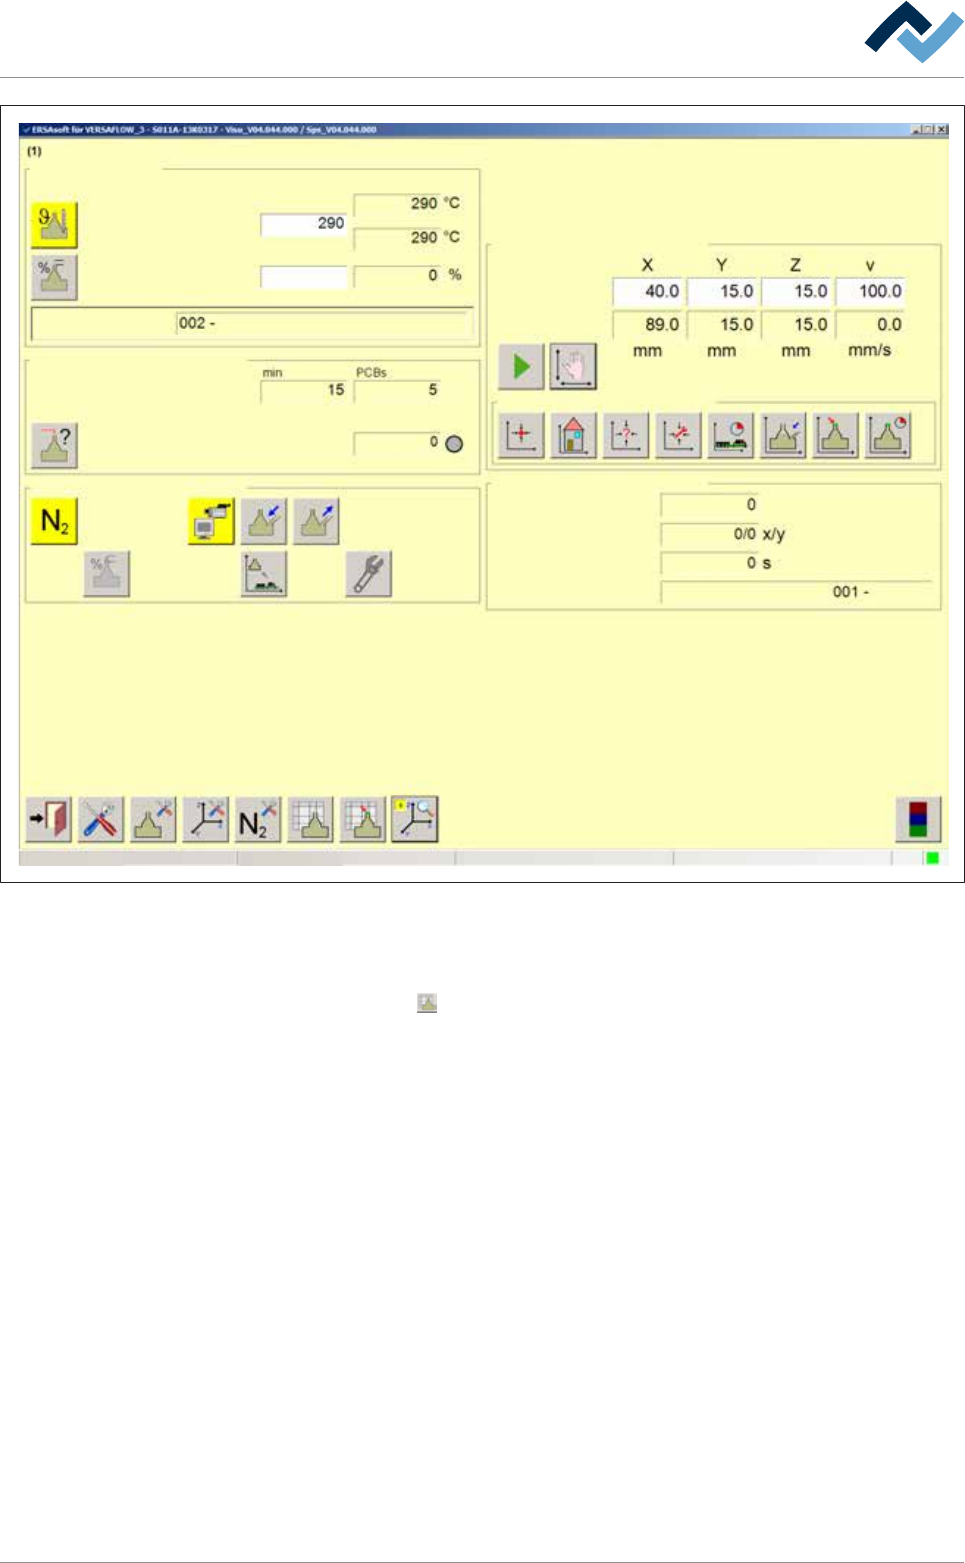
ð The [Soldering module] input dialog is opened:
Ersa GmbH Operating Instructions_VF335_en|Rev. 14|30/11/2017 255/695
6|Function description
Edit dialog Soldering unit 1 Solder pot 1
Solder pot
user:
none
Maintenance mode
Temperature
Operation mode
Set value Actual value
Solder wave off
Module tests
Next test
Wave offset
Switch functions
Manual movement
Set value
Actual value
Automatic positioning
Set no.
Panel
Remaining time
Active tool
Solder
pot 1
Wave power
1
Fig.69: The [Soldering unit 1 Solder pot 1] input dialog
c) Click on the [Wave power] input field and enter the [1%] value.
d) Enabling the solder wave
e) Click on the
button in the bottom toolbar.
ð The Data table solder nozzle is opened:
Ersa GmbH Operating Instructions_VF335_en|Rev. 14|30/11/2017 256/695