Operating Instructions_VF335_en.pdf - 第310页
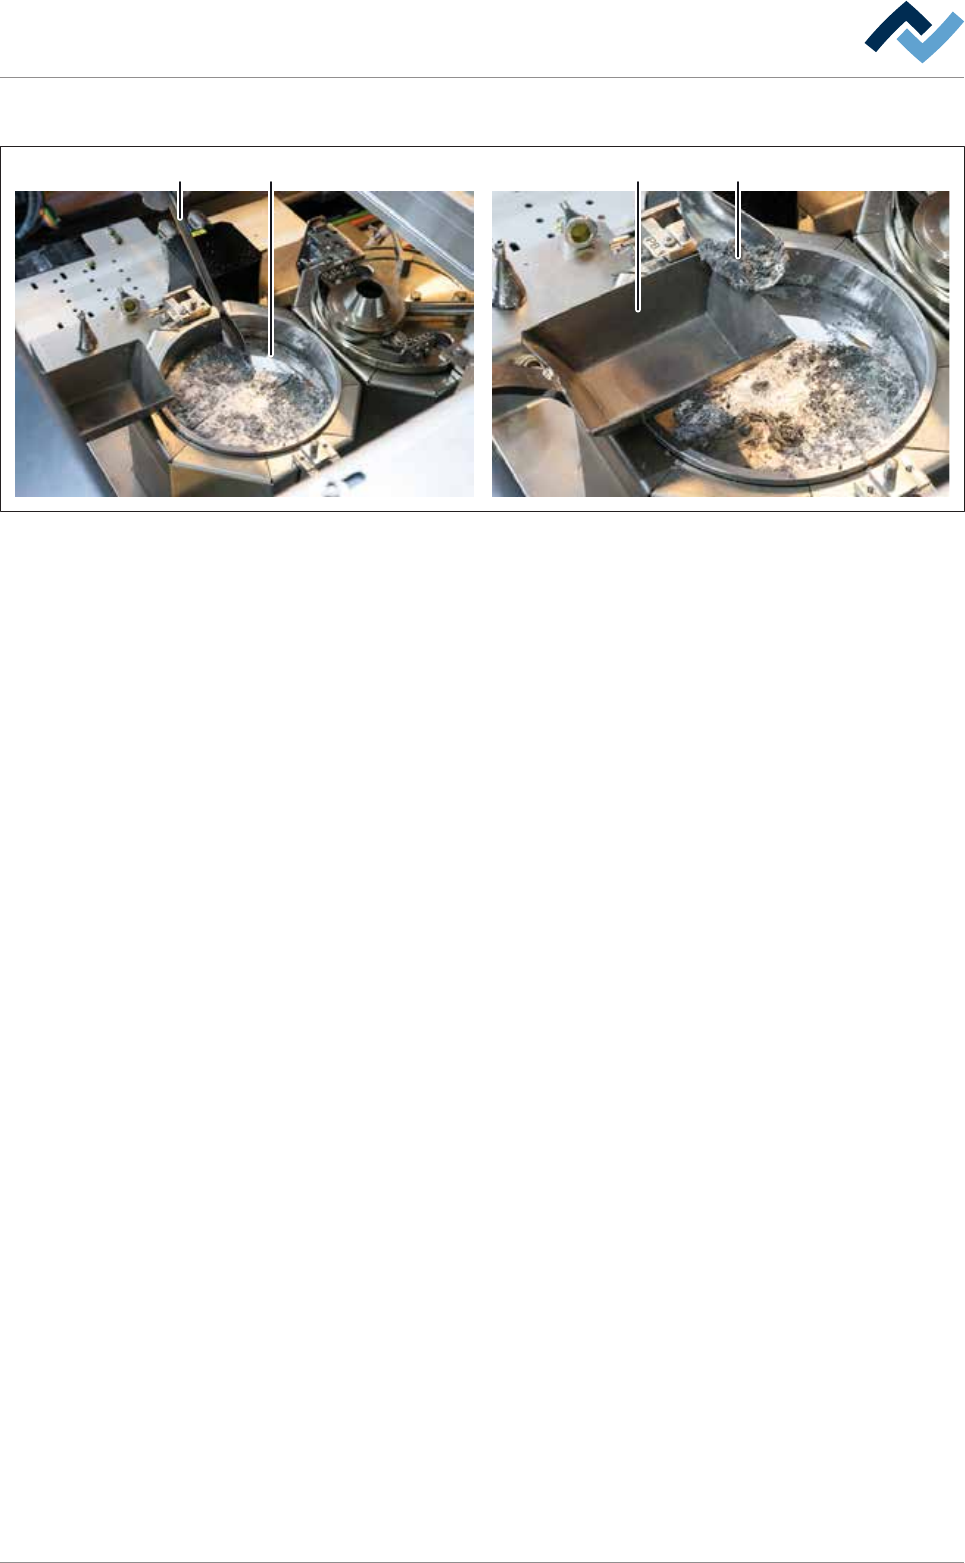
8|Service and maintenance Cleaning the solder surface 4 2 3 1 4 Fig.90: Cleaning the solder surface ü To clean the solder surface: a) Remove the dross from the solder surface (1) using the dross spoon (2). b) Collect …
8|Service and maintenance
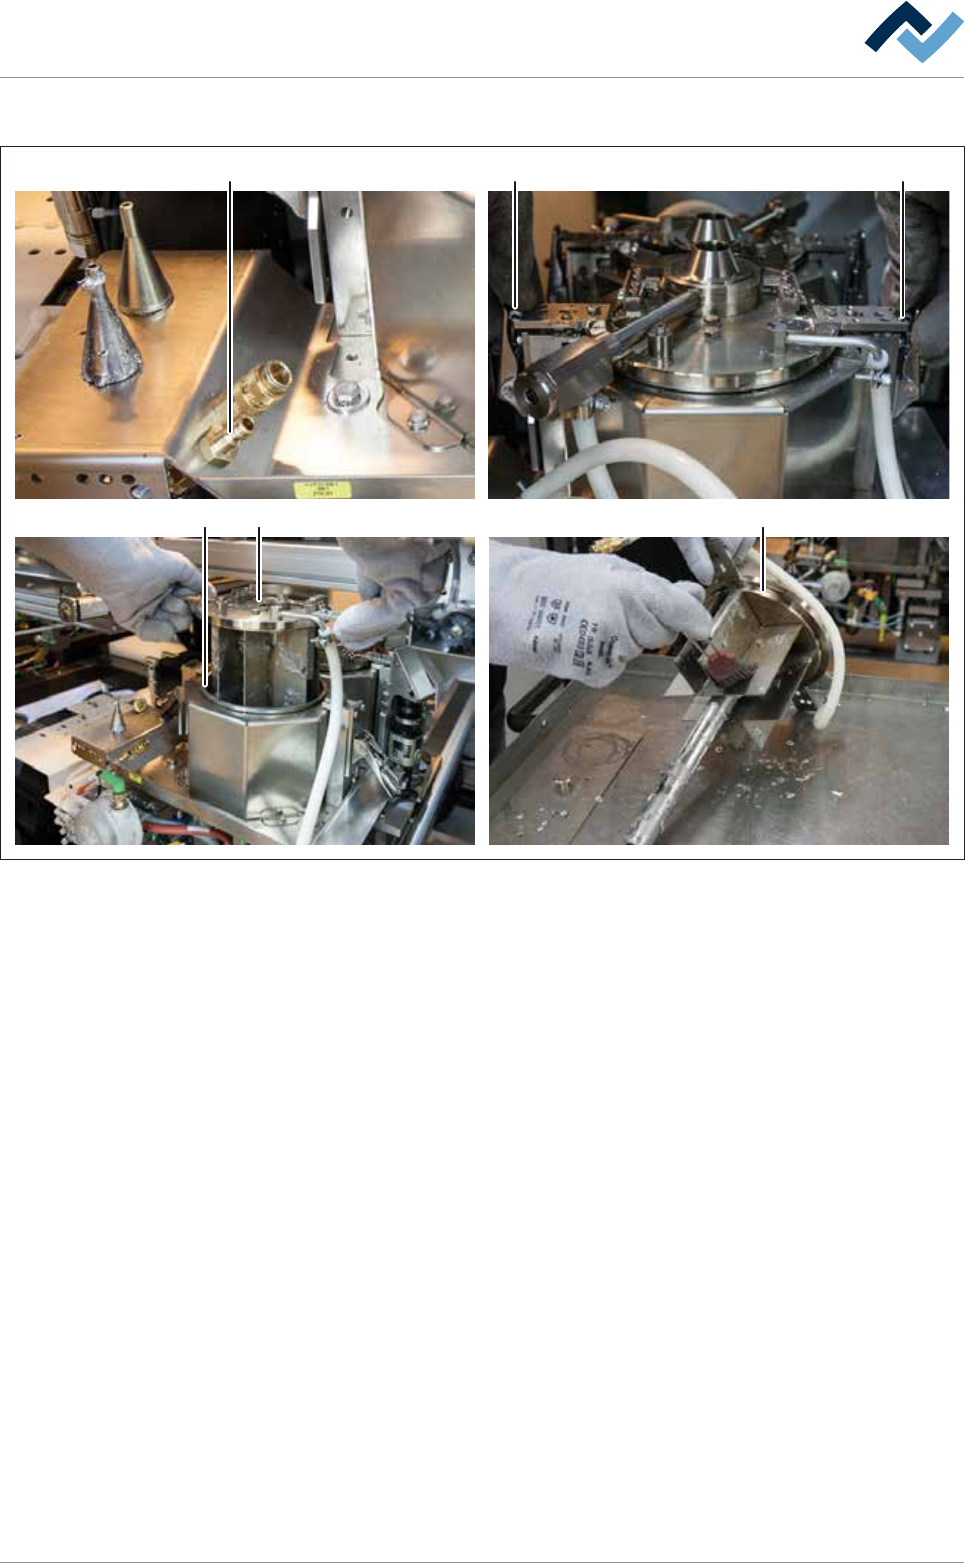
Removing and cleaning the solder pot cover
1 2 2
35
4
Fig.89: Removing and cleaning the solder pot cover
ü To remove and clean the solder pot cover:
a) Loosen the quick coupling (1) of the nitrogen supply.
b) Open the toggle-type fasteners (2).
c) Carefully lift the solder pot cover (3); let the liquid solder drain in the solder
pot.
d) Store the solder pot cover on a heat-resistant surface.
e) Clean all components of the solder pot cover with a brush. Remove any stub-
born solder residue with a wooden scraper.
f) Clean the nozzle base (6).
g) Clean the lower edge of the solder pot cover (4) and the edge of the solder pot
(5).
ð Note: The parts that come into contact with solder are easier to clean
while they are still hot!
ð The process has now been completed.
Ersa GmbH Operating Instructions_VF335_en|Rev. 14|30/11/2017 309/695
8|Service and maintenance
Cleaning the solder surface
4
2
3
1
4
Fig.90: Cleaning the solder surface
ü To clean the solder surface:
a) Remove the dross from the solder surface (1) using the dross spoon (2).
b) Collect the dross (4) in a ladle (3).
ð The process has now been completed.
Ersa GmbH Operating Instructions_VF335_en|Rev. 14|30/11/2017 310/695
8|Service and maintenance
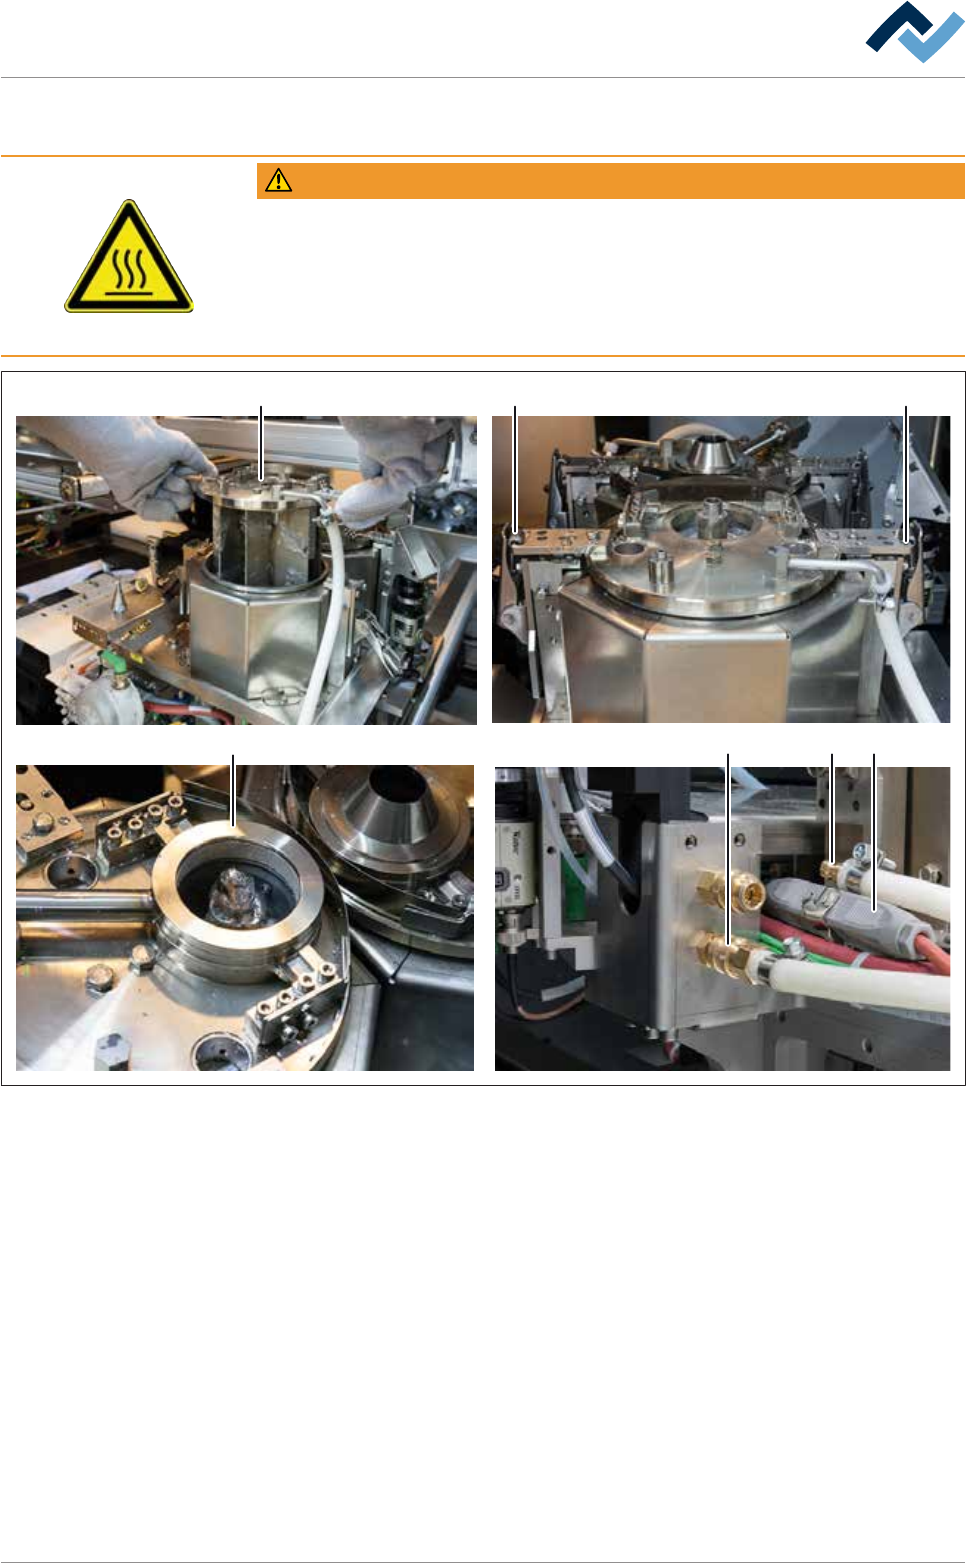
Positioning and closing the solder pot cover
WARNING
Risk of burns when dipping the components into the liquid solder!
ü When dipping the cold components, there is a risk of burns due to splashing
solder!
a) Dip parts very slowly into the solder!
b) Let the parts rest for a few minutes before closing the cover.
3
2 21
45 6
Fig.91: Positioning and closing the solder pot cover
ü To position and close the solder pot cover:
a) Lift the solder pot cover (1) and very slowly dip it into the molten mass.
b) Wait a few minutes until the solder has reached the set temperature again.
c) Close the toggle-type fasteners (2).
d) Position and fix the gassing hood.
e) Connect the quick coupling again.
ð If the solder pot is equipped with a nitrogen heating:
f) Connect the plug connector (6).
ð The process has now been completed.
Ersa GmbH Operating Instructions_VF335_en|Rev. 14|30/11/2017 311/695