Operating Instructions_VF335_en.pdf - 第437页
8|Service and maintenance 8.11.9.7 Changing the solder of the automatic solder supply (optional) ü If your machine has an automatic solder feeder (optional): a) Insert the solder with the appropriate solder alloy. The …
8|Service and maintenance
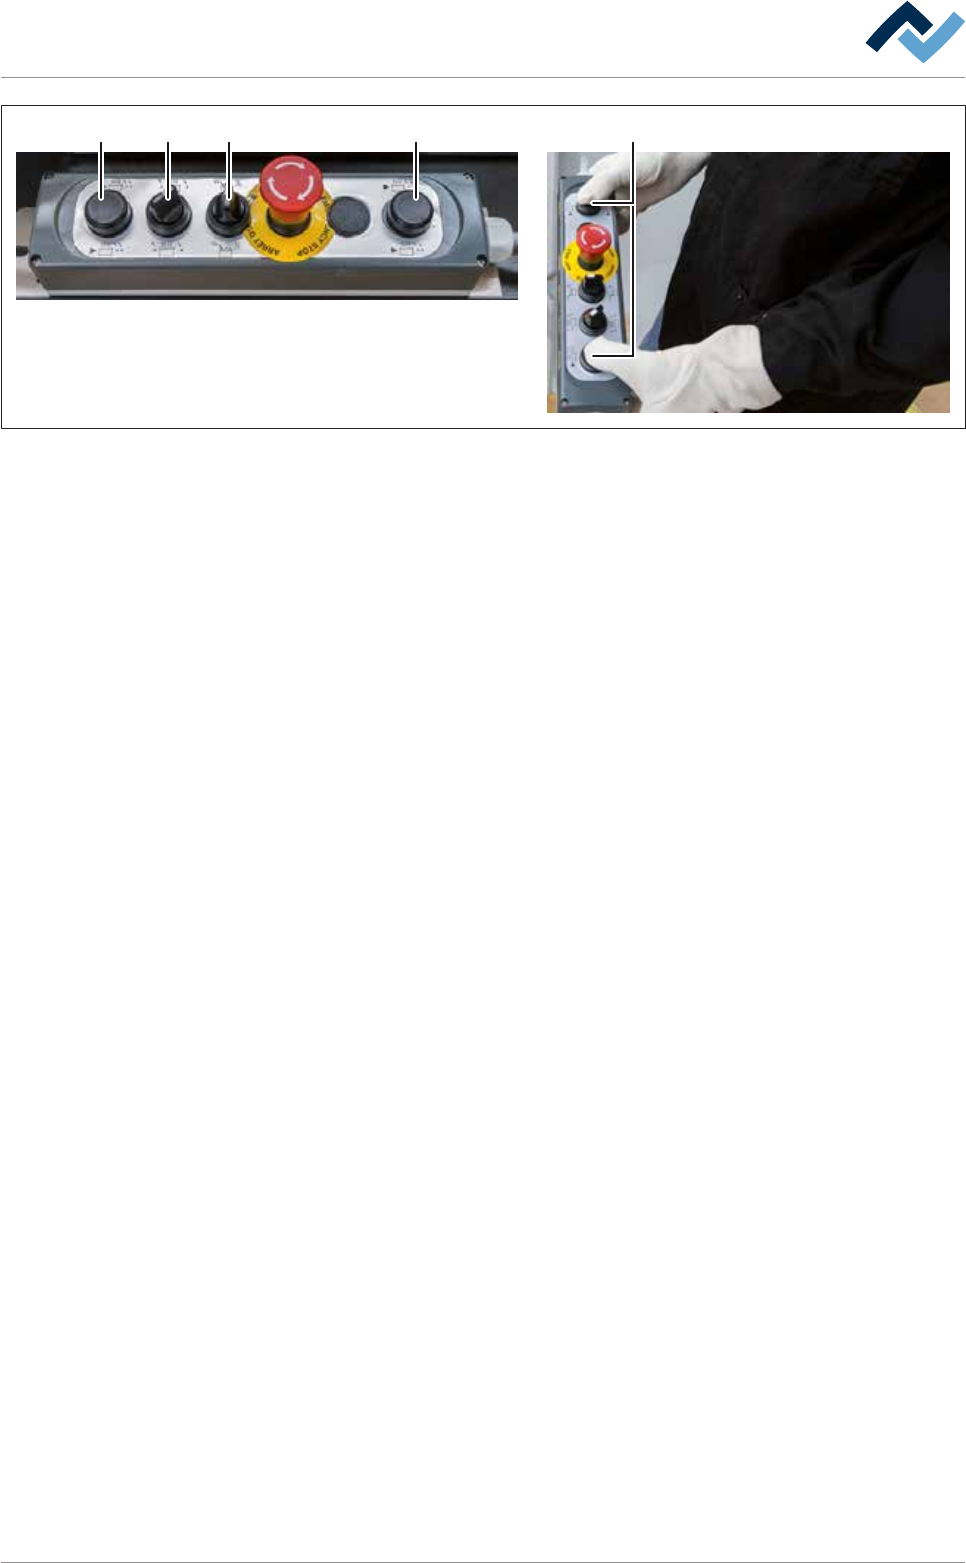
1514 14 14
9
27
Fig.173: Driving the DIP solder pot into the unit
l) On the control console, rotate switch (15) in the position shown.
m)Press and hold both buttons at the same time (14).
ð The solder pot is now conveyed into the machine and will automatically
stop in its final position.
n) Release the buttons (14).
o) Quickly activate the switch (27) to reset.
p) Close the cover of the gassing hood.
q) Using the lifting cart, lift the replacement rack until the height (2) is at least 15
mm greater than the height (1) of the DIP soldering module guide rail.
r) Carefully pull the lifting cart away from the machine.
s) Remove the traction aid from the machine.
t) If the machine has the [Hold Down] option, remove the [Hold Down].
u) If the machine has the [Solderbar feeder] option, remove the [Solderbar
feeder] from the storage compartment of the corresponding DIP solder pot
and insert theSolderbar feeder] back into the appropriate holder.
v) Close all the doors of the machine.
ð The process has now been completed.
Ersa GmbH Operating Instructions_VF335_en|Rev. 14|30/11/2017 436/695

8|Service and maintenance
8.11.9.7 Changing the solder of the automatic solder supply (optional)
ü If your machine has an automatic solder feeder (optional):
a) Insert the solder with the appropriate solder alloy. The alloy of the solder of
the automatic solder feeder must match the alloy in the solder pot!
ð The process has now been completed.
Ersa GmbH Operating Instructions_VF335_en|Rev. 14|30/11/2017 437/695

8|Service and maintenance
8.11.9.8 Completing the DIP solder pot replacement process
ü To complete the DIP solder pot replacement process:
ü The DIP solder pot is inserted into the machine as described.
a) Click on the button
.
ð the [Messages] is opened:
b) Acknowledge the messages on the terminal.
c) Open the input dialog for the DIP soldering module.
d) In the [Solder pot], click on the button
to switch off the heating.
ð The button is displayed in yellow.
ð The heating is switched on and the solder is heated.
ð The set temperature depends on the solder alloy used and is automatically
adjusted by the soldering program. If necessary, manually adjust the solder
temperature of the alloy used so as to avoid subsequent heating in the
[Automatic mode] operation mode.
e) Start the regular working process when the solder has reached the set temper-
ature.
ð The process has now been completed.
Ersa GmbH Operating Instructions_VF335_en|Rev. 14|30/11/2017 438/695