Operating Instructions_VF335_en.pdf - 第423页
8|Service and maintenance 8.11.9.3 Operating the lifting cart with the replacement rack NOTE Supplementary documents Before using the lifting cart for the first time, and in case you have any doubts about its use, plea…
8|Service and maintenance
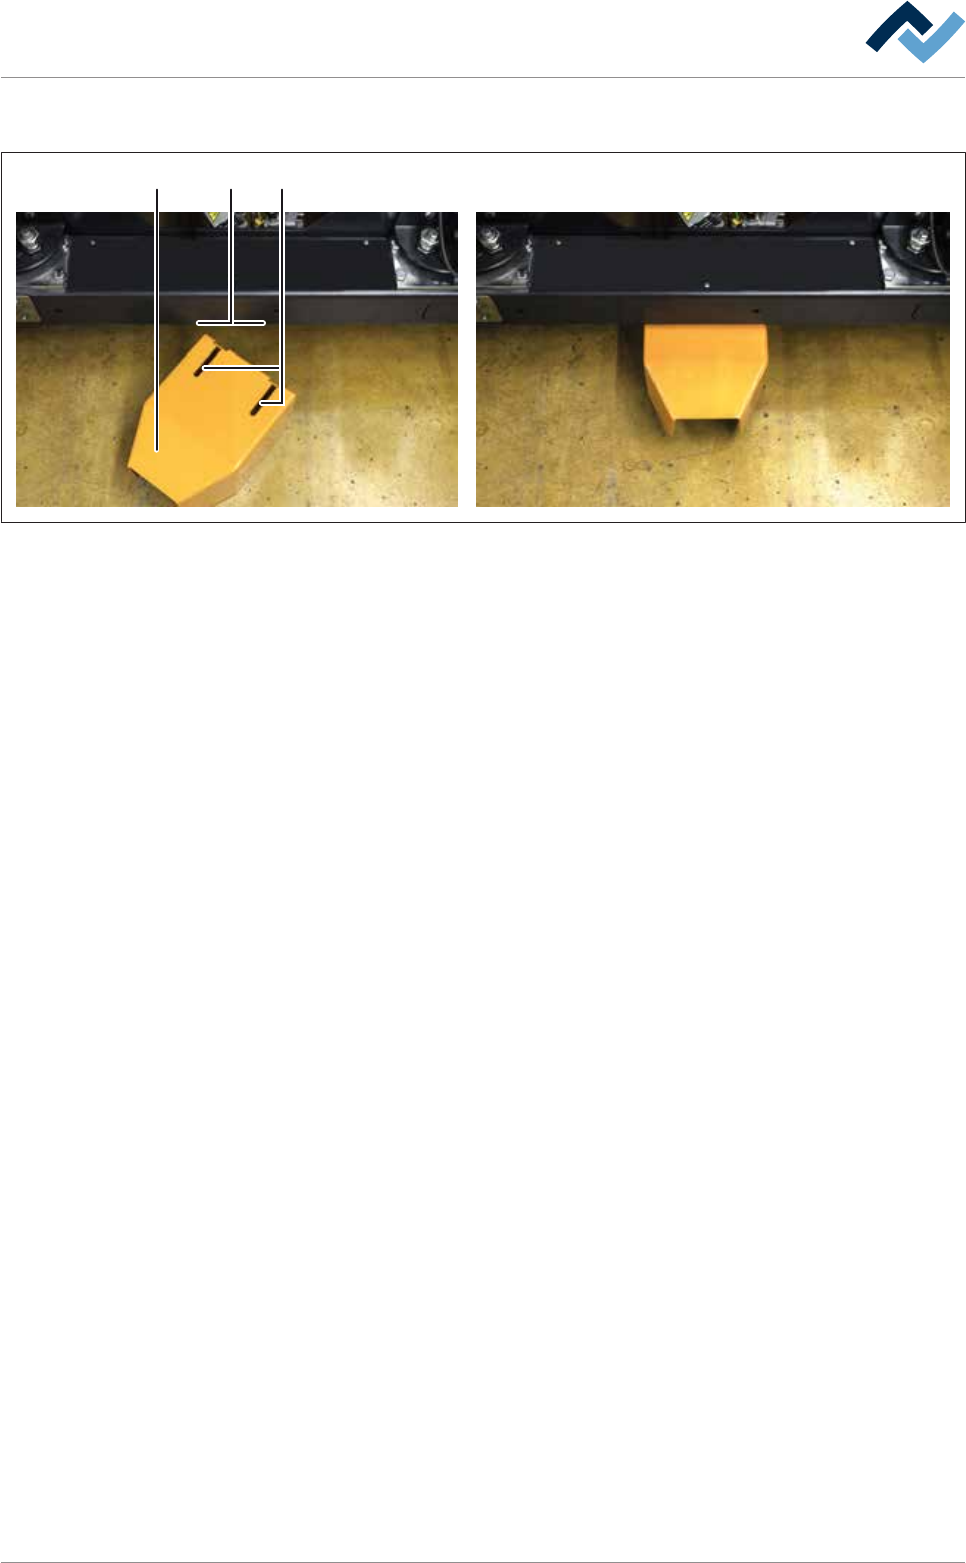
8.11.9.2 Mounting the traction aid on the machine
1 23
Fig.160: Mounting the traction aid on the machine.
Mounting the traction aid on the machine
Before replacing the solder pot, a traction aid must be mounted on the machine.
Thanks to this device, using the lifting cart it is possible to bring the replacement
rack to the correct position for replacing the solder pot on the machine. The lifting
cart is securely bolted to the replacement rack.
a) Insert the traction aid (1) under the DIP soldering module into the holder. In-
sert the holding screws (3) into the elongated holes (2).
ð Make sure that during this procedure the traction aid is not canted.
b) Slide the traction aid (1) backwards until it stops.
ð The process has now been completed.
Ersa GmbH Operating Instructions_VF335_en|Rev. 14|30/11/2017 422/695
8|Service and maintenance
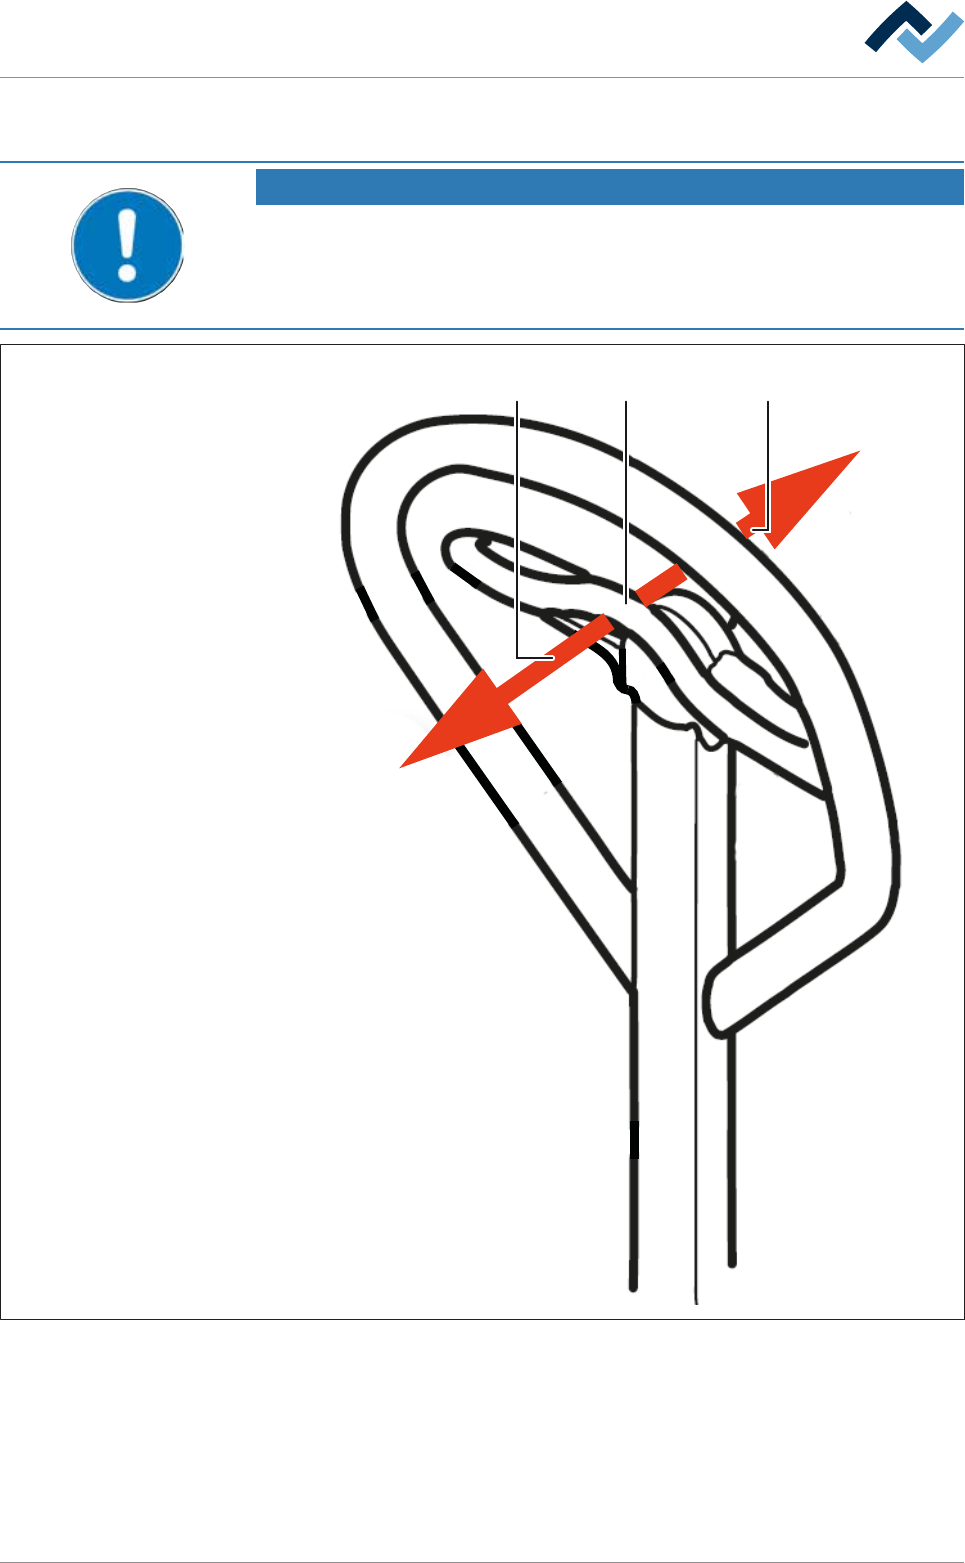
8.11.9.3 Operating the lifting cart with the replacement rack
NOTE
Supplementary documents
Before using the lifting cart for the first time, and in case you have any doubts about
its use, please read the corresponding manuals provided by the manufacturer to be-
come more acquainted with the relevant operating modes.
1 32
Fig.161: Operating the lifting cart
ü To operate the lifting cart.
ü The lifting cart is securely bolted to the replacement rack.
a) Before using the lifting cart for the first time, and in case you have any doubts
about its use, please read the corresponding manuals provided by the manu-
facturer.
Ersa GmbH Operating Instructions_VF335_en|Rev. 14|30/11/2017 423/695

8|Service and maintenance
b) To lift the replacement rack, push the lever (2) in direction (1) and move the
bar up and down until you reach the desired height.
c) To lower the replacement rack, push the lever (2) slowly in direction (3). The
replacement rack will be slowly lowered.
ð Always lower the replacement rack slowly and gently, in order to avoid any
damage to the replacement rack or the machine.
ð The process has now been completed.
Ersa GmbH Operating Instructions_VF335_en|Rev. 14|30/11/2017 424/695