Operating Instructions_VF335_en.pdf - 第399页
8|Service and maintenance Conveying solder pot into the machine NOTE To move the DIP solder pot out of the service position, acknowledge the service message To be able to move the DIP solder pot out of the service posi…

8|Service and maintenance
e) Sequentially move the screws of the bayonet locks with appropriate tools. In
doing so, slightly press the nozzle plate down.
ð In this way, the nozzle plate is fully lowered onto the pressure chamber.
f) Turn the rotary switch (D) on the control panel to the right.
ð In this way, the solder wave is enabled. Do not run the pump without ni-
trogen gassing for an unnecessarily long time. Otherwise, a lot of dross is
produced unnecessarily.
g) Wait about 10 minutes for the nozzle plate to heat up and the solder to reach
its target temperature again.
h) Remove any extraction tools.
i) Secure the nozzle plate with the socket spanner according to the diagram
shown.
j) Start by fixing the nozzle plate always at the zero point (C) and proceed accord-
ing to the illustrated numbering.
k) Clean all inlet bores with a round brush.
l) Solder wave height visual inspection:
ð Nozzles must be uniformly filled with solder and wave height be the same
for each nozzle.
ð The process has now been completed.
Ersa GmbH Operating Instructions_VF335_en|Rev. 14|30/11/2017 398/695
8|Service and maintenance
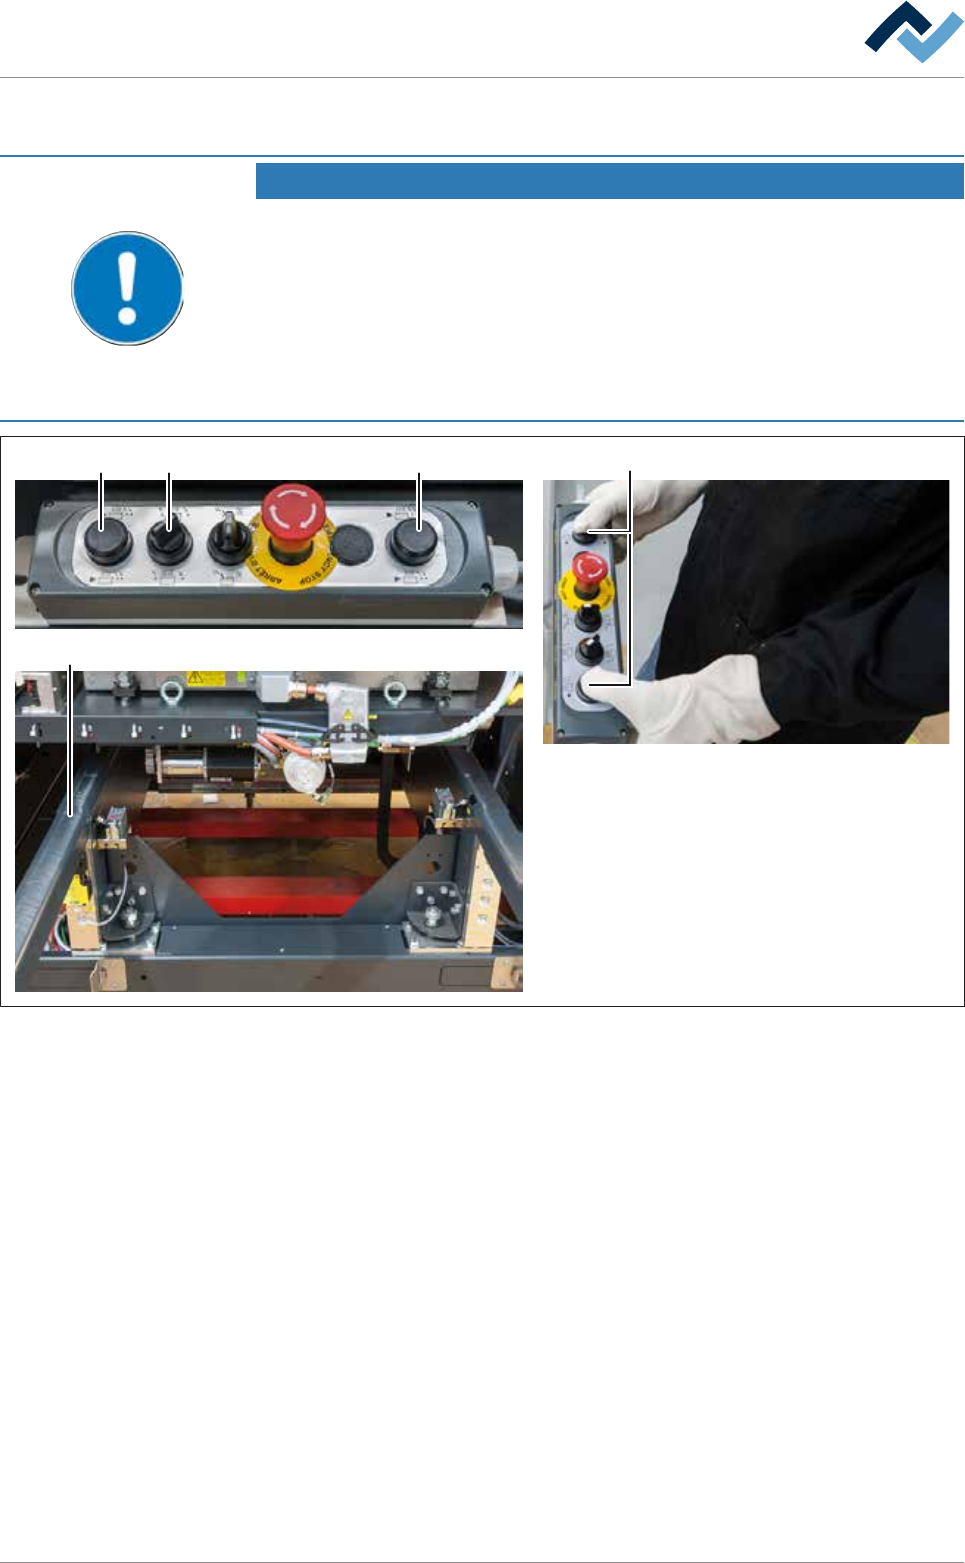
Conveying solder pot into the machine
NOTE
To move the DIP solder pot out of the service position, acknowledge the service
message
To be able to move the DIP solder pot out of the service position, acknowledge the
corresponding service message. Afterwards, you will have five minutes to move the
DIP solder pot out of the service position. During this time, a corresponding notice will
be displayed. If the DIP solder pot has not been moved after this time, a timeout mes-
sage appears. After acknowledging the timeout message, you will have another five
minutes to move the DIP solder pot out of the service position.
2
34 4 4
Fig.148: Conveying solder pot into the machine
ü To convey the solder pot into the machine:
a) On the control console, rotate switch (3) in the position shown.
b) Simultaneously press and hold both buttons (4).
ð The solder pot is now conveyed into the machine and will automatically
stop in its final position.
c) Release the buttons (4).
d) Remove the solder pot support (2).
e) Close all hoods and doors.
f) Stop the module maintenance.
ð The process has now been completed.
Ersa GmbH Operating Instructions_VF335_en|Rev. 14|30/11/2017 399/695

8|Service and maintenance
8.11.8 DIP soldering module (multiwave) with induction pump: Pump riser tube
cleaning
This kind of maintenance work must be performed while the solder is liquid! There-
fore, the following safety instructions must be strictly followed:
DANGER
Severe or fatal injury from hot machine!
The entire machine is hot during operation and contains liquid metal!
a) Service on the hot machine may only be carried out by specially trained staff,
qualified for this type of work! For these types of work, a company internal oper-
ating procedure for protective clothing is to be issued!
b) You should always take into account the possibility for metal to spray out!
c) Special care is required when refilling the pot and working on the pot!
NOTE
Use suitable protective equipment!
When performing any work on a hot pot, protective clothing must be worn:
a) Safety shoes
b) Face protection
c) Heat resistant gloves
d) Heat resistant apron.
CAUTION
Risk of material damage!
All the parts of the soldering module coming into contact with liquid solder are
coated.
a) These parts may only be cleaned with a suitable brush.
b) Use a wooden scraper for residual solder which is hard to remove.
WARNING
Death or severe injuries are possible with rolled out soldering module!
ü If the soldering module stands on the solder pot trestle while it is hot:
a) Shut off the work area with a red and white safety chain and a warning sign.
b) Remove possible tripping areas!
Ersa GmbH Operating Instructions_VF335_en|Rev. 14|30/11/2017 400/695