Operating Instructions_VF335_en.pdf - 第373页
8|Service and maintenance 4 8 6 5 7 3 Fig.133: Opening the flux material storage tank ü Opening the tank: a) Move the locking bow (3) by the handle end and close the tap (4) in the OFF direction b) Close the nitrogen …
8|Service and maintenance
8.11 Service work to be performed when required
8.11.1 Supplementing flux material storage
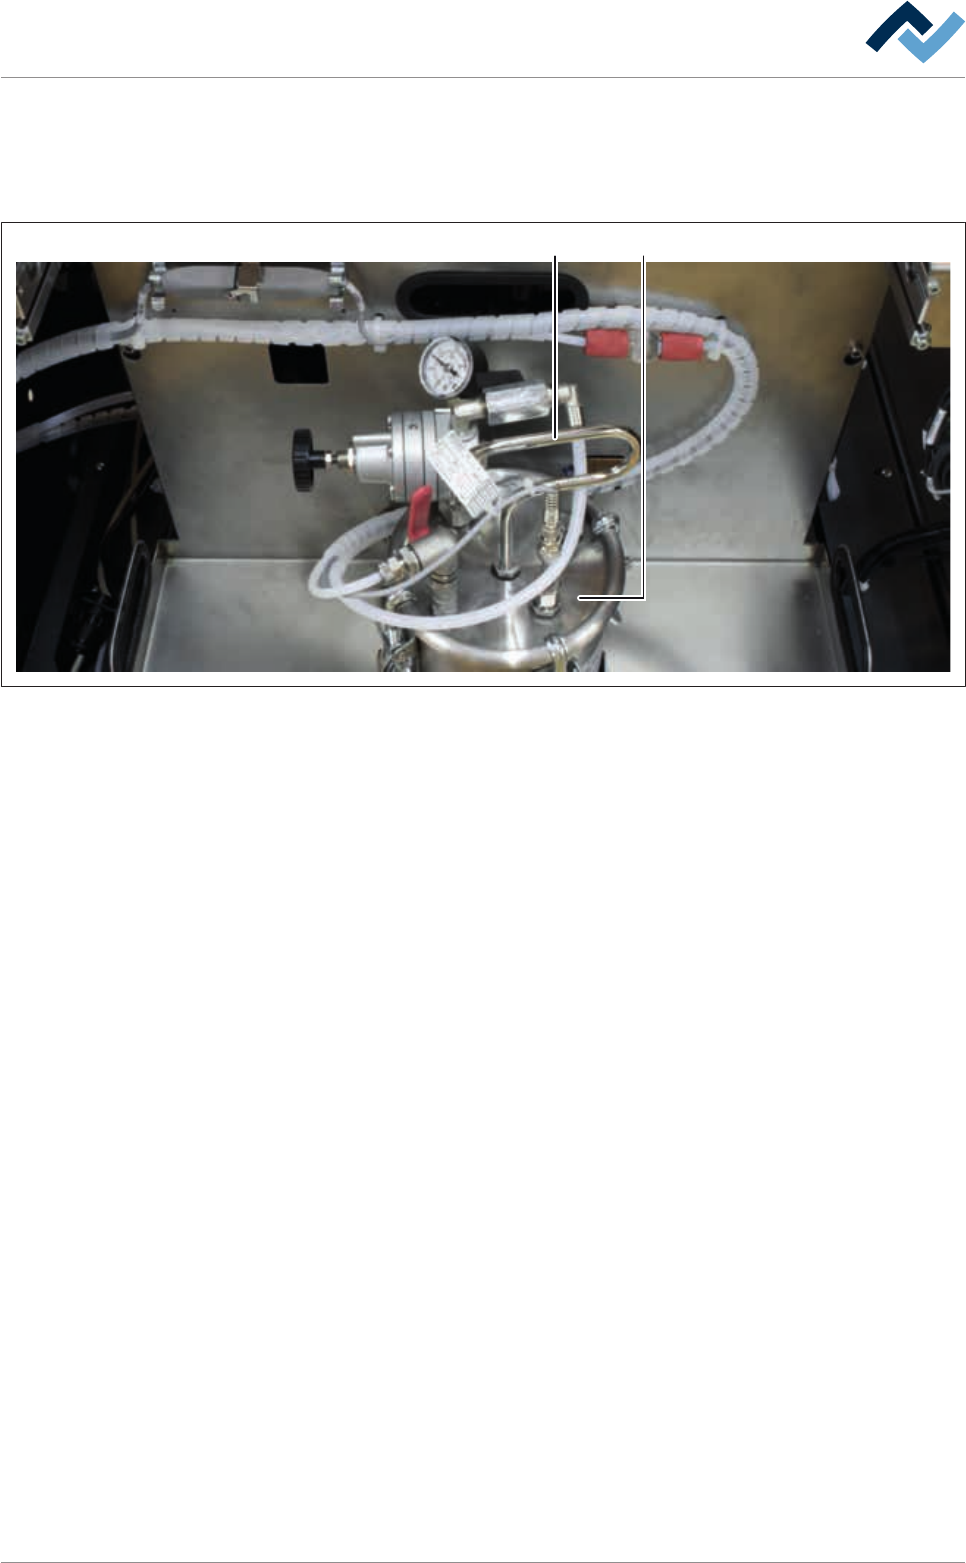
1 2
Fig.132: Flux material storage tank
Topping up the flux container
ü To dismantle the flux material tank:
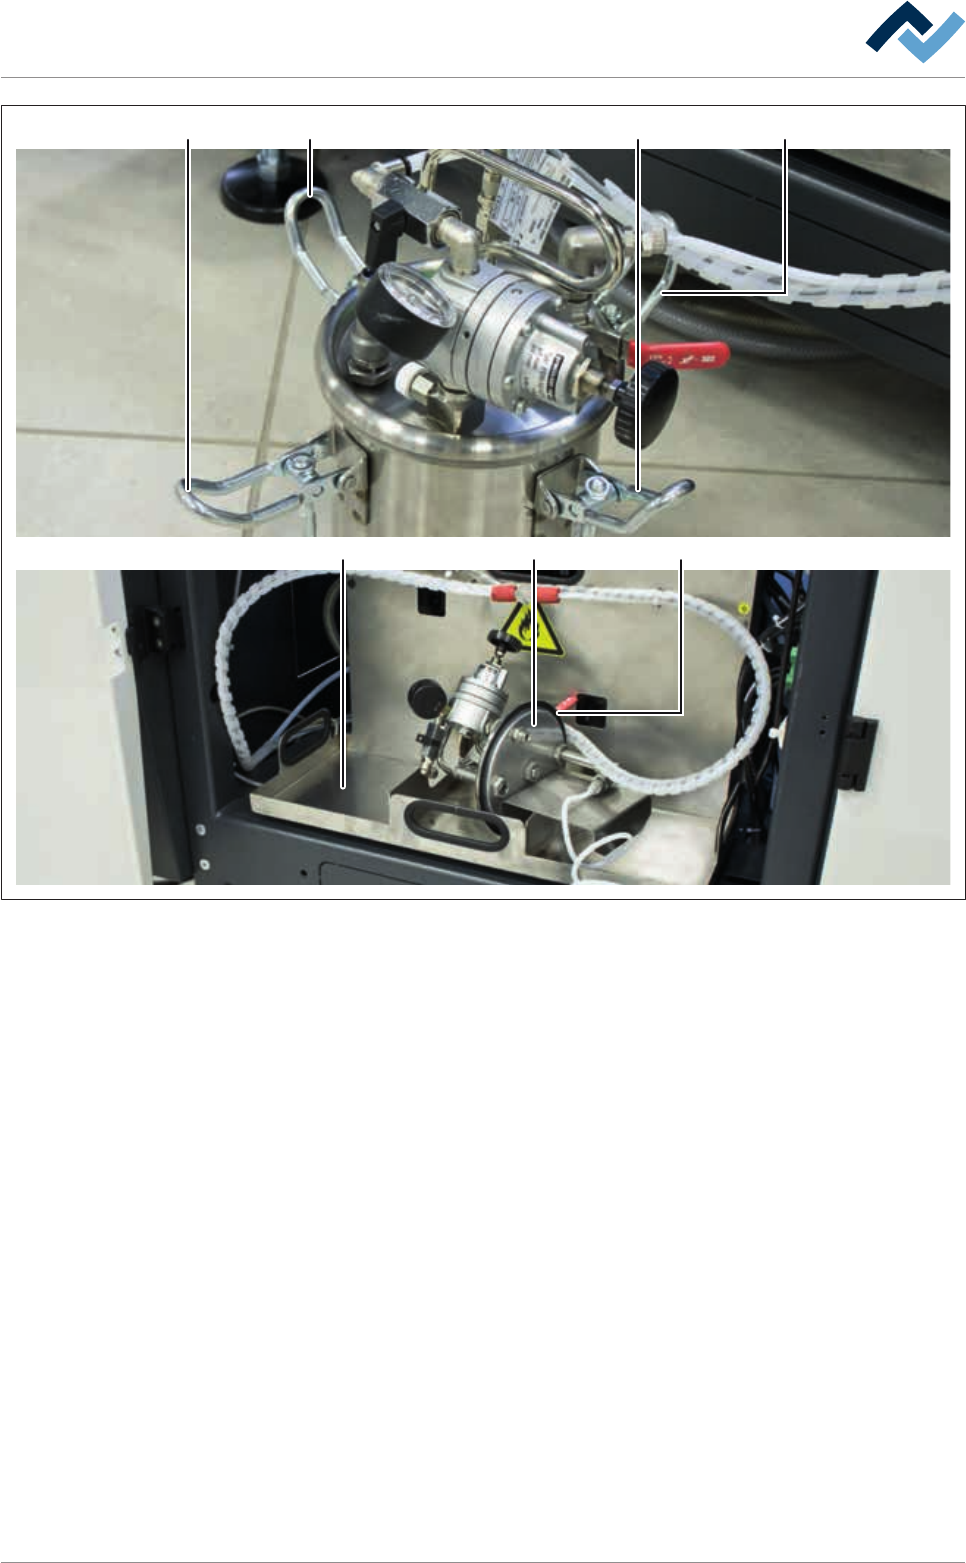
a) Open the door in the fluxer area.
b) Put on a grounding wrist strap and connect it to the machine equipotential
bonding.
c) Pull out the storage tank (3), holding it by the handle, and place it on a clean
surface.
Ersa GmbH Operating Instructions_VF335_en|Rev. 14|30/11/2017 372/695
8|Service and maintenance
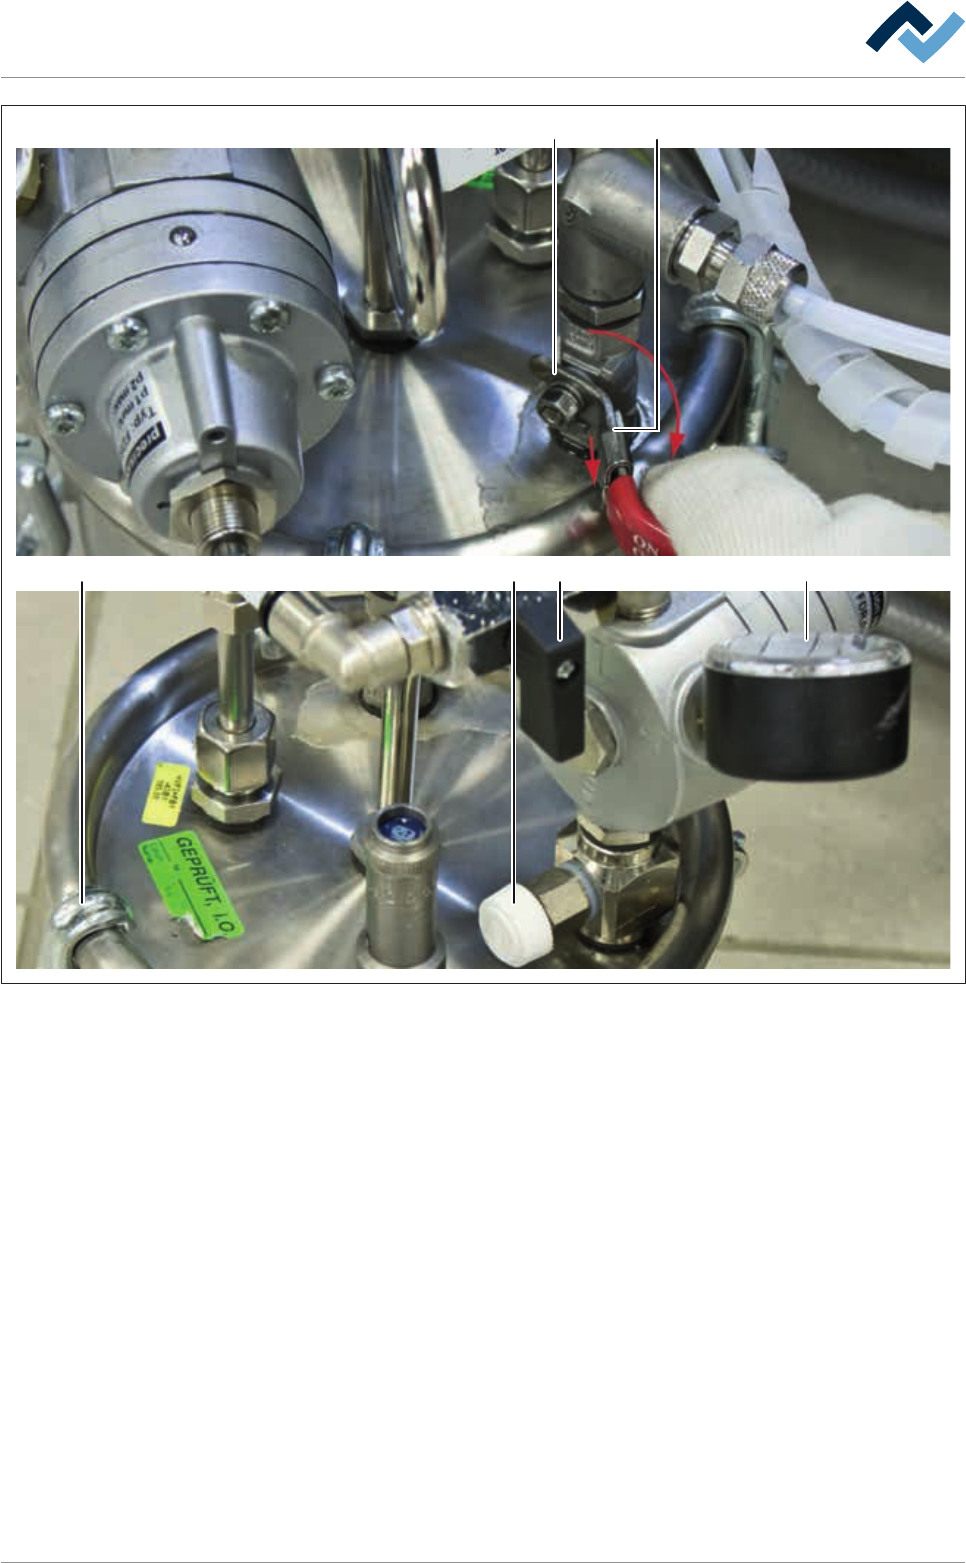
4
8 6 5 7
3
Fig.133: Opening the flux material storage tank
ü Opening the tank:
a) Move the locking bow (3) by the handle end and close the tap (4) in the OFF
direction
b) Close the nitrogen supply tap (5).
c) Release the pressure from the tank. To do this, slowly open the valve (6) until
wind noise can no longer be heard and the pressure gauge (7) shows a value of
0 bar. Close the valve (6) again.
ð The tank is now depressurized.
Ersa GmbH Operating Instructions_VF335_en|Rev. 14|30/11/2017 373/695
8|Service and maintenance
88
9 10 11
8 8
Fig.134: Opened storage tank
ü To remove the cover:
a) Open all four locks (8).
b) Clean the tray (9).
c) Lift the cover (10) and drain the flux material adhering to the container. Place
the cover (10) on the tray (9)
d) The ring (12) must remain in the liquid, otherwise the whole system must be
vented!
e) Visual inspection of the seal (11). Clean any dirty seals. Use cleaning agent re-
commended by the flux material manufacturer. Replace any porous and
hardened seals.
Ersa GmbH Operating Instructions_VF335_en|Rev. 14|30/11/2017 374/695