Operating Instructions_VF335_en.pdf - 第142页
6|Function description NOTE Monitoring As soon as the button is displayed in yellow, data is being logged. If the button is displayed in grey, no data is currently being logged: Settings in the [Traceability system] fr…
6|Function description
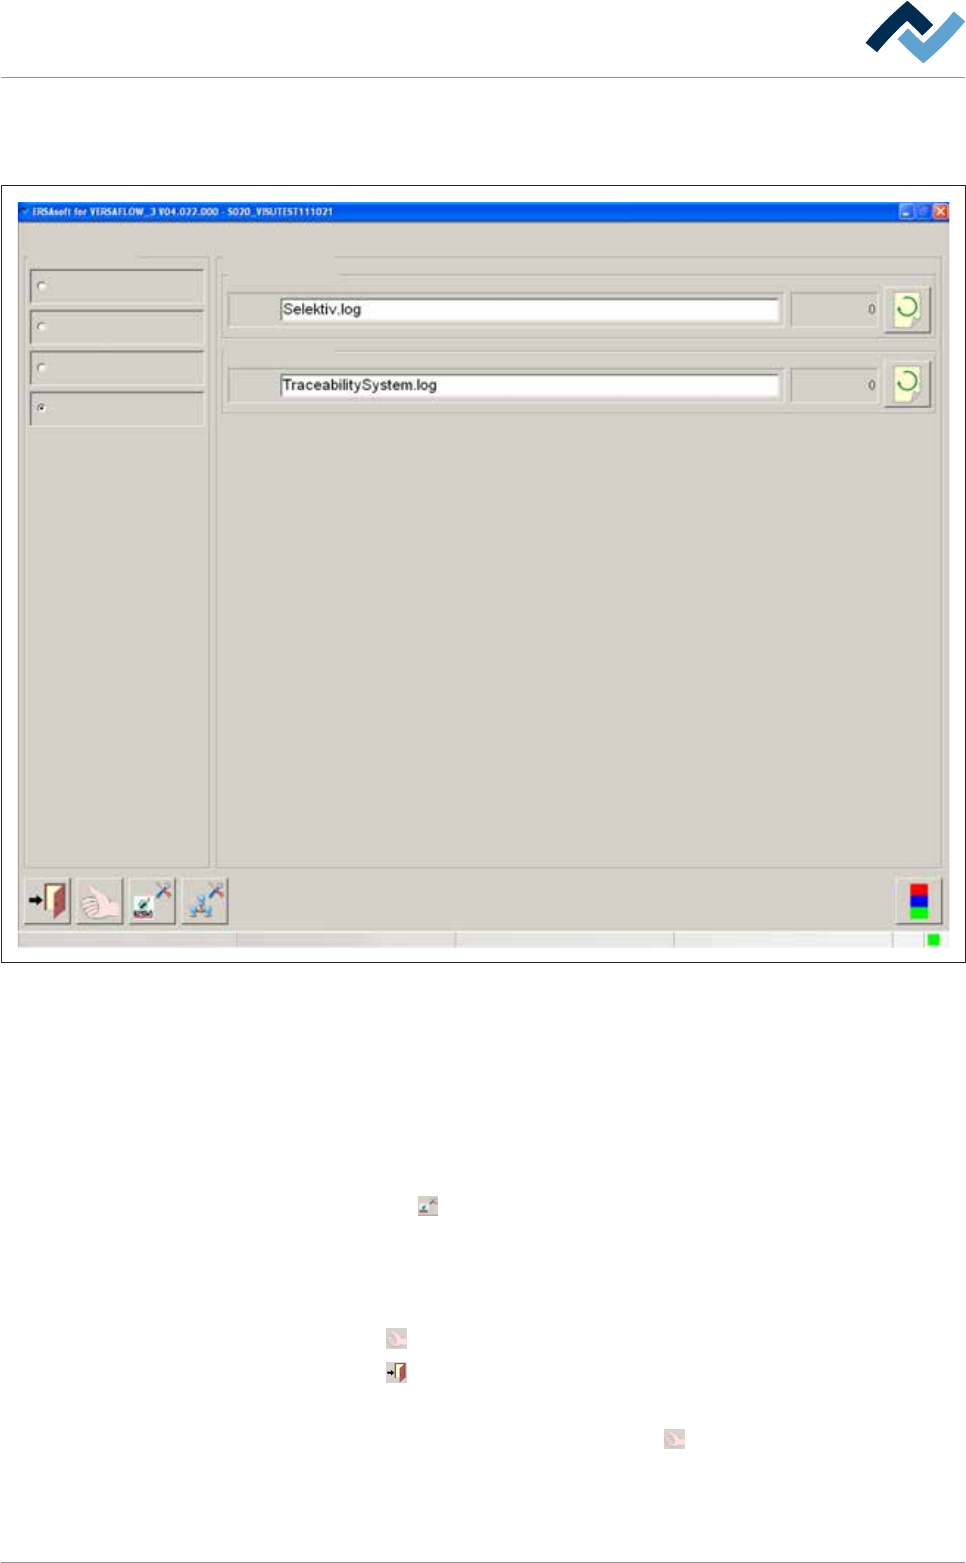
6.5.8 The [Logging] editing dialog
This dialog is used for logging various data of the machine.
Settings
General settings
Profile
User administration
File path
Logging
User ersa
Maintenance mode
File
File
Logging
ERSAsoft
Fig.25: The [Logging] editing dialog
Settings in the [ERSAsoft] frame
You can log visualization software data using the acquired data to perform, for ex-
ample, process analyses in case of production problems.
The [File] editing field
ü To log ERSA data
a) Click on the [File] editing field and enter a name for the log file.
b) Click on the
button.
ð A selection dialog box is displayed.
c) Specify the data to be logged. Enable the relevant check boxes.
ü Accept settings, close dialogs
a) Click on
to accept a setting.
b) Click on
to close a dialog.
ü As soon as the [Logging] editing dialog is displayed again:
a) Accept the setting again by clicking on the
button in the bottom toolbar,
otherwise no change will occur!
Ersa GmbH Operating Instructions_VF335_en|Rev. 14|30/11/2017 141/695
6|Function description
NOTE
Monitoring
As soon as the
button is displayed in yellow, data is being logged. If the button is
displayed in grey, no data is currently being logged:
Settings in the [Traceability system] frame
You can log traceability system data using the acquired data to document the
traceability of production parameters within a traceability system.
ü To log traceability system data
a) Proceed as described above in the [ERSAsoft] frame. After entering a name for
the log file, click on the
button.
Ersa GmbH Operating Instructions_VF335_en|Rev. 14|30/11/2017 142/695
6|Function description
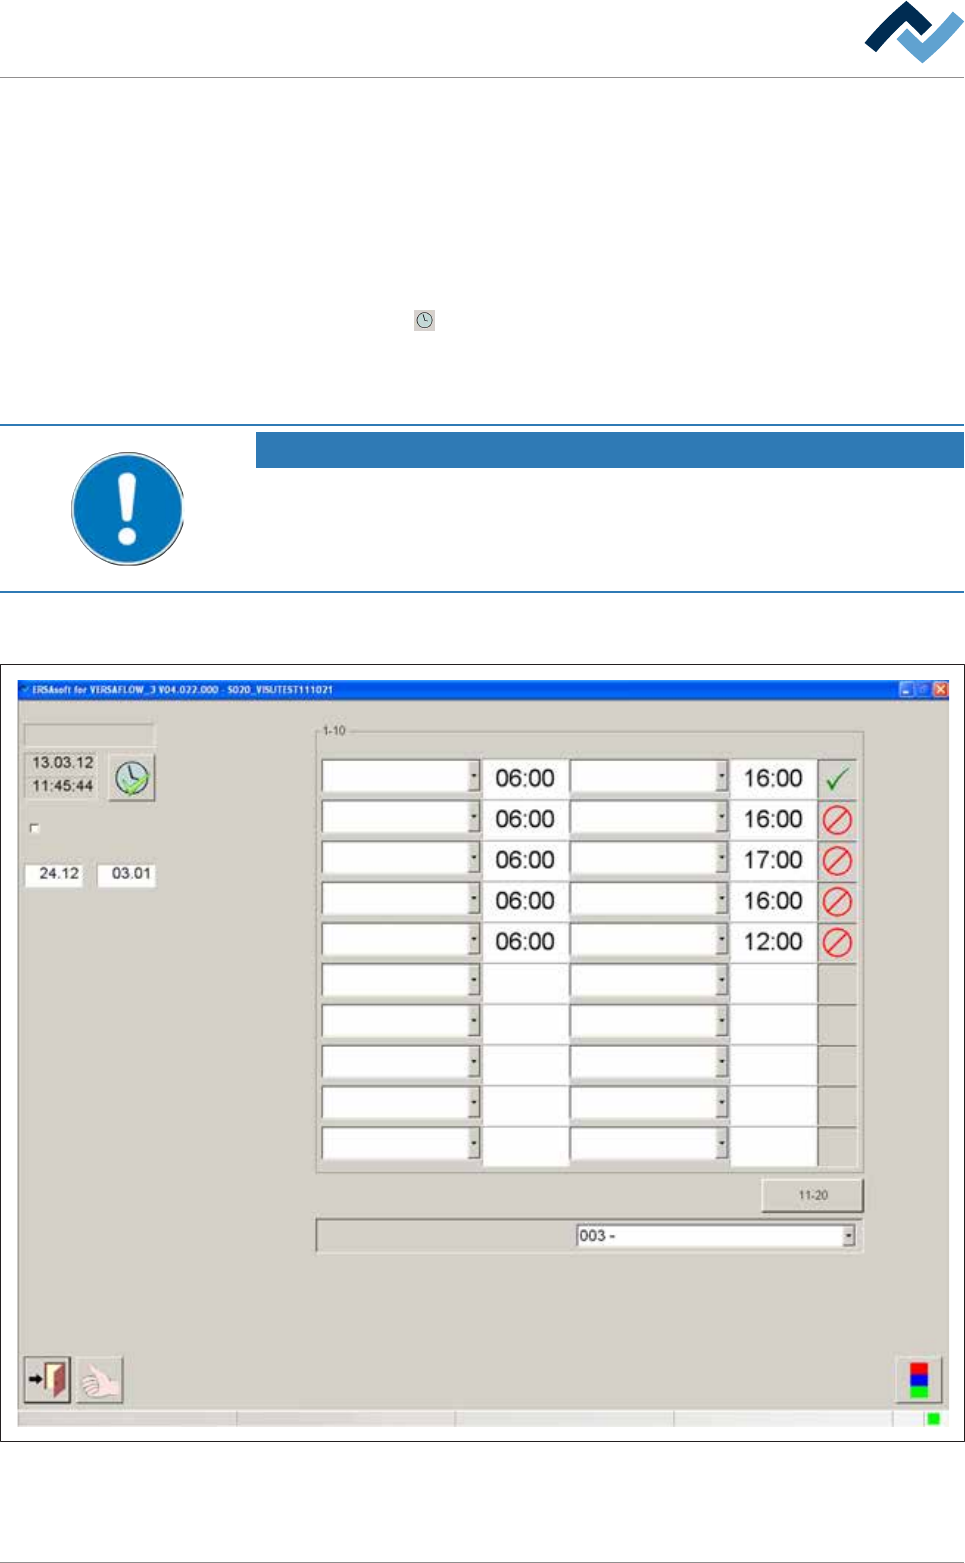
6.6 The [Weekly timer] setting dialog.
In this dialog, you can determine the timeframe for the machine to be ready for op-
eration. For example, the solder in the pot will be heated from the standby temper-
ature to the set temperature in due time, so that the solder has reached its set
temperature when production is started. The modules switch-on time and the time
ahead of it can be defined in the setting dialogs of the units.
ü Opening a dialog:
a) click on the
button in the top toolbar of the start dialog.
ð If the [Password:] input field is displayed:
b) enter user name and correct password.
NOTE
Are any changes possible?
The [Weekly timer] user rights are required to access this dialog. Without name and
password, the settings can only be displayed. In this case, press the [ESC] key on your
keyboard, or click on the [Cancel] button when a password is required.
After entering [User name] and [Password:] correctly, the [Weekly timer] setting
dialog is displayed:
Settings Weekly timer
Tuesday
Shut down period active
From: To:
Operation mode if timer is off
Tuesday Tuesday
Monday Monday
Wednesday Wednesday
Thursday Thursday
Friday Friday
On day On time Off day Off time Active
Voltage supply OK
User ersa Maintenance mode
Fig.26: The [Weekly timer] settings dialog
Ersa GmbH Operating Instructions_VF335_en|Rev. 14|30/11/2017 143/695