Operating Instructions_VF335_en.pdf - 第335页
8|Service and maintenance 8.6.12 Flux reserve: Visual inspection, cleaning 3 2 4 4 1 Fig.107: Spray fluxer connections ü Visual inspection and cleaning of the storage tank: a) Visually inspect all hoses and connection…
8|Service and maintenance
a) In the start dialog, observe the button.
ð If the solder level is correct, this button is displayed in green.
b) Open the soldering module quick connector (1).
ð The
button must be displayed in red now.
c) Close the connection (2).
ð The
button is displayed in green. In this case, the correct functioning of
the solder level monitoring is ensured.
d) Connect the quick connector (1) again.
ð The process has now been completed.
8.6.11 Conveyor system: visual inspection
DANGER
Risk of injury due to gloves entrapment!
ü When working on the running conveyor system:
a) Let the machine cool down to room temperature!
b) Do not wear gloves!
c) Keep fingers away from moving parts (transport chains, gear wheels, gear racks)!
d) For the lubrication of the conveyor chains use a brush, a dosage bottle or a spray!
ü To inspect the conveyor system:
a) Switch off all conveyors.
b) let the machine cool down.
c) Check if the conveyor profiles are firmly seated and complete.
– Secure loose conveyor profiles.
– Replace missing or damaged conveyor profiles.
– Refasten loose screws and nuts.
a) Visual inspection of the conveyor chains. Smooth and soft running must be
guaranteed.
b) Clean all conveyor chains with a lint-free cloth.
ð The process has now been completed.
With regard to this, please read Chapters Cleaning agents used [
}300] and Tools
and auxiliary materials [}301].
Ersa GmbH Operating Instructions_VF335_en|Rev. 14|30/11/2017 334/695
8|Service and maintenance
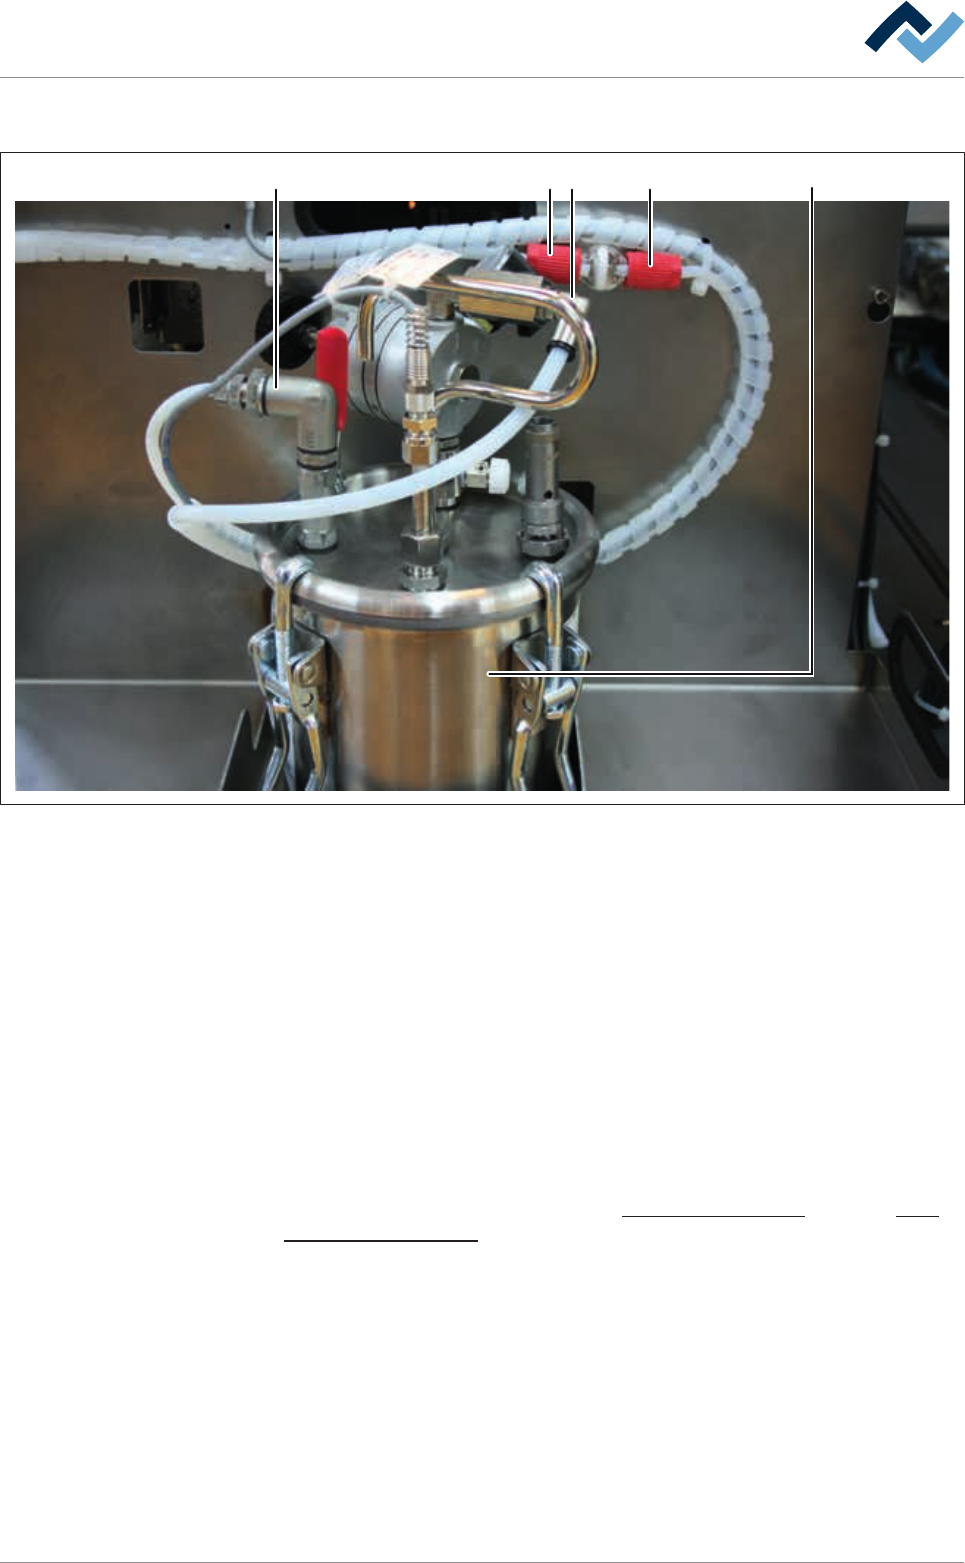
8.6.12 Flux reserve: Visual inspection, cleaning
324 41
Fig.107: Spray fluxer connections
ü Visual inspection and cleaning of the storage tank:
a) Visually inspect all hoses and connections (1), (2), (4).
b) Clean dirty components.
c) Lift the flux material tank (3) and carefully move it back and forth.
ð Prevent any flux material leakage. Tightness and firm fit must be guaran-
teed.
d) In the event of flux material leakage or audible wind noise, depressurize the
system.
e) Tighten up leaking connections.
f) Have defective connections replaced by qualified staff.
ð The process has now been completed.
With regard to this, please read Chapters Cleaning agents used [
}300] and Tools
and auxiliary materials [}301].
Ersa GmbH Operating Instructions_VF335_en|Rev. 14|30/11/2017 335/695
8|Service and maintenance
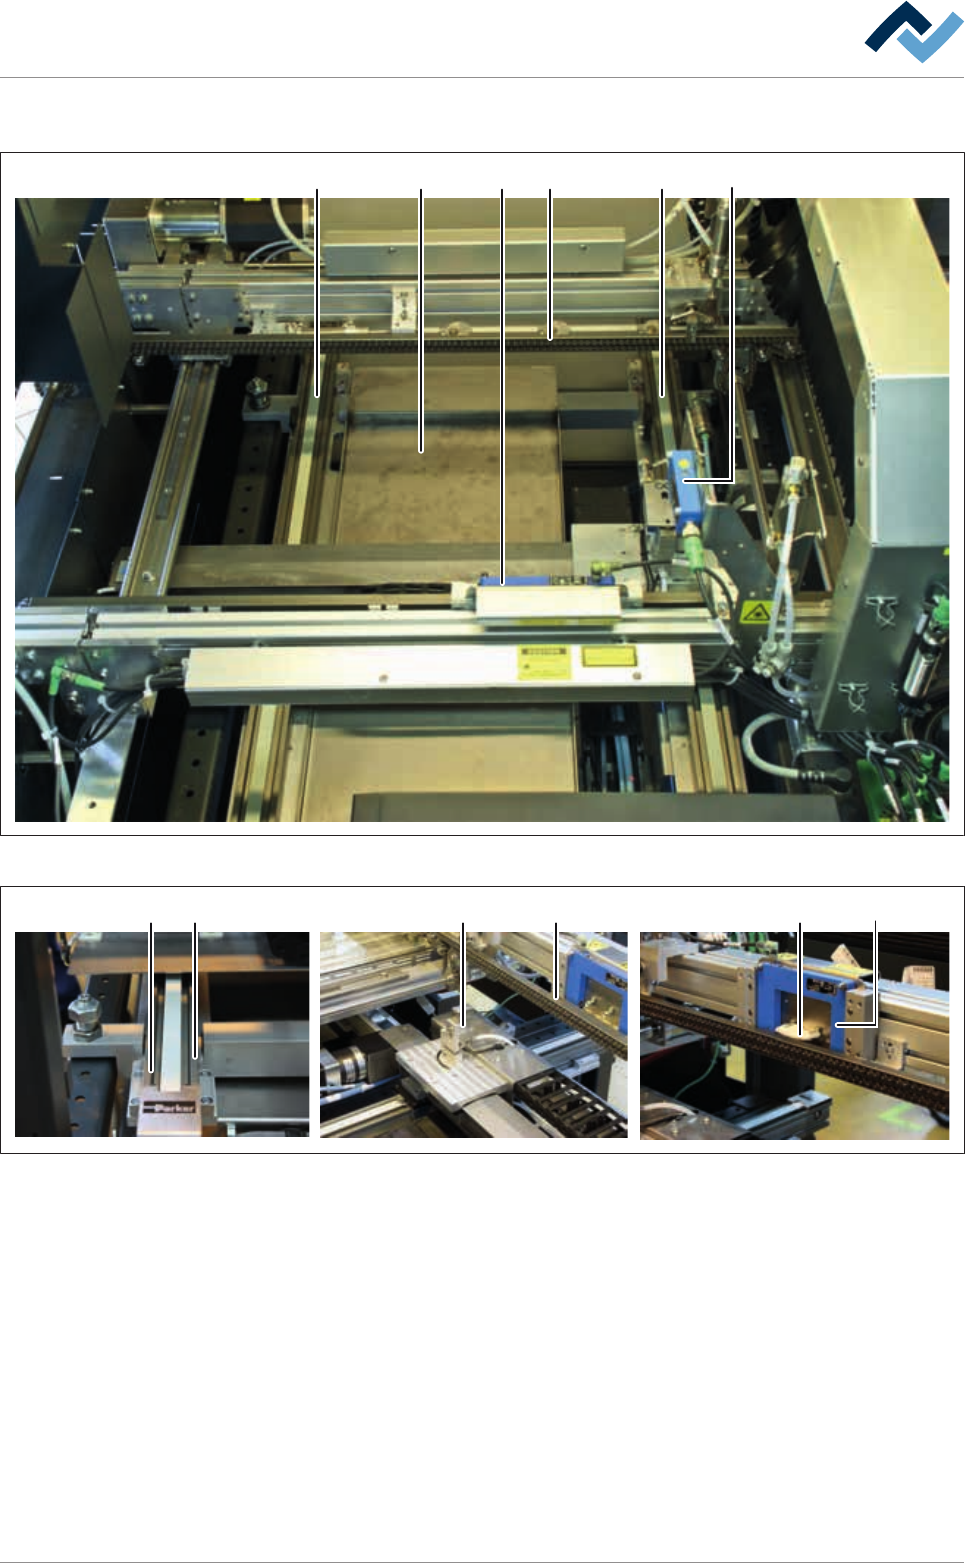
8.6.13 Spray fluxer: Cleaning the whole fluxer area
42 24 31
Fig.108: The whole fluxer area
875 5 36
Fig.109: The whole fluxer area
ü To clean the spray fluxer:
a) Open doors and hoods in the fluxer area.
b) Visual inspection of the whole fluxer area.
c) Travel the spray head into the service position. With regard to this, please read
Chapter [Functional description].
d) Clean covering (1) of the the spray heads. Remove residual flux material with a
cleaning cloth.
e) Travel the spray head into the work position again.
ð The process has now been completed.
ü To clean the whole fluxer area:
Ersa GmbH Operating Instructions_VF335_en|Rev. 14|30/11/2017 336/695