Operating Instructions_VF335_en.pdf - 第307页
8|Service and maintenance Removing and cleaning a solder nozzle 1 3 2 Fig.87: Removing and cleaning a solder nozzle ü To remove and clean a solder nozzle: a) Remove the upper part of the gassing cap (1) and clean with…
8|Service and maintenance
Preparation of maintenance tasks
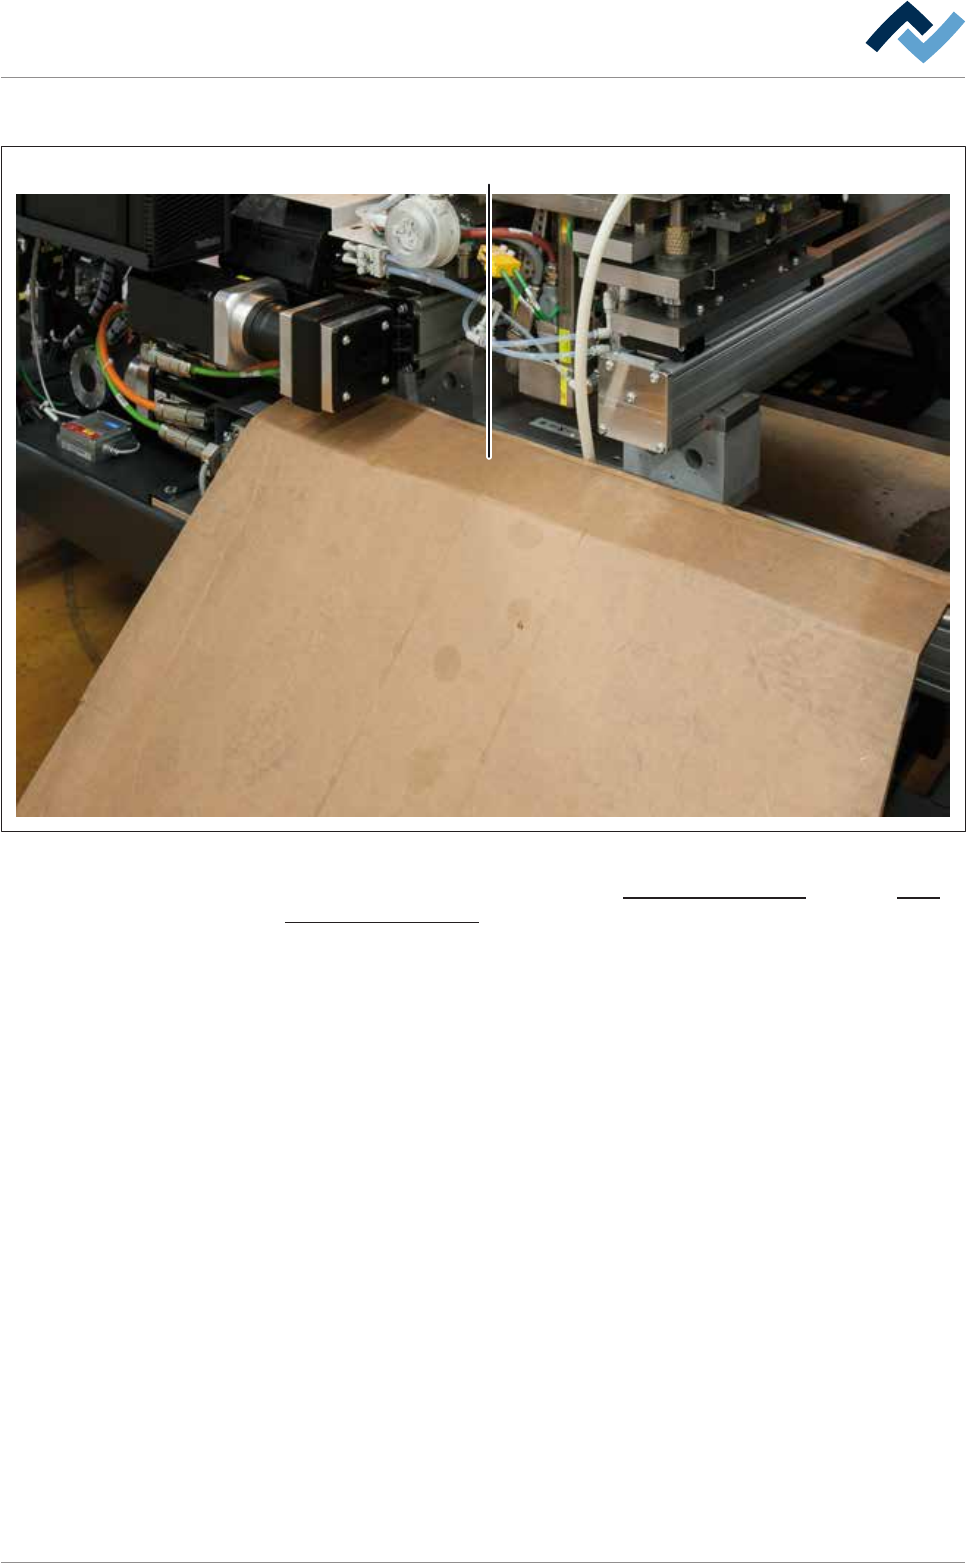
1
Fig.86: Covering the axis system
With regard to this, please read Chapters Cleaning agents used [
}300] and Tools
and auxiliary materials [}301].
ü To prepare for maintenance tasks:
ü The machine is in the [Maintenance mode] operating mode.
ü The solder in the soldering module is completely molten.
a) The solder wave is switched off.
b) Activate the module service on the terminal.
ð The solder pot is moved to [Service] position.
c) Open the doors and hoods in the area of the soldering module.
d) Cover the axis system (1).
ð The process has now been completed.
Ersa GmbH Operating Instructions_VF335_en|Rev. 14|30/11/2017 306/695
8|Service and maintenance
Removing and cleaning a solder nozzle
1 3
2
Fig.87: Removing and cleaning a solder nozzle
ü To remove and clean a solder nozzle:
a) Remove the upper part of the gassing cap (1) and clean with a brush.
b) Detach the solder nozzle (2) with the nozzle pliers (3).
ð Clean the solder nozzle with a brush. Remove any stubborn solder residue
with a wooden scraper.
ð Note: The parts that come into contact with solder are easier to clean
while they are still hot!
c) To visually inspect a solder nozzle:
ð If the soldering nozzle presents damages:
d) Replace the damaged nozzle.
ð The process has now been completed.
If the activation of the solder nozzle is required:
NOTE
Supplementary documents
To prepare the solder nozzles, the [106314] document is available. You can find the
document on the [product_data_selective] data carrier, which is included in delivery.
Ersa GmbH Operating Instructions_VF335_en|Rev. 14|30/11/2017 307/695
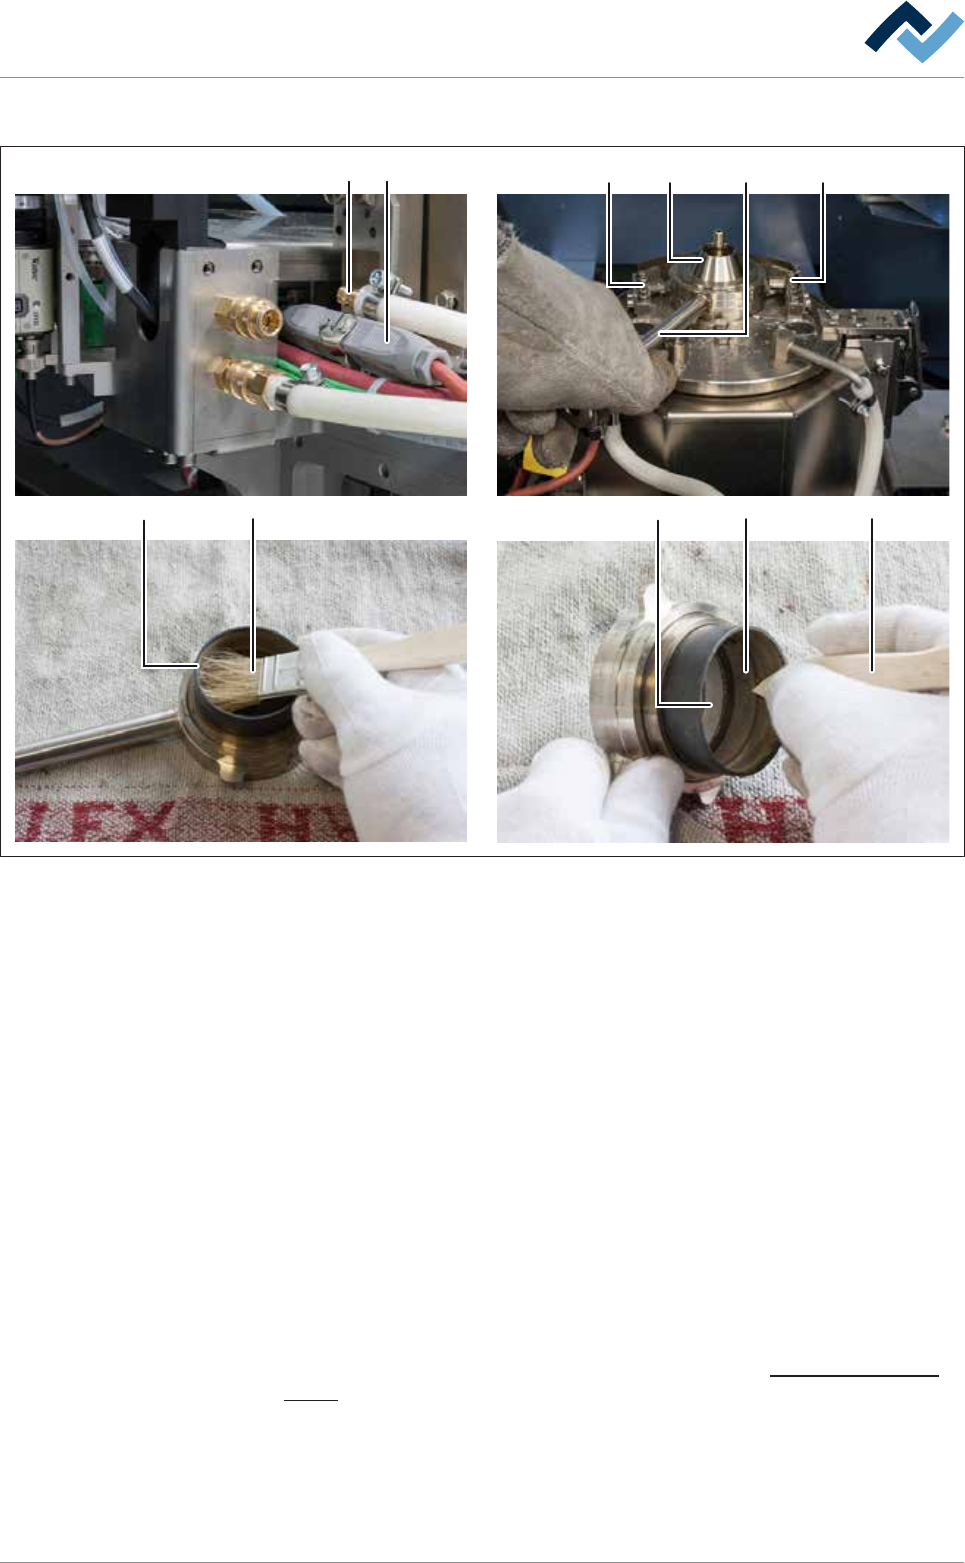
8|Service and maintenance
Cleaning the gassing cap
1 10
6 7 9
2
3 4 3
5 8
Fig.88: Cleaning the gassing cap
ü To clean the gassing cap:
a) Loosen the quick coupling (1) of the nitrogen supply.
ð If the solder pot is equipped with a nitrogen heating:
b) Loosen the plug connector (10).
c) Loosen the gassing cap on lever (2) with a rotational movement of the reten-
tion springs (3).
d) Store the gassing cap on a heat-resistant surface.
e) Clean the gassing ring (8) and the gassing cap with a brush.
f) Remove any stubborn solder residue with a wooden scraper.
g) Then clean the gassing ring (8) in an ultrasound bath.
h) Visual inspection of the gassing ring (8).
ð For heavily worn gassing rings:
i) Replace the gassing ring.
ð The process has now been completed.
If you need to replace the gassing ring: Please read Chapter Gassing ring replace-
ment [}383].
Ersa GmbH Operating Instructions_VF335_en|Rev. 14|30/11/2017 308/695