Operating Instructions_VF335_en.pdf - 第382页
8|Service and maintenance l) Reassemble the upper part of the gassing cap (4). m) Connect the quick coupling (1) again. ð The process has now been completed. Ersa GmbH Operating Instructions_VF335_en|Rev. 14|30/11/…
8|Service and maintenance
1
6 7 9
2
3 4 3
5 8
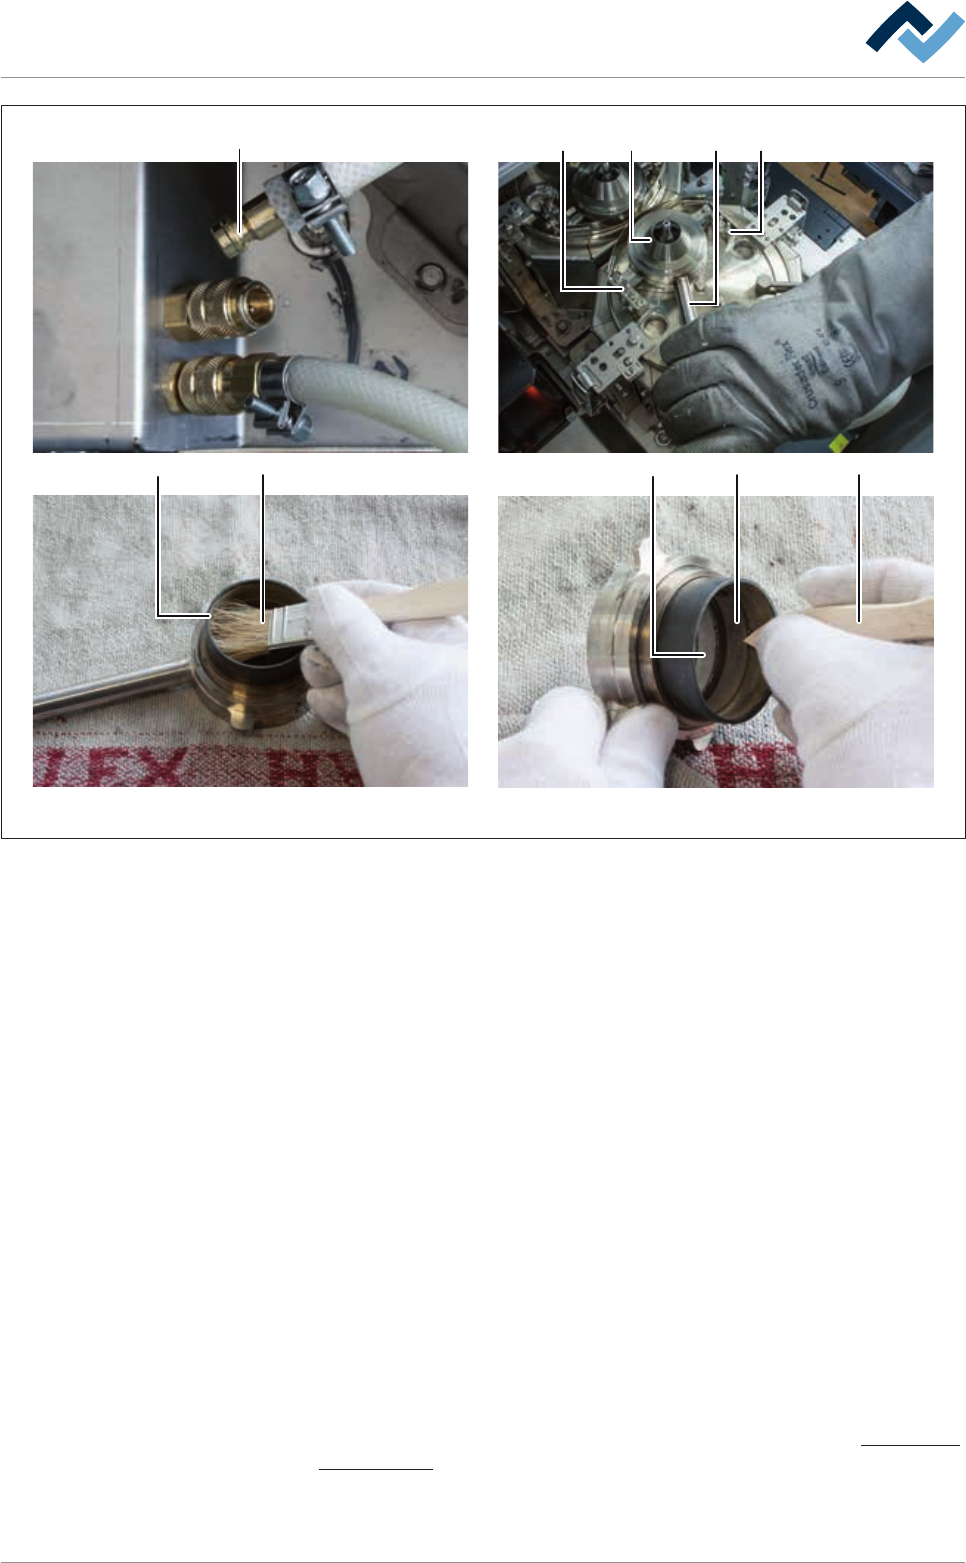
Fig.139: Cleaning the gassing cap
Gassing cap cleaning
ü Cleaning the gassing cap:
ü The solder in the soldering module is completely molten.
ü The soldering module is in the [Service].
a) Open the cover pane in the area of the soldering module.
b) Loosen the quick coupling (1) of the nitrogen supply.
c) Loosen the gassing cap on lever (2) with a rotational movement of the reten-
tion springs (2).
d) Put the gassing cap on a heat-resistant surface.
e) Let the gassing cap cool down.
f) Remove the upper part of the gassing cap (4) and clean with a brush.
g) Clean the gassing ring (8) and the gassing cap with a brush.
ð Remove any stubborn solder residue with a wooden scraper.
h) Then clean the gassing ring (8) in an ultrasound bath.
i) Visual inspection of the gassing ring (8).
ð For heavily worn gassing rings:
j) Replace the gassing ring. With respect to this, please read Chapter Gassing ring
replacement [}383].
k) Reassemble the gassing cap.
Ersa GmbH Operating Instructions_VF335_en|Rev. 14|30/11/2017 381/695

8|Service and maintenance
l) Reassemble the upper part of the gassing cap (4).
m)Connect the quick coupling (1) again.
ð The process has now been completed.
Ersa GmbH Operating Instructions_VF335_en|Rev. 14|30/11/2017 382/695

8|Service and maintenance
8.11.6 Gassing ring replacement
CAUTION
Risk of material damage!
The gassing ring is very sensitive and must therefore be handled with care!
First remove the gassing hood. With regard to this, please read Chapter Cleaning
the gassing cap [}380].
Ersa GmbH Operating Instructions_VF335_en|Rev. 14|30/11/2017 383/695