Operating Instructions_VF335_en.pdf - 第383页
8|Service and maintenance 8.11.6 Gassing ring replacement CAUTION Risk of material damage! The gassing ring is very sensitive and must therefore be handled with care! First remove the gassing hood. With regard to this,…

8|Service and maintenance
l) Reassemble the upper part of the gassing cap (4).
m)Connect the quick coupling (1) again.
ð The process has now been completed.
Ersa GmbH Operating Instructions_VF335_en|Rev. 14|30/11/2017 382/695

8|Service and maintenance
8.11.6 Gassing ring replacement
CAUTION
Risk of material damage!
The gassing ring is very sensitive and must therefore be handled with care!
First remove the gassing hood. With regard to this, please read Chapter Cleaning
the gassing cap [}380].
Ersa GmbH Operating Instructions_VF335_en|Rev. 14|30/11/2017 383/695
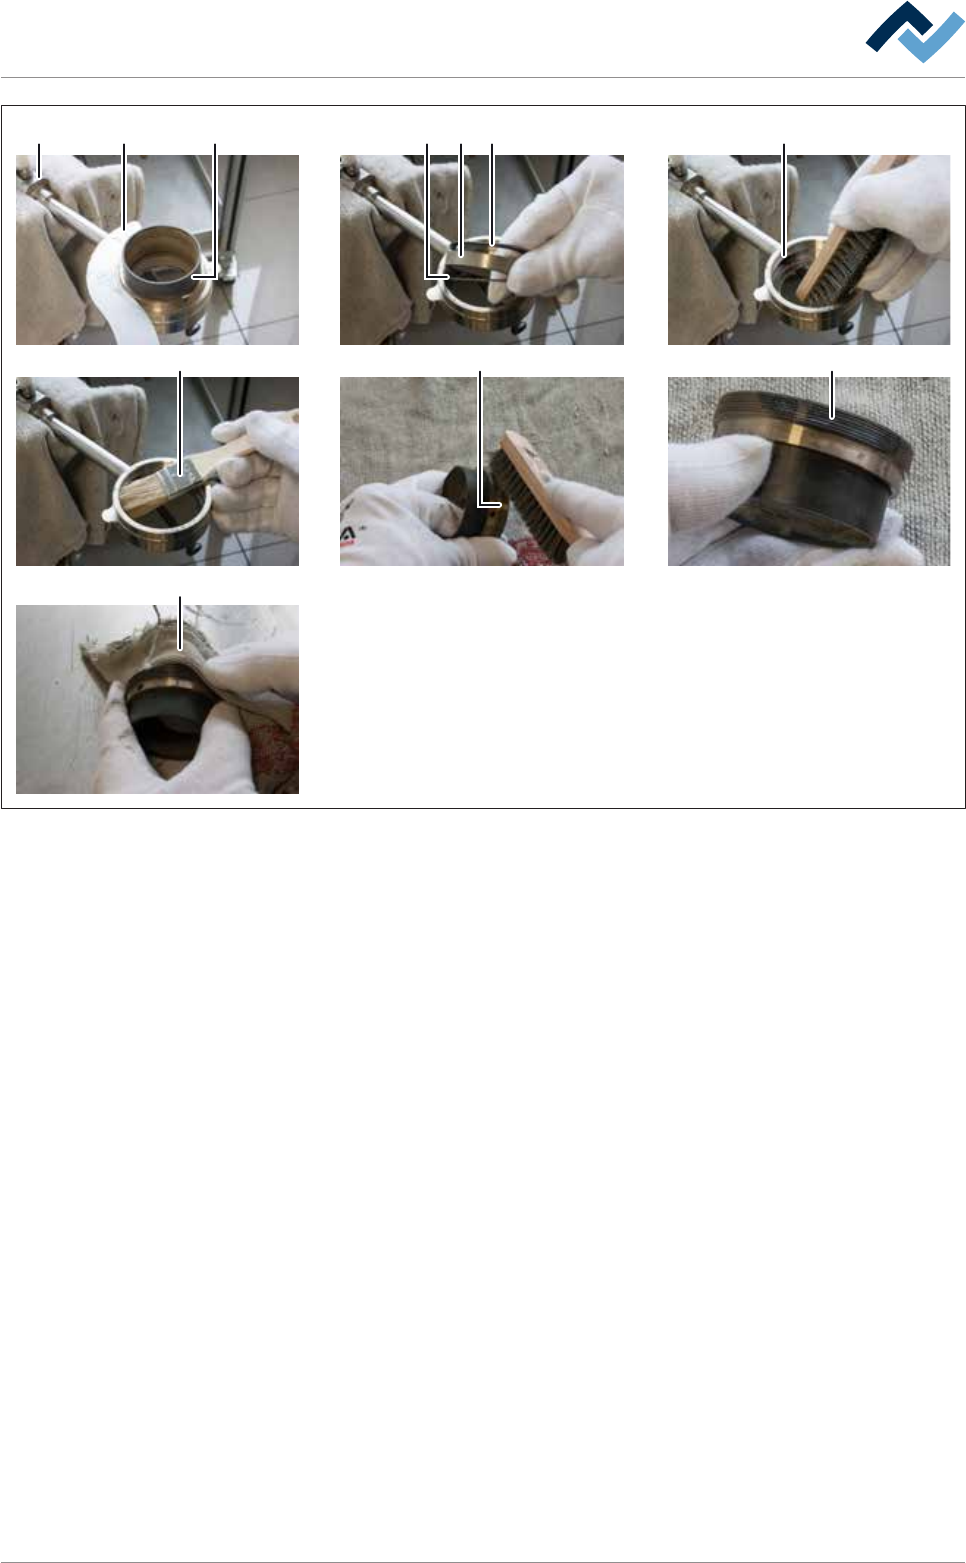
8|Service and maintenance
1A 4 5
6
9
8
33
7
2
Fig.140: Gassing ring replacement
Dismantling the gassing ring
ü To dismantle the gassing ring:
a) Fix the gassing hood on lever (A) in a jaw vice.
b) Loosen the inner ring (2) with hook wrench (1) and unscrew it by hand.
c) Take out gassing ring (4) and both sealing rings (3).
d) Clean the internal thread (5) with a stainless steel wire brush. Then complete
the cleaning with a brush.
e) Clean the external thread (7) with a stainless steel wire brush. Then complete
the cleaning with a brush.
f) Clean the seat of the gassing ring with a stainless steel wire brush. Then com-
plete the cleaning with a brush.
ð The process has now been completed.
Applying the high temperature grease
ü Apply the high-temperature grease on the threads:
a) Sparingly apply high-temperature grease on the external thread of the inner
ring.
ð Only thread pitches may be filled with high-temperature grease!
b) Wipe off any excess high-temperature grease with a rag.
ð The high-temperature grease may only be applied to the thread pitches!
ð The process has now been completed.
Ersa GmbH Operating Instructions_VF335_en|Rev. 14|30/11/2017 384/695