Operating Instructions_VF335_en.pdf - 第367页
8|Service and maintenance 12 Fig.127: Filling with flux material ü Filling with flux material : a) Fill with flux material (maximum capacity 2 litres) up to 40mm below the edge. b) Clean the edge of the flux material …
8|Service and maintenance
88
9 10 11
8 8
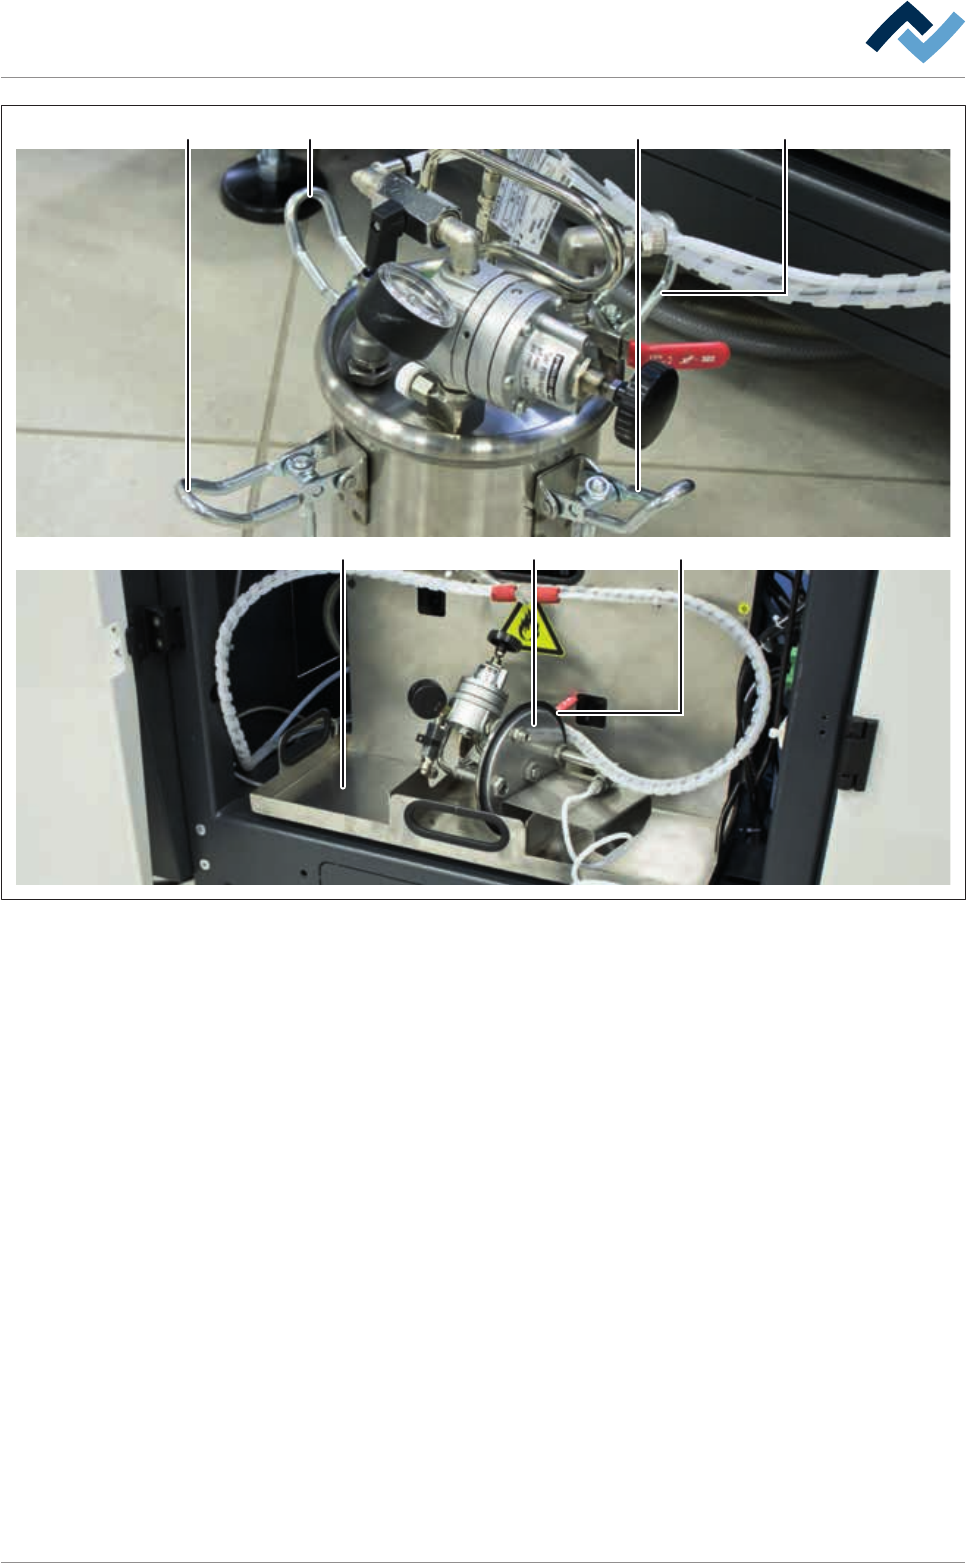
Fig.126: Removing the cover
ü To remove the cover:
a) Open all four locks (8).
b) Clean the tray (9).
c) Lift the cover (10) and drain the flux material adhering to the tank. Remove the
cover on the tray (9).
d) Visual inspection of the sealing (11). Clean the contaminated sealing. Use a
cleaning agent recommended by the flux material manufacturer. Replace any
porous or hardened sealing.
e) Empty the tank. Visual inspection of all parts of the flux material tank for debris
and corrosion.
f) Replace damaged or worn parts. Clean contaminated parts.
g) Visual inspection of the interior of the flux material tank. Remove all debris.
Ersa GmbH Operating Instructions_VF335_en|Rev. 14|30/11/2017 366/695

8|Service and maintenance
12
Fig.127: Filling with flux material
ü Filling with flux material :
a) Fill with flux material (maximum capacity 2 litres) up to 40mm below the edge.
b) Clean the edge of the flux material tank with a lint-free cloth.
c) Carefully lift the cover (10) of the flux tank and put it into the container. Close
all four locks (8).
d) Place the tank into the storage space.
Ersa GmbH Operating Instructions_VF335_en|Rev. 14|30/11/2017 367/695
8|Service and maintenance
12 13758 43
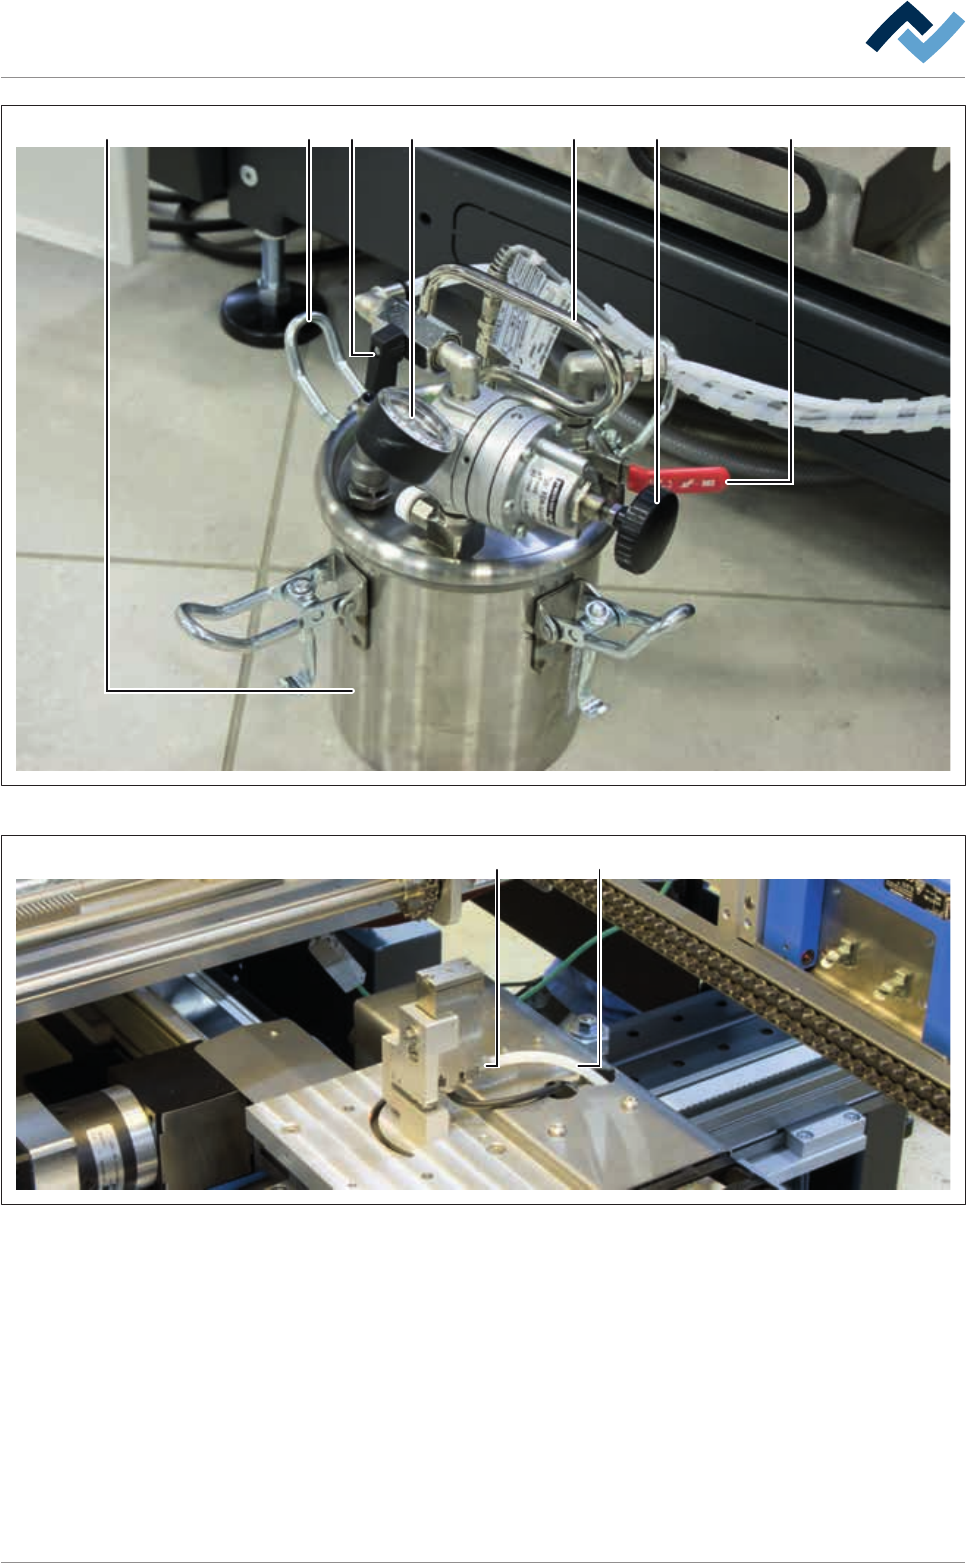
Fig.128: Checking the flux material storage tank
1 2
Fig.129: Venting the line
ü Venting lines and adjusting pressure:
a) Visual inspection of all the tank components. Clean dirty components.
b) On the spray head, release the hose (2) by opening the screw connection (2)
and introduce it into a collecting vessel.
c) Open the tap (4) in the ON direction. Open the nitrogen supply tap (5) carefully
until the flux material comes out of the hose (2).
d) As soon as the flux material emerges without bubbling, close the tap (5).
e) Mount the hose (2) on the spray head, then tighten the screw connection (1).
Ersa GmbH Operating Instructions_VF335_en|Rev. 14|30/11/2017 368/695