Operating Instructions_VF335_en.pdf - 第391页
8|Service and maintenance Cleaning the nozzle plate 1 5 6 2 2 6 6 6 3 4 Fig.143: Clean the nozzle plate. This figure shows only one nozzle (2). Your nozzle plate may have multiple nozzles of different shapes. ü To cle…

8|Service and maintenance
f) Carefully lift the nozzle plate diagonally so that the liquid residual solder can be
drained into the solder bath.
ð Accident risk! Pay special attention to the weight of the nozzle plate!
g) Remove the nozzle plate carefully and place it on a heat-resistant surface.
ð The process has now been completed.
Ersa GmbH Operating Instructions_VF335_en|Rev. 14|30/11/2017 390/695
8|Service and maintenance
Cleaning the nozzle plate
1
5 6
2
2 6
6
6
34
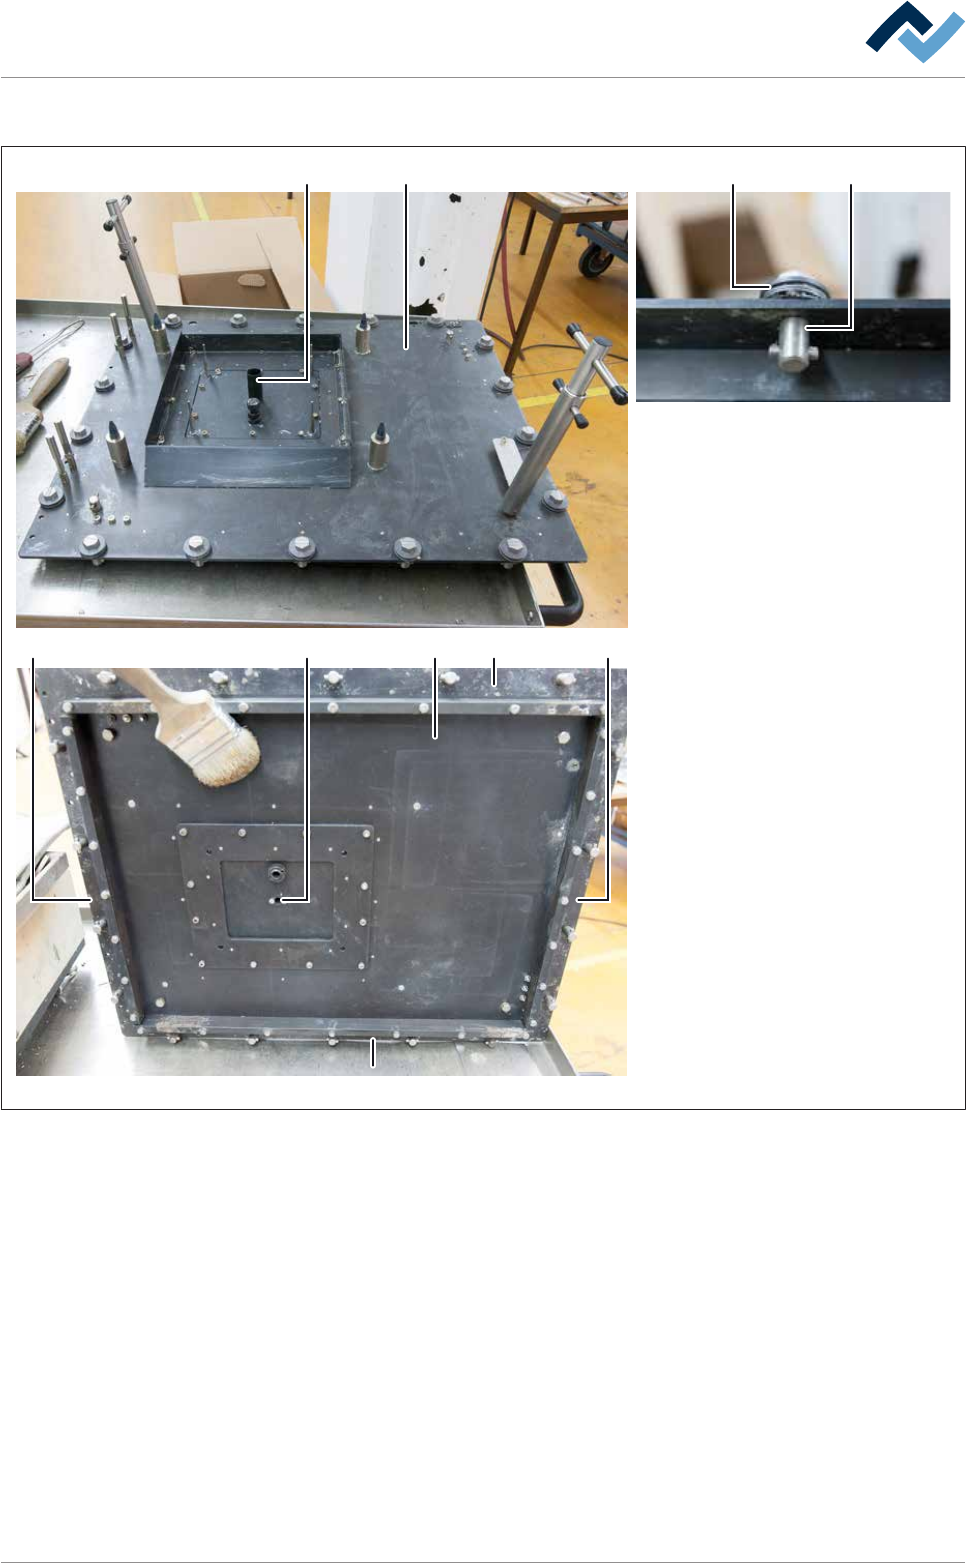
Fig.143: Clean the nozzle plate. This figure shows only one nozzle (2). Your nozzle plate may have multiple nozzles of different
shapes.
ü To clean the nozzle plate:
ü Note: The parts coming into contact with solder are easier to clean while they
are still hot!
a) Clean all bayonet locks (3) and disc springs (4).
ð Bayonet locks and disc springs must be easy to move.
b) Clean the bottom (5) of the nozzle plate.
c) Clean sealing surfaces (6) with special care!
ð In case of dirty nozzles (2).
d) Clean all available nozzles (2) inside and outside.
e) Perform a visual inspection of the upper surface of the nozzle plate.
Ersa GmbH Operating Instructions_VF335_en|Rev. 14|30/11/2017 391/695

8|Service and maintenance
f) If necessary, remove any contamination (oxides, dross) with a silicone brush.
Remove any stubborn solder residue with a wooden scraper.
ð The process has now been completed.
Ersa GmbH Operating Instructions_VF335_en|Rev. 14|30/11/2017 392/695