Operating Instructions_VF335_en.pdf - 第404页
8|Service and maintenance Disassembling the nozzle plate 1 2 2 4 3 7 A A 5 6 8 8 Fig.150: Disassemble the nozzle plate . Always hold bolted removing tools by the upper toggle (A)! ü To disassemble the nozzle plate: a)…

8|Service and maintenance
l) Release the buttons (4).
ð The process has now been completed.
Ersa GmbH Operating Instructions_VF335_en|Rev. 14|30/11/2017 403/695
8|Service and maintenance
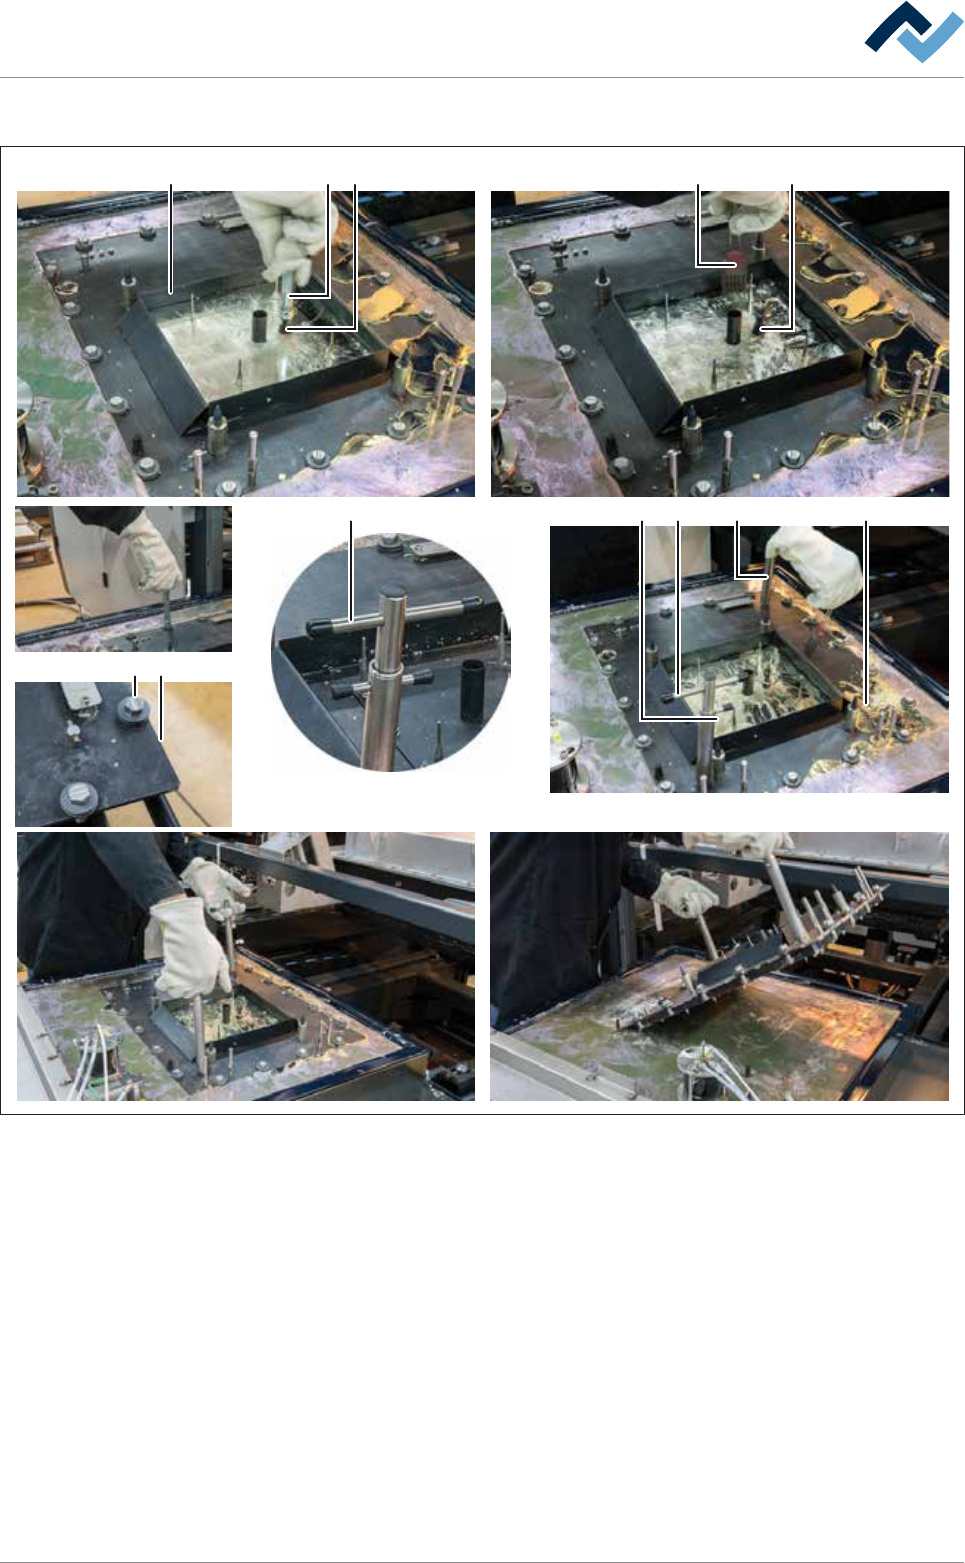
Disassembling the nozzle plate
1
2
24
3
7AA
5 6
88
Fig.150: Disassemble the nozzle plate. Always hold bolted removing tools by the upper toggle (A)!
ü To disassemble the nozzle plate:
a) Remove any solder from the baffle frame (1). To do so, open the drain screw
(2) with a socket spanner (3).
b) Unlock all bayonet catches (5) with the socket spanner. Align the bayonet
catches so that the slots of the bolts (5) are parallel to the edges (6) of the
nozzle plate.
c) If necessary, convey any soiling (oxides, dross) into the solder bath using a silic-
one brush (4).
ð As soon as the solder has run out of the baffle frame:
d) Close the drain screw (2) and remove the socket spanner (3).
e) Place the two removing tools (8) on the nozzle plate and lock them.
Ersa GmbH Operating Instructions_VF335_en|Rev. 14|30/11/2017 404/695

8|Service and maintenance
ð Risk of accident! Always hold bolted removing tools by the upper toggle
(A)!
f) Carefully lift the nozzle plate obliquely so that the liquid solder residue can
flow into the solder bath.
ð Risk of accident! Observe the weight of the nozzle plate!
g) Remove the nozzle plate and place it on a heat-resistant base.
ð The process has now been completed.
Ersa GmbH Operating Instructions_VF335_en|Rev. 14|30/11/2017 405/695