Operating Instructions_VF335_en.pdf - 第412页
8|Service and maintenance Cleaning the pump riser tube 1 2 2 3 Fig.155: Clean the inner (1) and outer (3) pump riser tube ü To clean the inner and outer pump riser tube: ü Please note: The parts coming into contact wi…
8|Service and maintenance
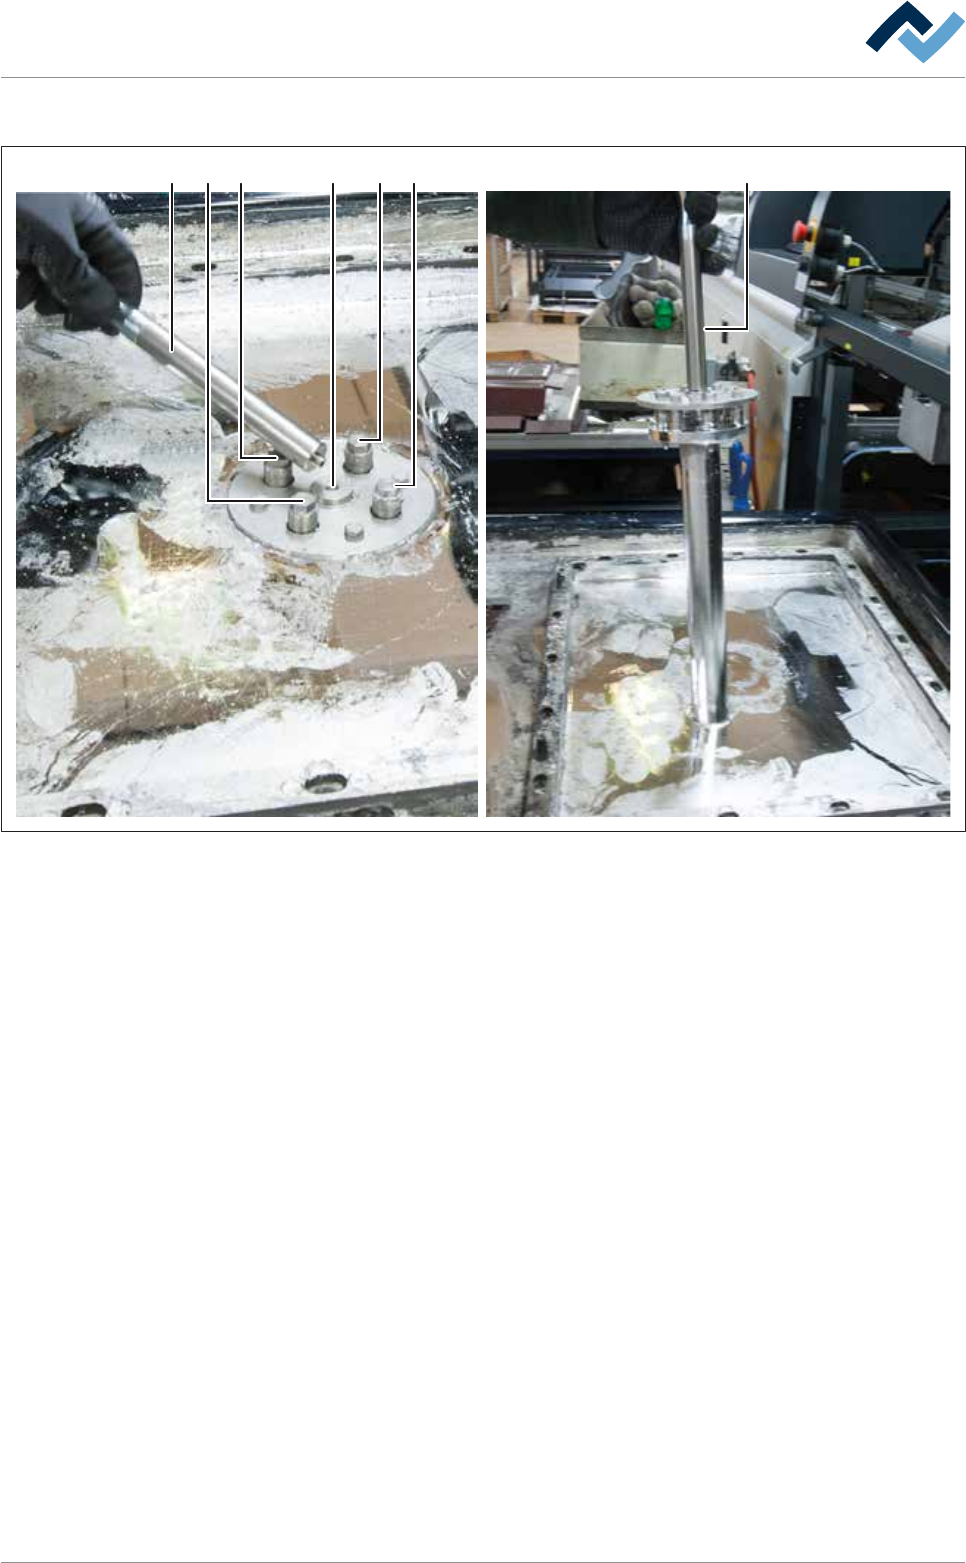
Disassembling the pump riser tube
1 1 1 12 33
Fig.154: Loosen four screws (1) and disassemble the pump riser tube.
ü To disassemble the pump riser tube:
a) Loosen four screws (1) using a socket spanner.
b) Screw the dismantling tool (3) into the thread (2).
c) Carefully lift the pump riser tube using the dismantling tool (3) so that the li-
quid solder residue can flow into the solder bath.
ð Risk of accident! Observe the weight of the pump riser tube!
d) Pull out the pump riser tube and place it on a heat-resistant base.
ð The process has now been completed.
Ersa GmbH Operating Instructions_VF335_en|Rev. 14|30/11/2017 411/695
8|Service and maintenance
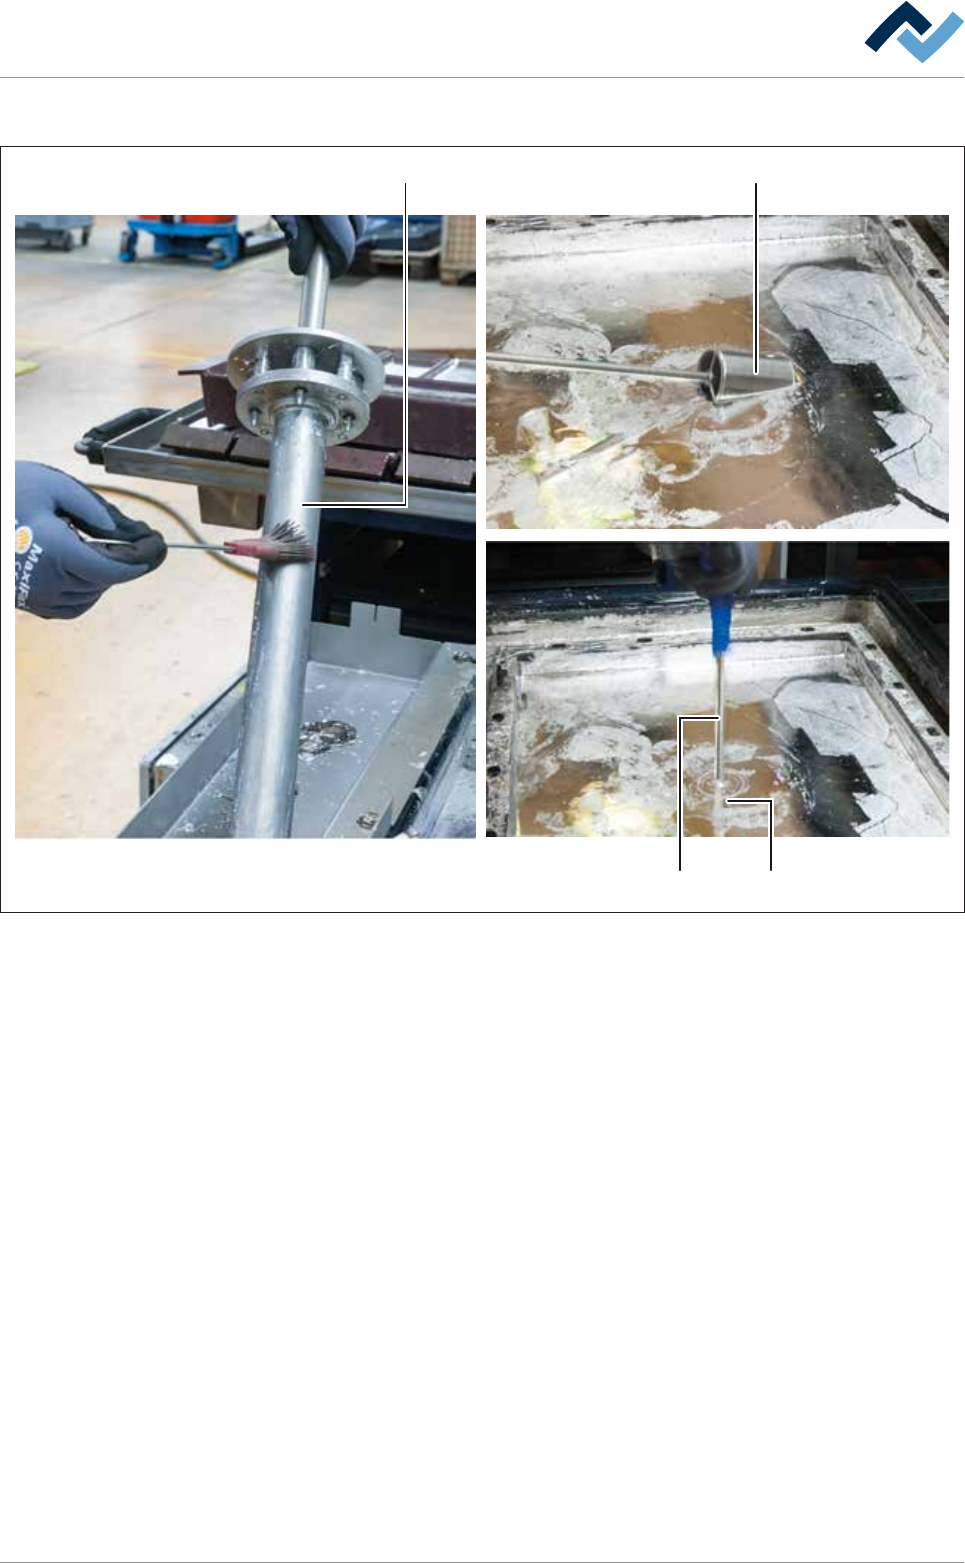
Cleaning the pump riser tube
1
2
2
3
Fig.155: Clean the inner (1) and outer (3) pump riser tube
ü To clean the inner and outer pump riser tube:
ü Please note: The parts coming into contact with solder can be cleaned more
easily as long as they are still hot!
a) Clean the pump riser tube (1) with a silicone brush.
b) Carefully heat the scoop for the riser tube (2) in the solder bath.
c) Insert the scoop for the riser tube (2) into the outer pump riser tube (3) in the
solder bath and carefully move it up and down.
ð Risk of accident! Carefully move the scoop for the riser pipe up and down
to avoid any splashing of liquid solder!
ð The process has now been completed.
Ersa GmbH Operating Instructions_VF335_en|Rev. 14|30/11/2017 412/695
8|Service and maintenance
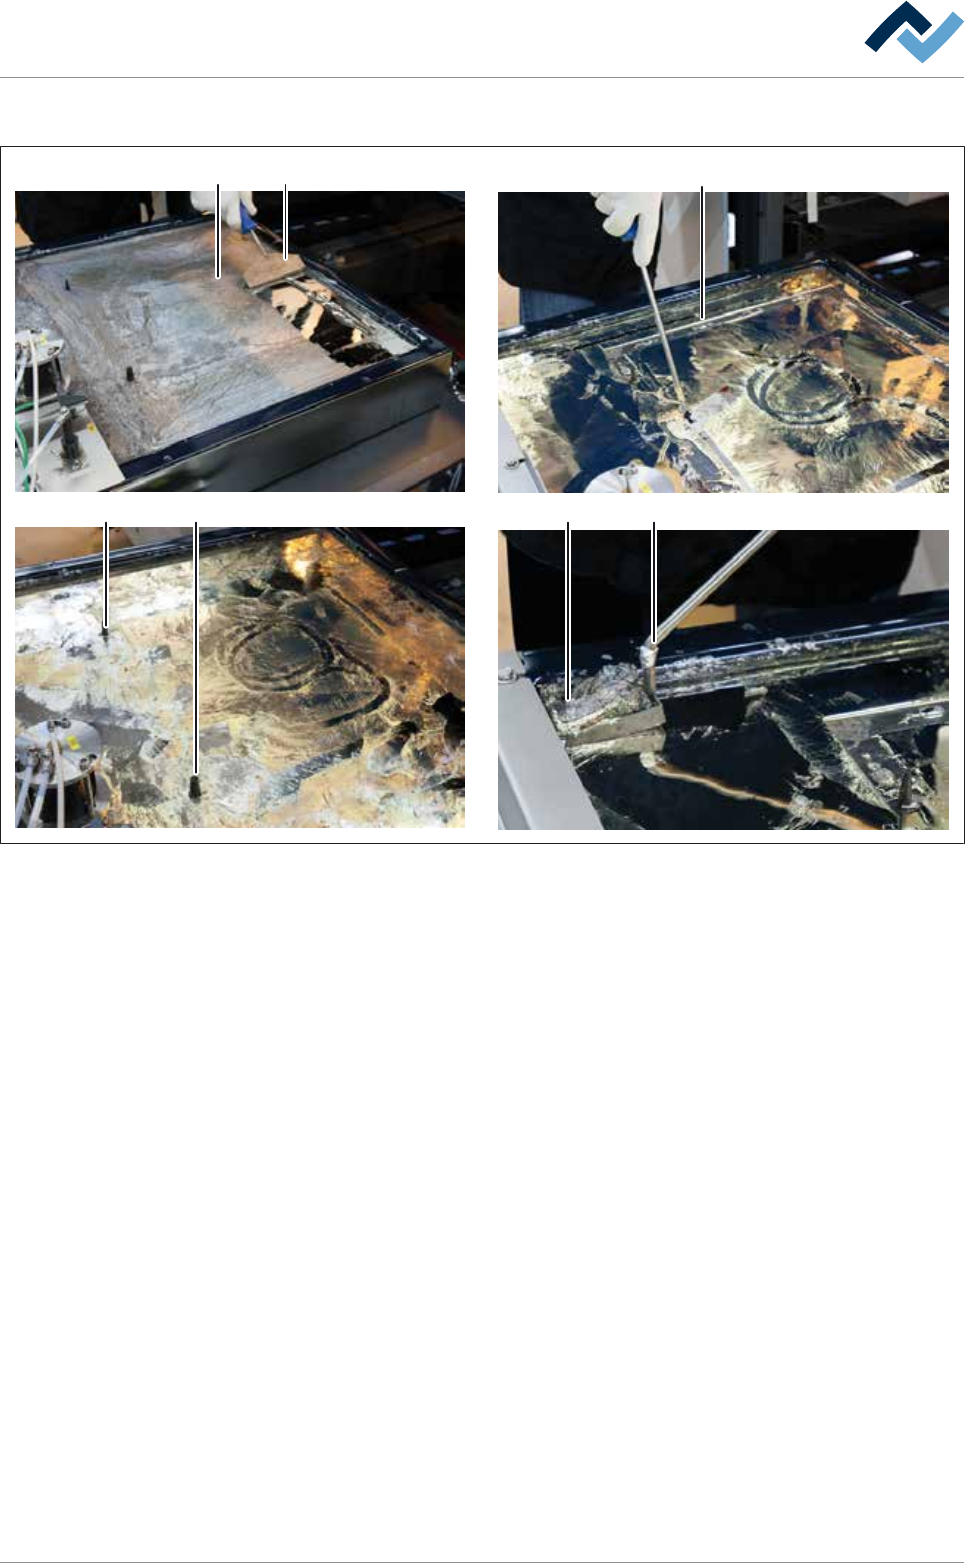
Cleaning the solder surface
4
5 5
67
1
2
Fig.156: Cleaning the solder surface
a) Remove any solder dross from the entire solder surface (1) with the solder
scraper (2) or a silicone scraper.
b) Collect the solder dross in a corner of the solder pot.
ð Please note: Work carefully and exerting little pressure to avoid damaging
coated surfaces!
c) Carefully clean the area around the coding pins (5).
d) Carefully clean the contact points of the coding pins and pressure chamber.
ð Please note: This cleaning process is particularly important. The area
around the contact points must be free of oxides and solder dross. Adher-
ent soiling can lead to leaks later on, after installation of the nozzle plate!
e) Use a perforated scoop (6) to remove the solder dross (7).
ð The process has now been completed.
Ersa GmbH Operating Instructions_VF335_en|Rev. 14|30/11/2017 413/695