Operating Instructions_VF335_en.pdf - 第406页
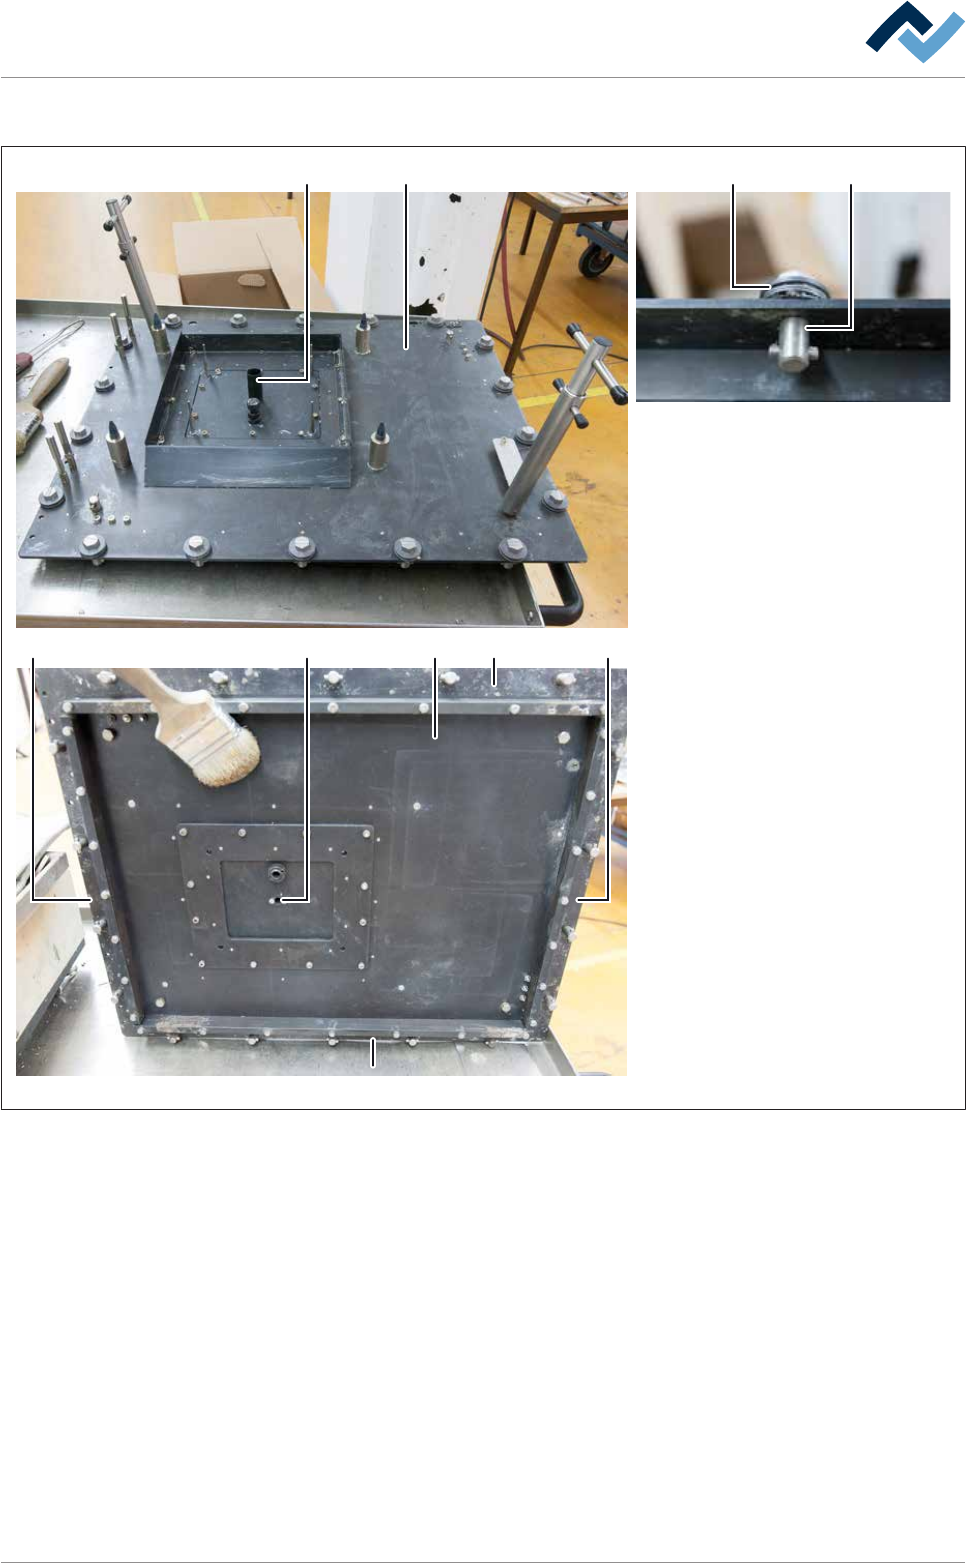
8|Service and maintenance Cleaning the nozzle plate 1 5 6 2 2 6 6 6 3 4 Fig.151: Clean the nozzle plate. In this figure, only one nozzle (2) is present. Your nozzle plate may have several nozzles of different shapes. …

8|Service and maintenance
ð Risk of accident! Always hold bolted removing tools by the upper toggle
(A)!
f) Carefully lift the nozzle plate obliquely so that the liquid solder residue can
flow into the solder bath.
ð Risk of accident! Observe the weight of the nozzle plate!
g) Remove the nozzle plate and place it on a heat-resistant base.
ð The process has now been completed.
Ersa GmbH Operating Instructions_VF335_en|Rev. 14|30/11/2017 405/695
8|Service and maintenance
Cleaning the nozzle plate
1
5 6
2
2 6
6
6
34
Fig.151: Clean the nozzle plate. In this figure, only one nozzle (2) is present. Your nozzle plate may have several nozzles of different
shapes.
ü To clean the nozzle plate:
ü Please note: The parts coming into contact with solder can be cleaned more
easily as long as they are still hot!
a) Thoroughly clean all bayonet catches (3) and disc springs (4).
ð Bayonet catches and disc springs must be easy to move.
b) Clean the underside (5) of the nozzle plate.
c) Carefully clean sealing surfaces (6)!
ð In the case of soiled nozzles (2).
d) Clean all nozzles (2) inside and outside.
e) Visually inspect the top of the nozzle plate.
Ersa GmbH Operating Instructions_VF335_en|Rev. 14|30/11/2017 406/695

8|Service and maintenance
f) If necessary, remove any soiling (oxides, dross) using a silicone brush (4). Re-
move any stuck solder residue with a wooden scraper.
ð The process has now been completed.
Ersa GmbH Operating Instructions_VF335_en|Rev. 14|30/11/2017 407/695