DECAN_F2_Service(Eng_Ver1).pdf - 第134页
5-34 Fast & Flexible Chip Shooter DECAN F2 Service Manual Pin Assignment of R Axis Home Sensor Cab le
5-33
Head
5.8.3. How to replace the R-axis sensor individually
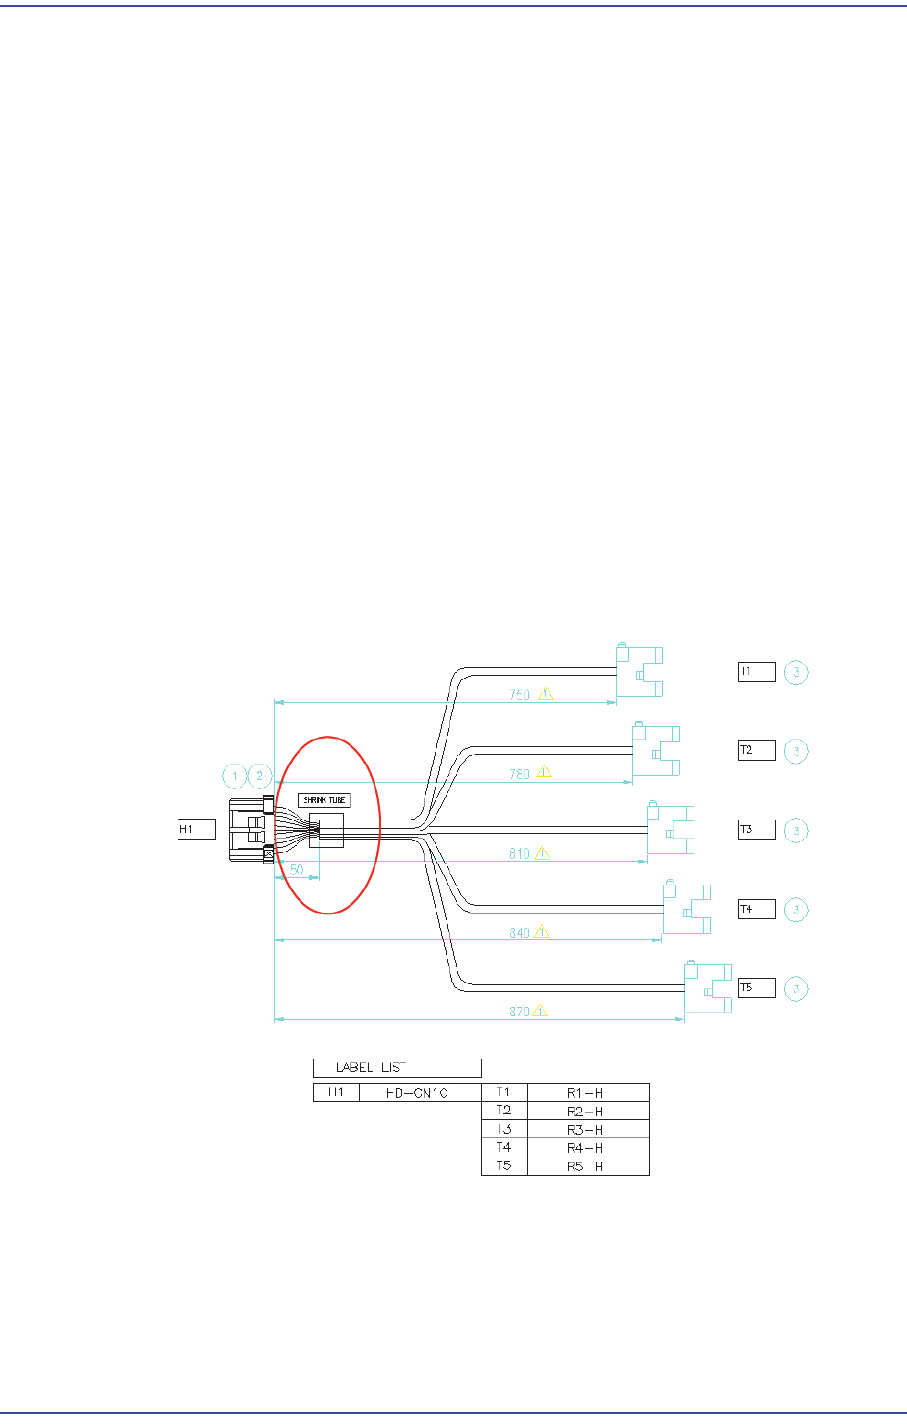
1) Remove the R-axis home sensor cable from the machine as shown in Figure 1.
After removing the CN10 connector of the Head IF board, remove the R-axis home
sensors (5 sets).
2) Remove the area treated with a shrink tube as shown in Figure 1.
3) Replace the R-axis home sensor.
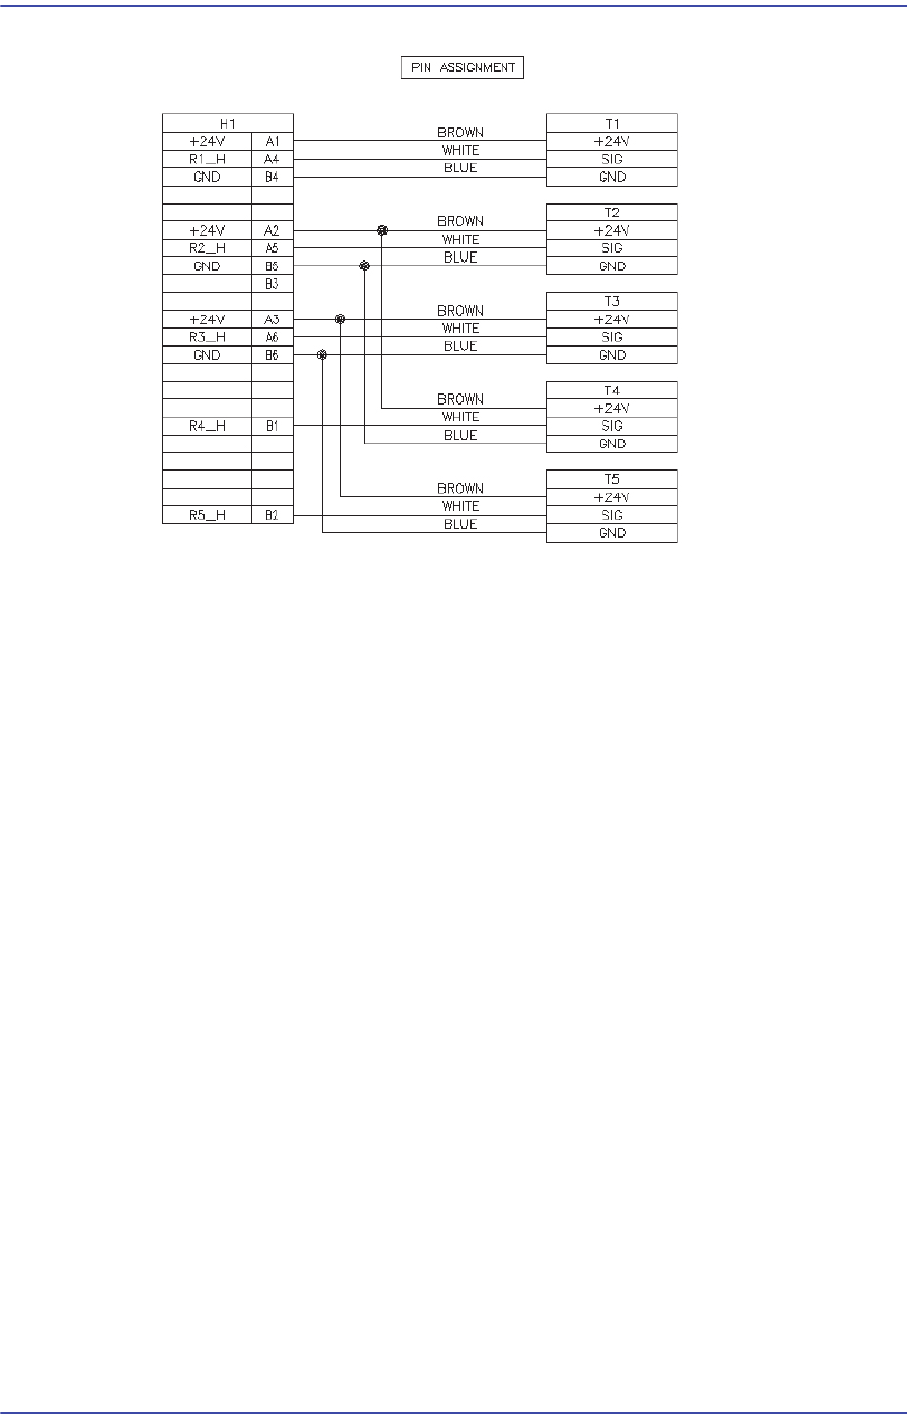
R1 Home Sensor: Connect the sensor to A1/A4/B4 referring to Figure 2.
R2 Home Sensor: Connect the sensor to A2/A5/B5 correctly referring to Figure 2.
R3 Home Sensor: Connect the sensor to A3/A6/B6 correctly referring to Figure 2.
R4 Home Sensor: Connect the sensor to A2/B1/B5 correctly referring to Figure 2.
R5 Home Sensor: Connect the sensor to A3/B2/B6 correctly referring to Figure 2.
4) After replacing the Z-axis sensor, finish the area where the connector and cable is
connected and then they are treated with a shrink tube by using insulation tape so that
current does not leak out.
5) After replacing the sensor, connect the connector to the Head I/F board and connect
the Z-axis home sensors (5 sets) to the head spindle again.
R Axis Home Sensor Cable
5-34
Fast & Flexible Chip Shooter DECAN F2 Service Manual
Pin Assignment of R Axis Home Sensor Cable
5-35
Head
5.9. Z Axis Motor / Belt / Sensor
5.9.1. Required Tools
T wrench (other tools supplied) or hex wrench
Gear wrench or torque wrench
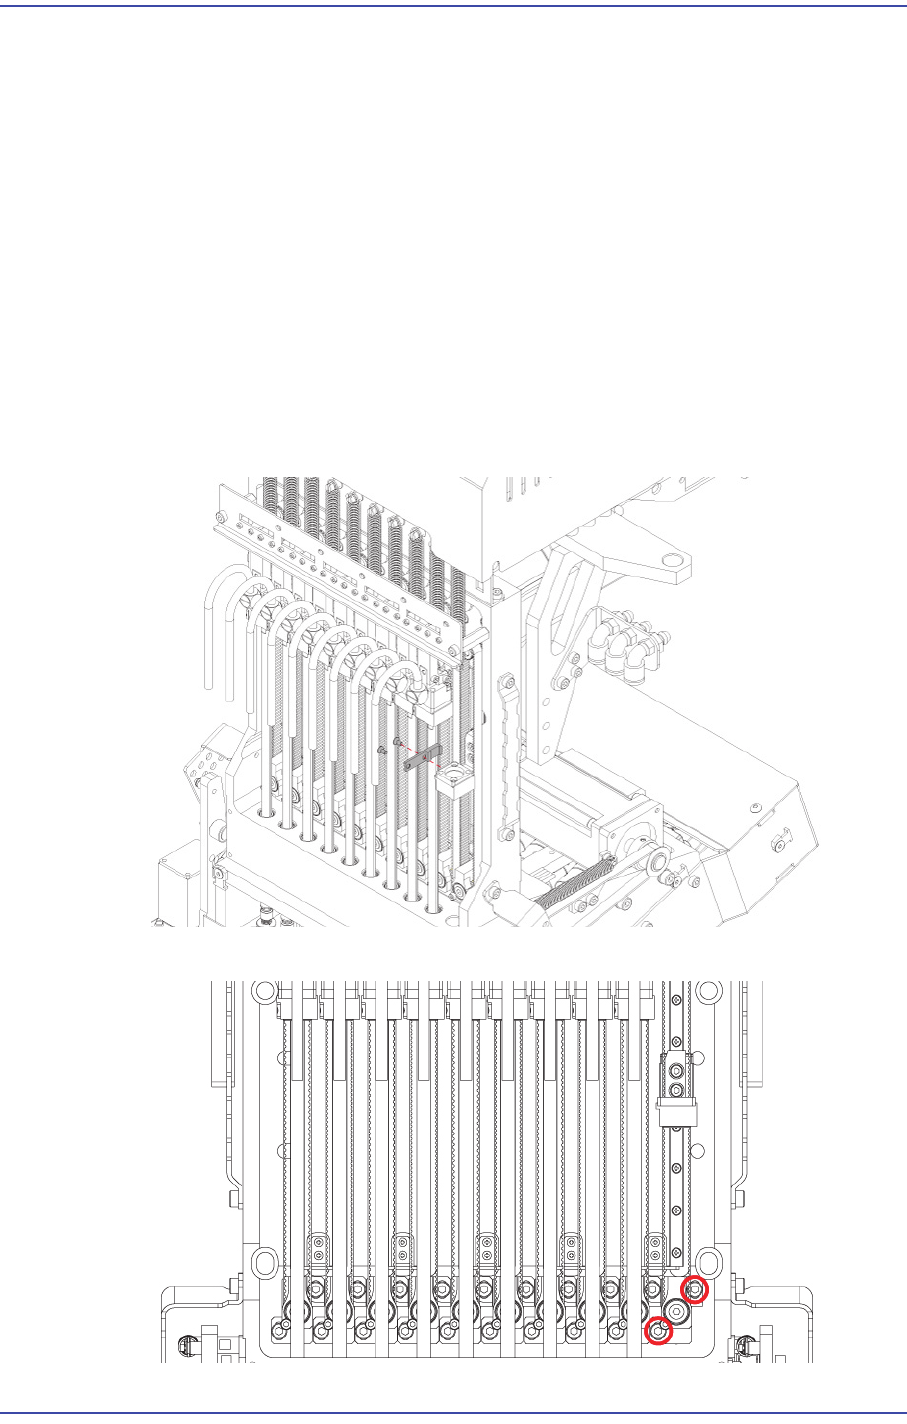
5.9.2. Belt Replacement Procedure
1) Manipulate the teaching box to move the head module to the front.
2) Close the PC as usual and turn off the main switch at the front of the machine.
3) Remove the spindle at the location where the spindle is replaced referring to the
Spindle Replacement Procedure.
4) Unscrew the fixing bolts(2-M2*4) securing belt clamp and remove it.
5) Slightly loosen the fixing bolts securing the Z idle body and remove the loosened belt.