DECAN_F2_Service(Eng_Ver1).pdf - 第558页
18-38 Fast & Flexible Chip Shooter DECAN F2 Service Manual Manual: Input the cycle into the edit bo x at the right and perform mapping for every corresponding cycle manually . <Automatic Nex t> check box Se…
18-37
Machine Calibration
18.3.7. Gantry Thermal Mapping
The fiducial marks on the conveyer shall be taught at 3 points in order to compensate the
thermal deformation of the XY coordinate system due to the heat created by the friction of
the ball screw after operation of the machine.
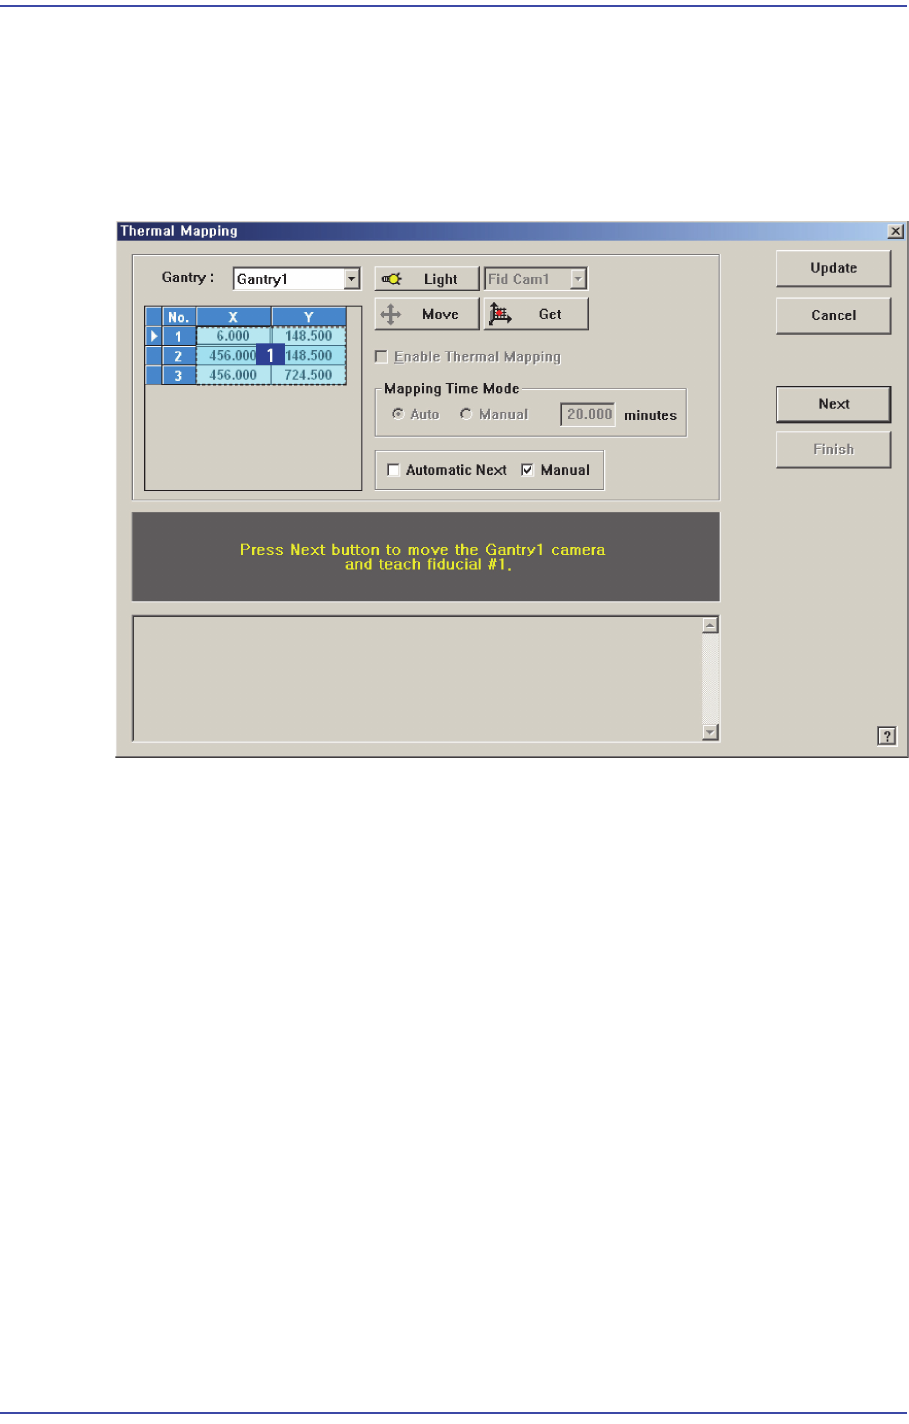
Figure18.13 “Gantry Thermal Mapping” dialog box
1: Grid group
<Gantry> combo box
Select the gantry for which the thermal mapping is to be performed.
<Move> button
Move the fiducial camera of the corresponding gantry to the position of the fiducial
mark selected from the Grid group.
<Get> button
Apply the coordinate value of the current position as the selected fiducial mark
position.
<Enable Gantry Thermal Mapping> check box
Decides whether to carry out Gantry Thermal Mapping. When all the fiducials on the
transport rail are taught for Calibration, it will be checked automatically. To disable
the “Gantry Mapping”, remove the check from the check box.
<Mapping Time Mode> group
Set the cycle by which the mapping is performed.
Auto: Automatically performs the mapping by the cycle already determined.
18-38
Fast & Flexible Chip Shooter DECAN F2 Service Manual
Manual: Input the cycle into the edit box at the right and perform mapping for
every corresponding cycle manually.
<Automatic Next> check box
Select this check box and click the <Next> button. Then the gantry thermal mapping is
performed automatically.
<Manual> check box
Move the gantry to the designated position by using the teaching box and perform the
gantry mapping manually.
18.3.7.1. Procedure
The gantry mapping method is as follows.
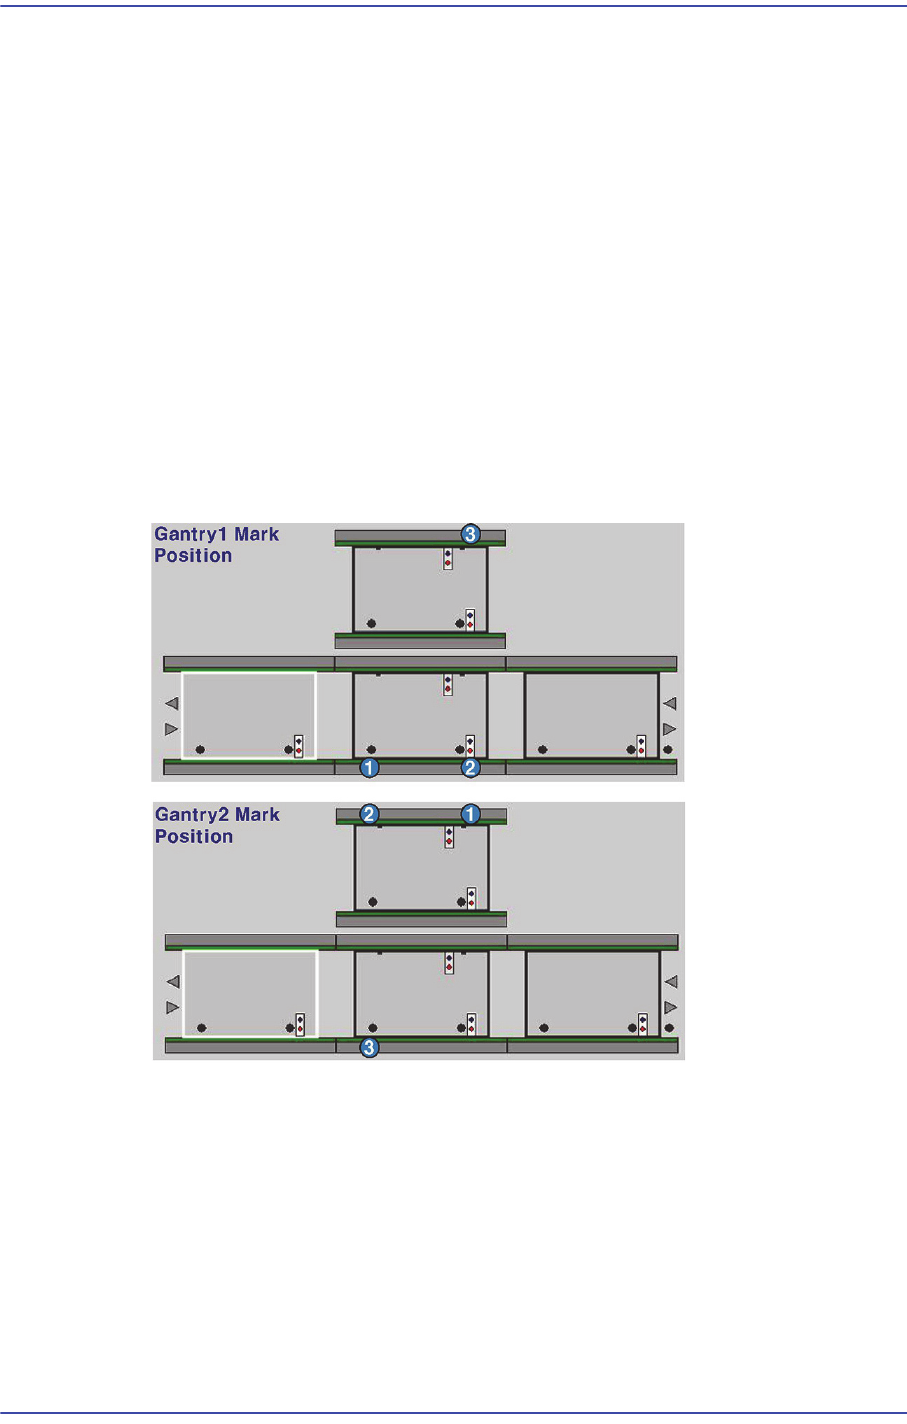
1. Referring to the following figure, perform teaching of the position of fiducial mark 3
located on the upper surface of the conveyor.
2. Click the <Move> button to move the fiducial camera to the designated position.
3. Adjust the position of the fiducial camera by using the teaching box so that the center
of the cross hair displayed in the SMVision window matches with the center of the
fiducial mark # 3 that was already set on the conveyor.
4. Click the <Get> button to reflect the current coordinate.
5. Identically teach fiducial marks #1 and #3 in order as shown in the above figure.
6. Once the teaching of the fiducial marks at three points for Gantry 1F is completed, the
teaching of the fiducial marks at three points for Gantry 1R is performed. The teaching
is performed in the same manner for Gantry 1F.
18-39
Machine Calibration
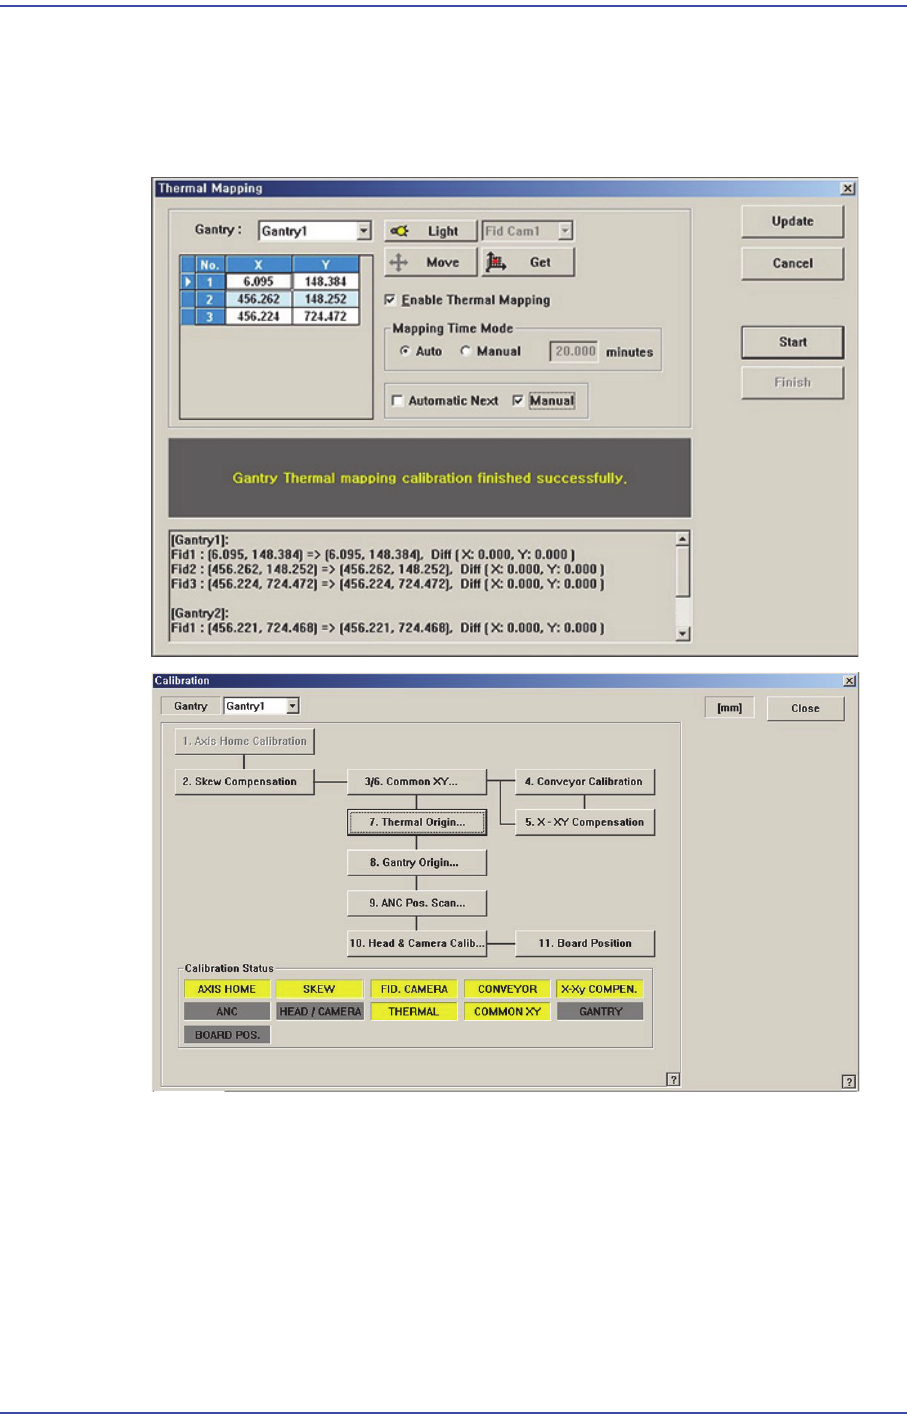
7. If the teaching is completed properly, check the "Enable Thermal Mapping" and set
the Mapping Time Mode. When selecting the Mapping Time Mode manually, set the
time.
8. Click the <Update> button