DECAN_F2_Service(Eng_Ver1).pdf - 第91页
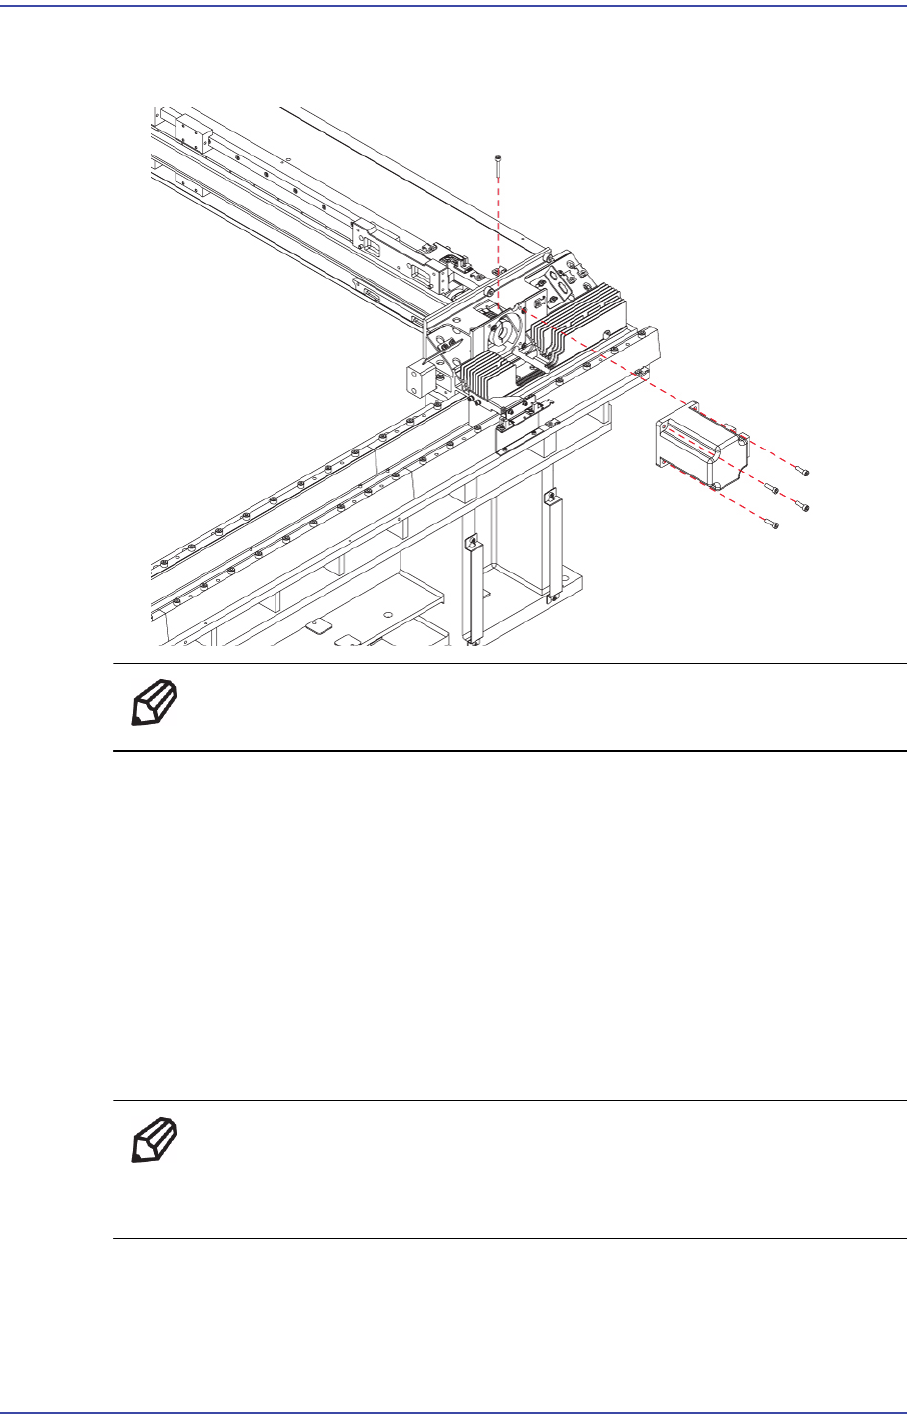
4-3 X Frame 6) Remove the fixing screws(4-M5*18) that secure the X-axis motor on the Bracket-X and replace the motor . Ref The part number of the new Motor is EP08-0001 85. 7) The assembling is performed in the reverse o…
4-2
Fast & Flexible Chip Shooter DECAN F2 Service Manual
screw.
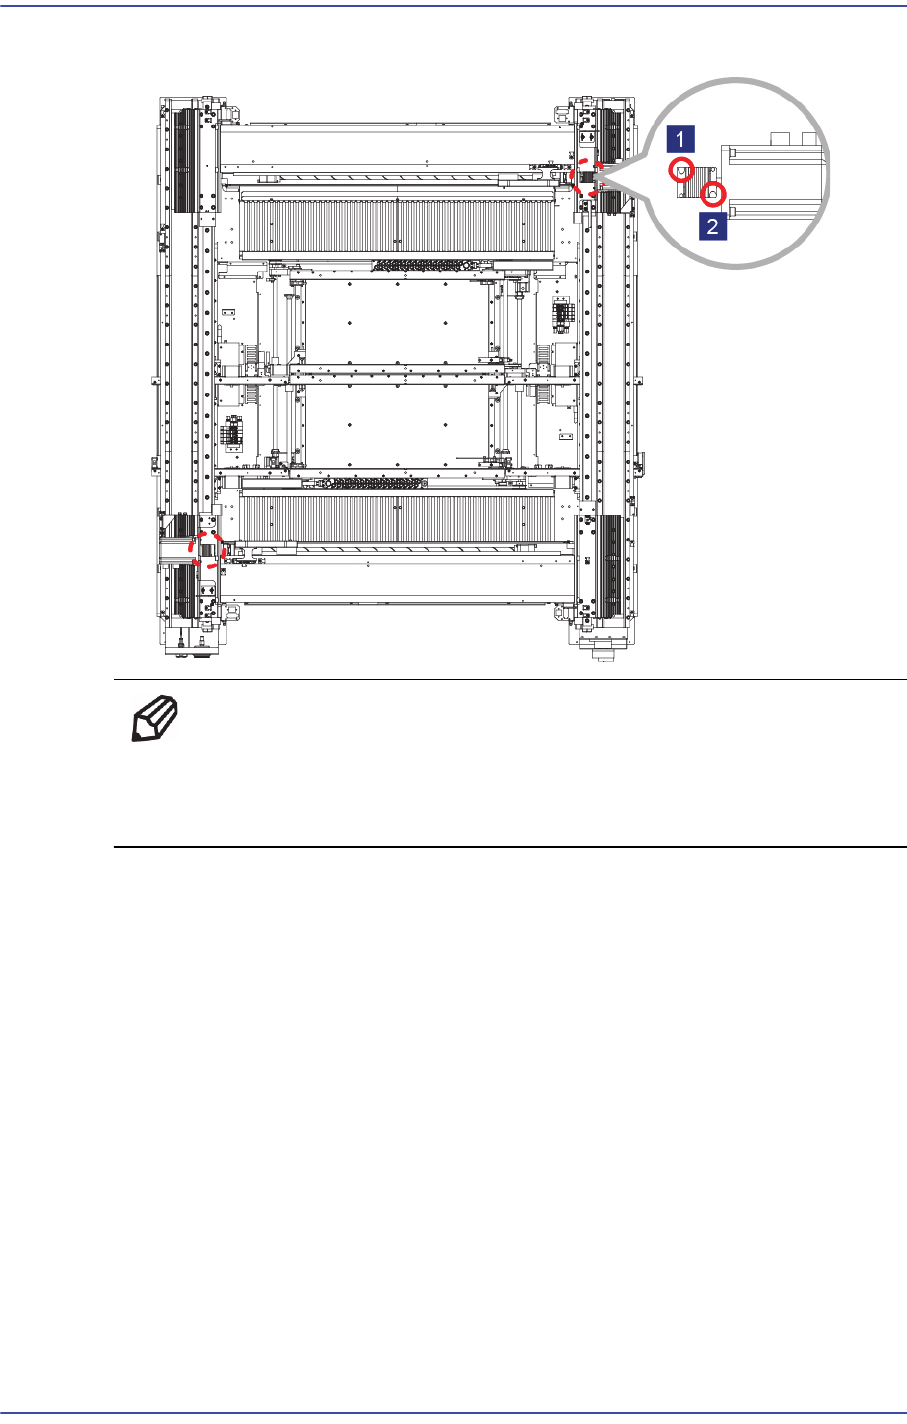
Ref When replacing only the X-axis motor, remove only the set
screw(No2) near the motor and when replacing only the ball screw,
remove only the set screw(No1) near the ball screw.
4-3
X Frame
6) Remove the fixing screws(4-M5*18) that secure the X-axis motor on the Bracket-X
and replace the motor.
Ref The part number of the new Motor is EP08-000185.
7) The assembling is performed in the reverse order of disassembling.
8) Perform the following calibrations.
Axis Home Calibration
Common X-Y (1'st)
Thermal Mapping
Gantry Mapping
ANC, Position Teaching
Total Time: 0.8Hour
Ref For a standard conveyor option, remove the machine from the in-line
before replacing the motor.
4-4
Fast & Flexible Chip Shooter DECAN F2 Service Manual
4.2. Ball Screw
4.2.1. Required Tools
T wrench (other tools supplied) or hex wrench
Gear wrench or torque wrench
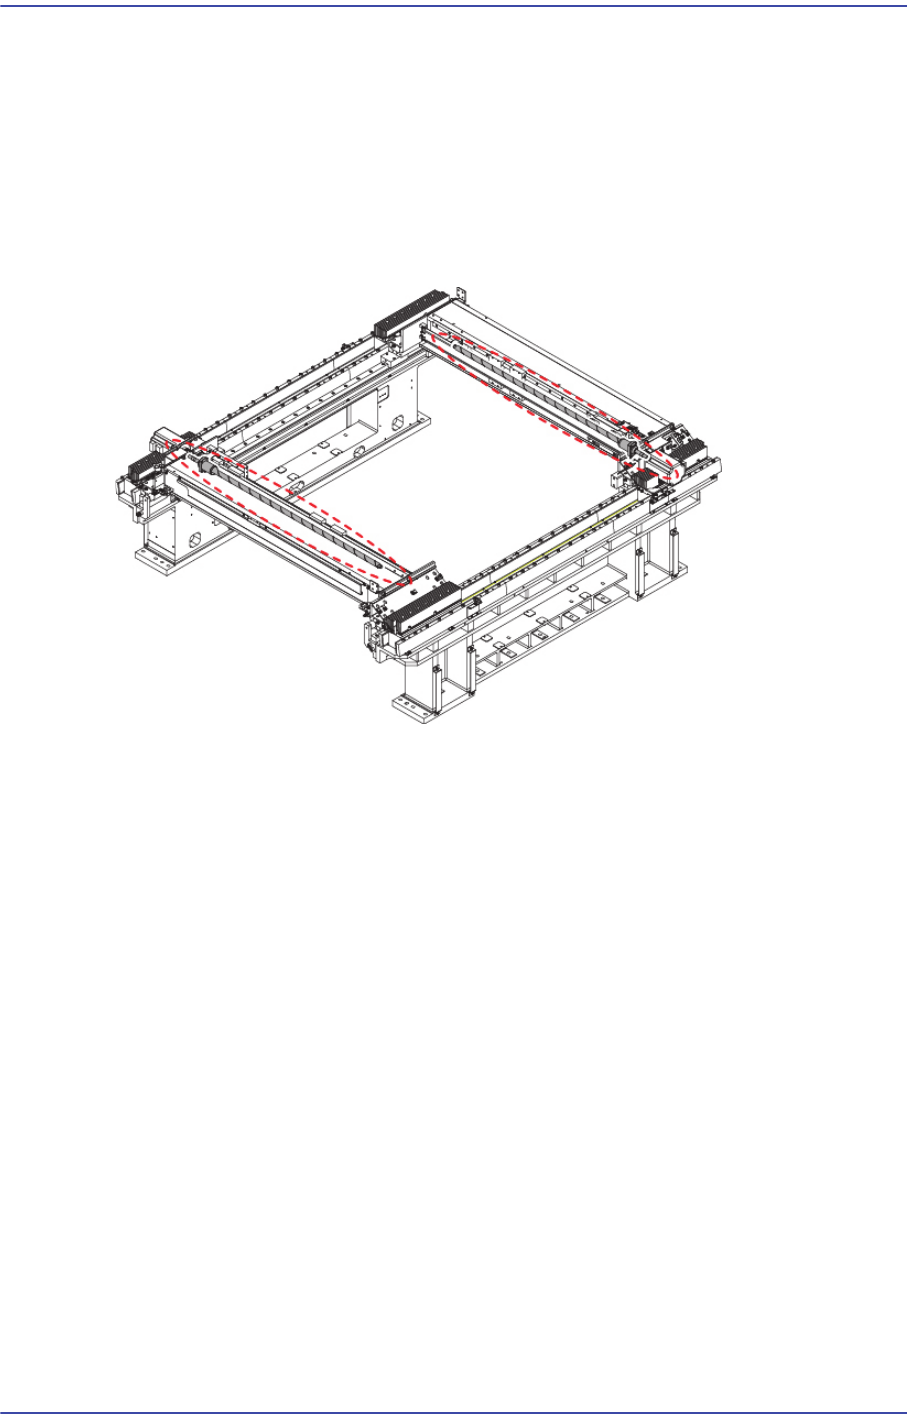
4.2.2. Position of Ball Screw
4.2.3. Ball Screw Replacement Procedure
1) Manipulate the teaching box to move the X Frame to the front.
2) Close the PC as usual and turn off the main switch at the front of the machine.
3) Unscrew the fixing bolts(8-M3*5) securing the Ball Screw Cover and remove Ball
Screw Cover.