DECAN_F2_Service(Eng_Ver1).pdf - 第151页
6-1 Conveyor Chapter6. Conveyor 6.1. Conveyor Sensor 6.1.1. Required Tools Precision screw driver set (other supplied tools) T wrench (other tools supplied) or hex wrench Crosshead (Phillips) screwdriver Nippers …
6-1
Conveyor
Chapter6. Conveyor
6.1. Conveyor Sensor
6.1.1. Required Tools
Precision screw driver set (other supplied tools)
T wrench (other tools supplied) or hex wrench
Crosshead (Phillips) screwdriver
Nippers and cable ties
Calipers
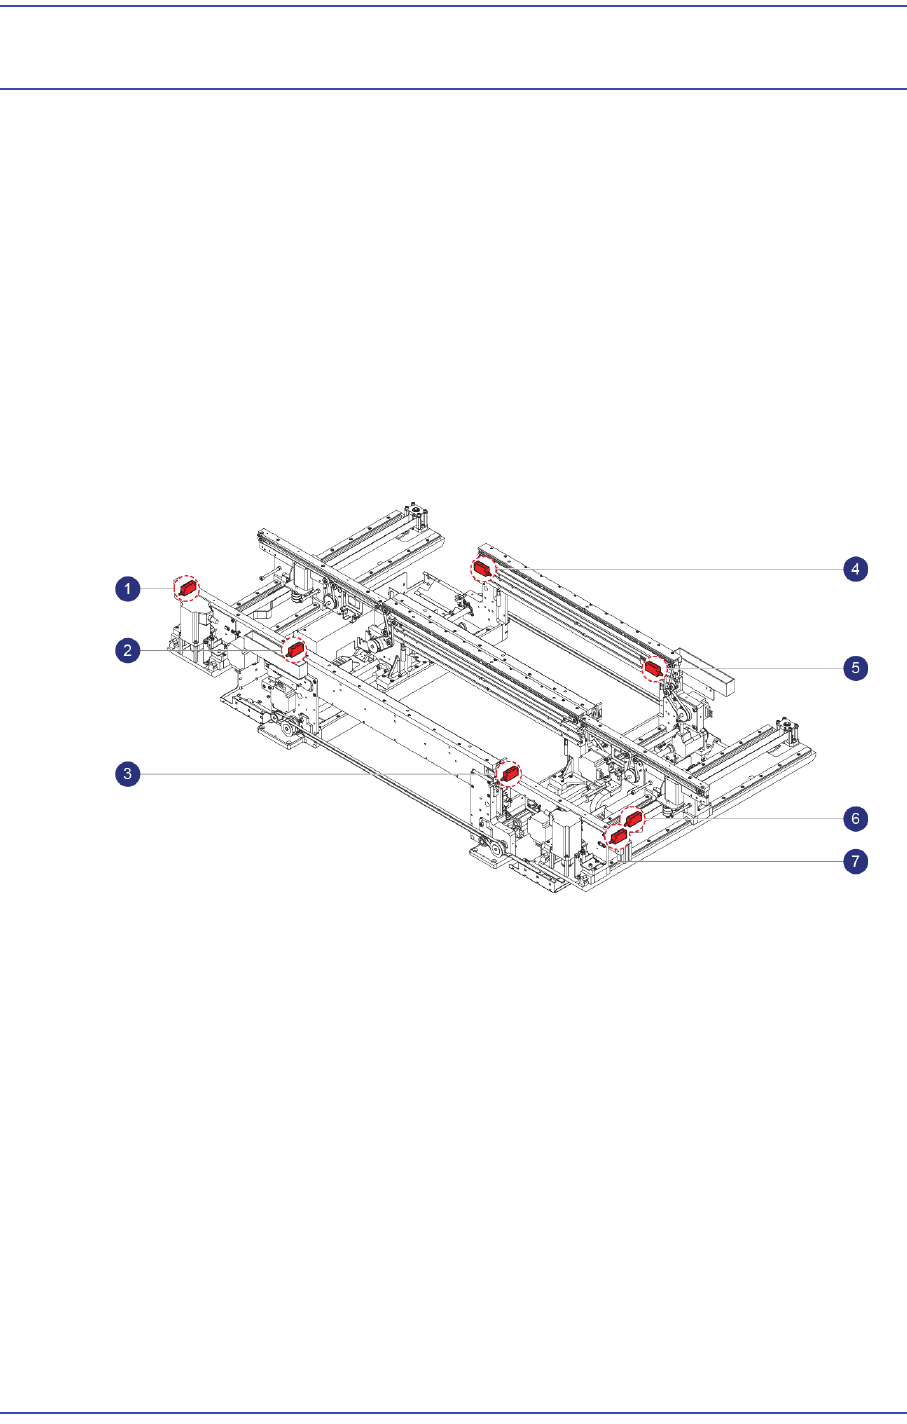
6.1.2. Location of PCB Detected Sensor
1: Entry Sensor
2: Front Conveyor Work Sensor1
3: Front Conveyor Work Sensor2
4: Rear Conveyor Work Sensor1
5: Rear Conveyor Work Sensor2
6: Exit Sensor
7: PCB Out detecting Sensor
6.1.3. PCB Detected Sensor Replacement Procedure
1) Manipulate the teaching box to increase the conveyor width.
2) Close the PC as usual and turn off the main switch at the front of the machine.
3) Remove the connector on the Sensor to be replaced.
4) Unscrew the fixing bolts(2-M3*15) securing the sensor to be replaced and remove it.
5) Replace the Sensor with a new one.
6-2
Fast & Flexible Chip Shooter DECAN F2 Service Manual
Ref The part number of the new Sensor is J32111003A.
6) Assembled the reverse order of disassembling.
7) Turn on the main switch at the front of the machine and boot the PC once the
replacement is completed.
8) Check whether the replaced sensor performs detection properly.
9) Perform the following calibrations.
Board Position Calibration
(Time: 0.5 hour)
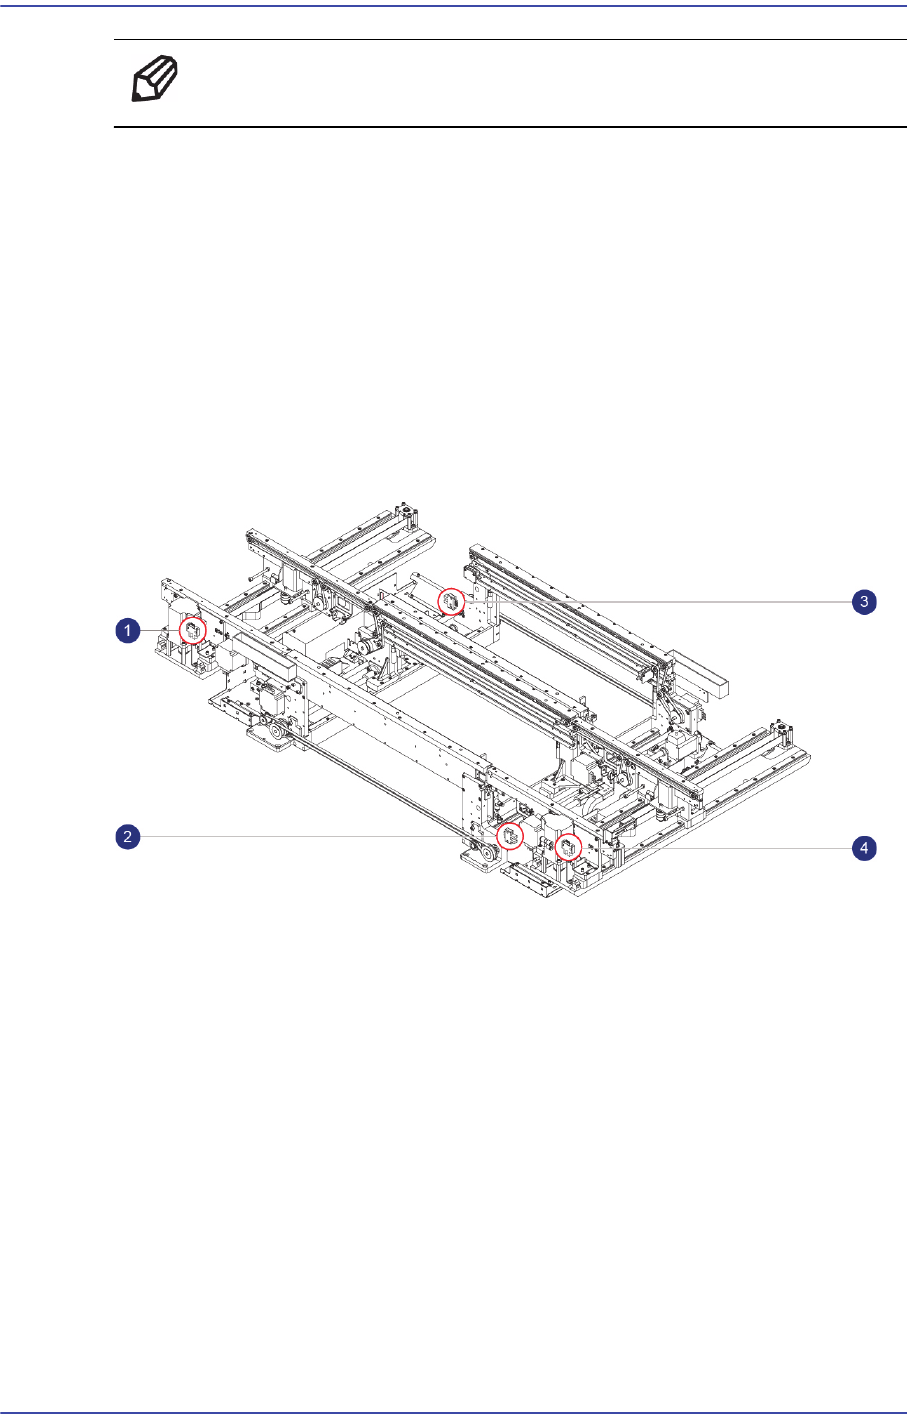
6.1.4. Location of Conveyor Width Sensor
1: Entry Zone Width Detecting Sensor
2: Front Conveyor Work Zone Width Detecting Sensor
3: Work Zone Width Detecting Sensor
4: Exit Zone Width Detecting Sensor
6.1.5. Location of Conveyor Width Sensor
1) Manipulate the teaching box to increase the conveyor width.
2) Close the PC as usual and turn off the main switch at the front of the machine.
3) Remove the connector on the Sensor to be replaced.
4) Unscrew the Fixing bolts(2-M3*10) securing the Conveyor Width Sensor using a
wrench and remove it.
5) Replace the Sensor with a new one.