DECAN_F2_Service(Eng_Ver1).pdf - 第90页
4-2 Fast & Flexible Chip Shooter DECAN F2 Service Manual screw . Ref When replacing only the X-axis motor , remove only the set screw(No2) near the motor and when replacing only the ball screw , remove only the set s…
4-1
X Frame
Chapter4. X Frame
4.1. Motor
4.1.1. Required Tools
T Wrench (other tools supplied) or Hex Wrench
Torque Wrench
Dial Gage
Snap ring plier
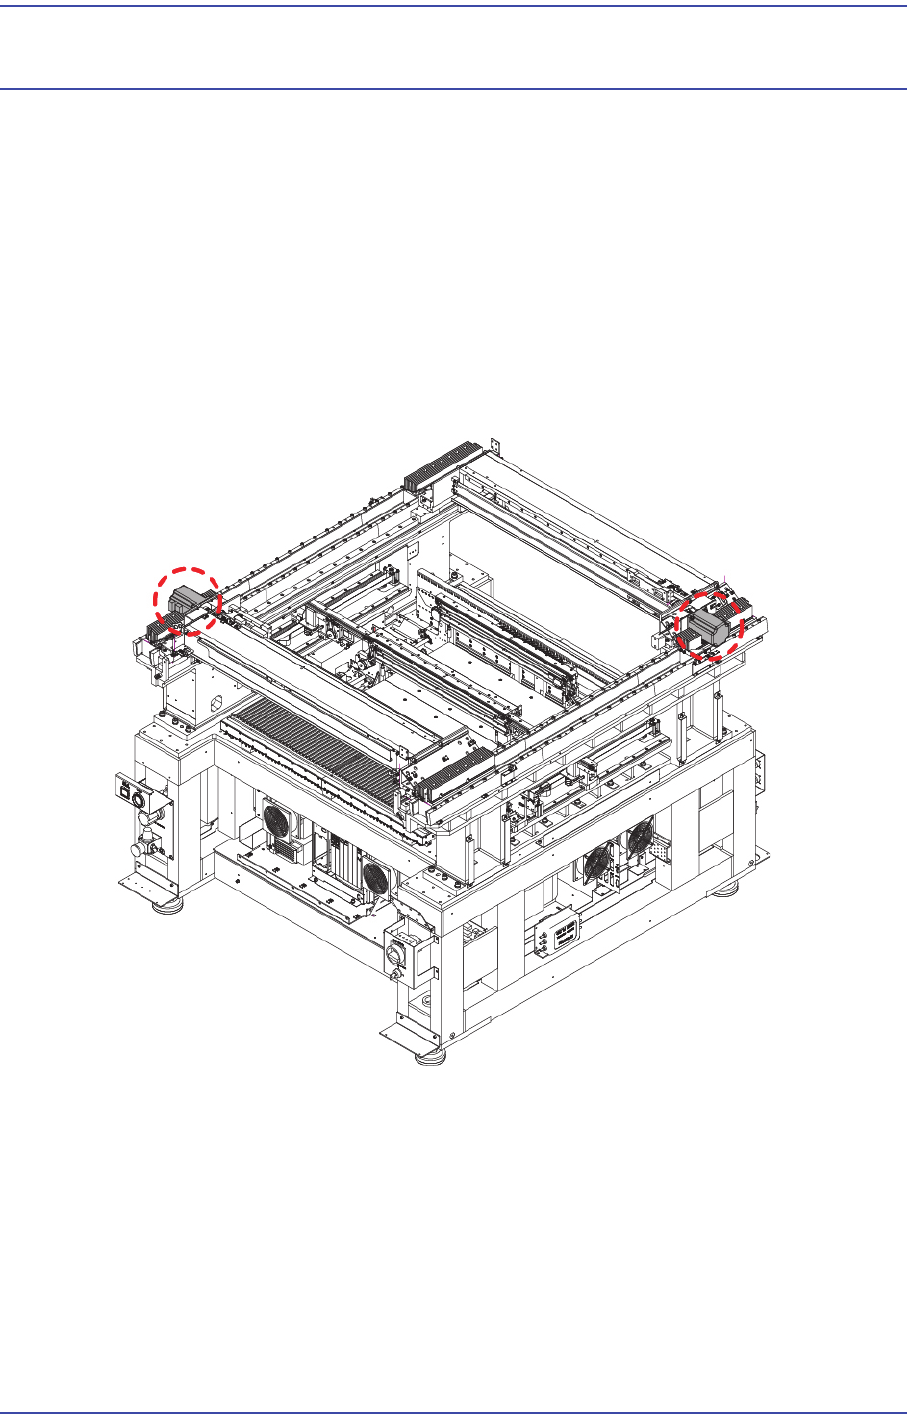
4.1.2. Position of Motor
4.1.3. Motor Replacement Procedure
1) Manipulate the teaching box to move the X Frame to the front.
2) Close the PC as usual and turn off the main switch at the front of the machine.
3) Remove the side cover of the motor to be removed.
4) Disconnect the motor power cable connector and encoder cable connector from the X-
axis motor.
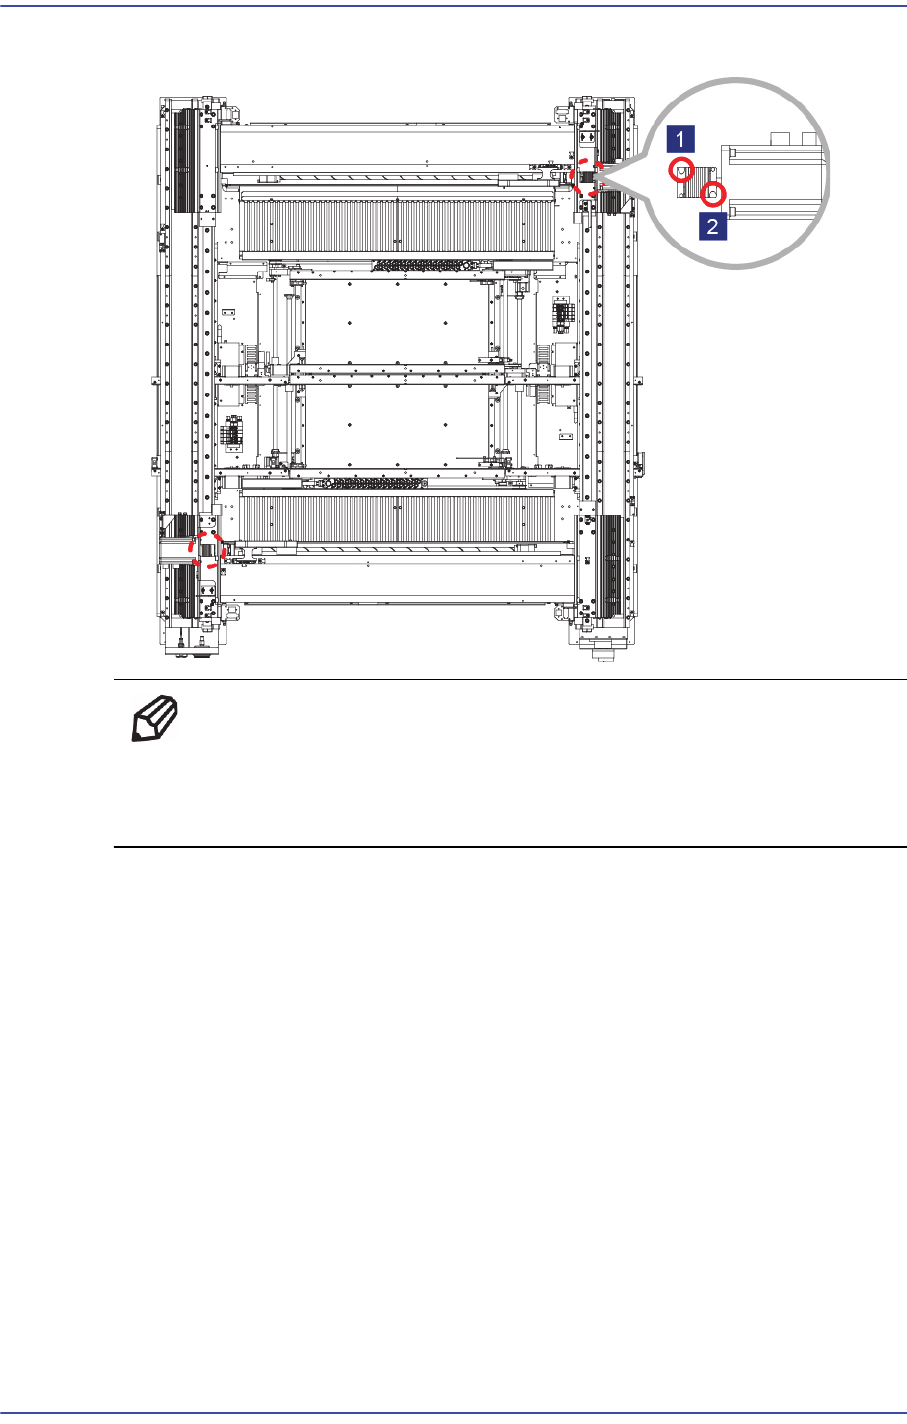
5) Remove the set screws (No2) of the coupling that connects the X-axis motor and ball
4-2
Fast & Flexible Chip Shooter DECAN F2 Service Manual
screw.
Ref When replacing only the X-axis motor, remove only the set
screw(No2) near the motor and when replacing only the ball screw,
remove only the set screw(No1) near the ball screw.
4-3
X Frame
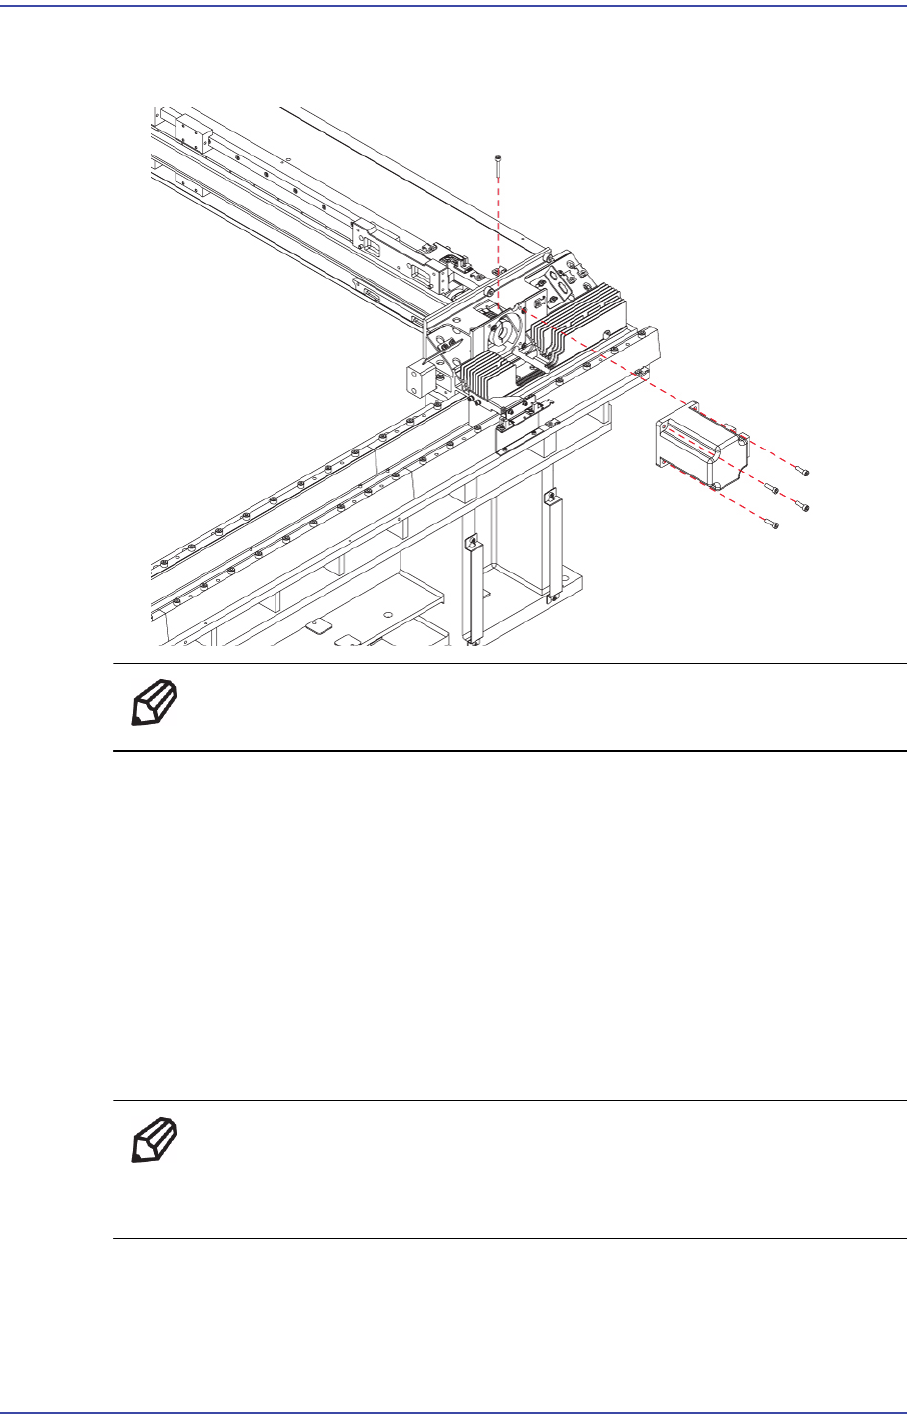
6) Remove the fixing screws(4-M5*18) that secure the X-axis motor on the Bracket-X
and replace the motor.
Ref The part number of the new Motor is EP08-000185.
7) The assembling is performed in the reverse order of disassembling.
8) Perform the following calibrations.
Axis Home Calibration
Common X-Y (1'st)
Thermal Mapping
Gantry Mapping
ANC, Position Teaching
Total Time: 0.8Hour
Ref For a standard conveyor option, remove the machine from the in-line
before replacing the motor.