00195982-03_SM_SWS_EN.pdf - 第118页
6 Supply unit 6.3 Settings 118 Service Manual SIPLACE Wafer System (SWS) 11/2018 Fig.131: Connection input for transformer 1. Power input from terminal panel X1 2. Output PC 3. Terminal block input voltage for transform…
6 Supply unit
6.3 Settings
Service Manual SIPLACE Wafer System (SWS) 11/2018 117
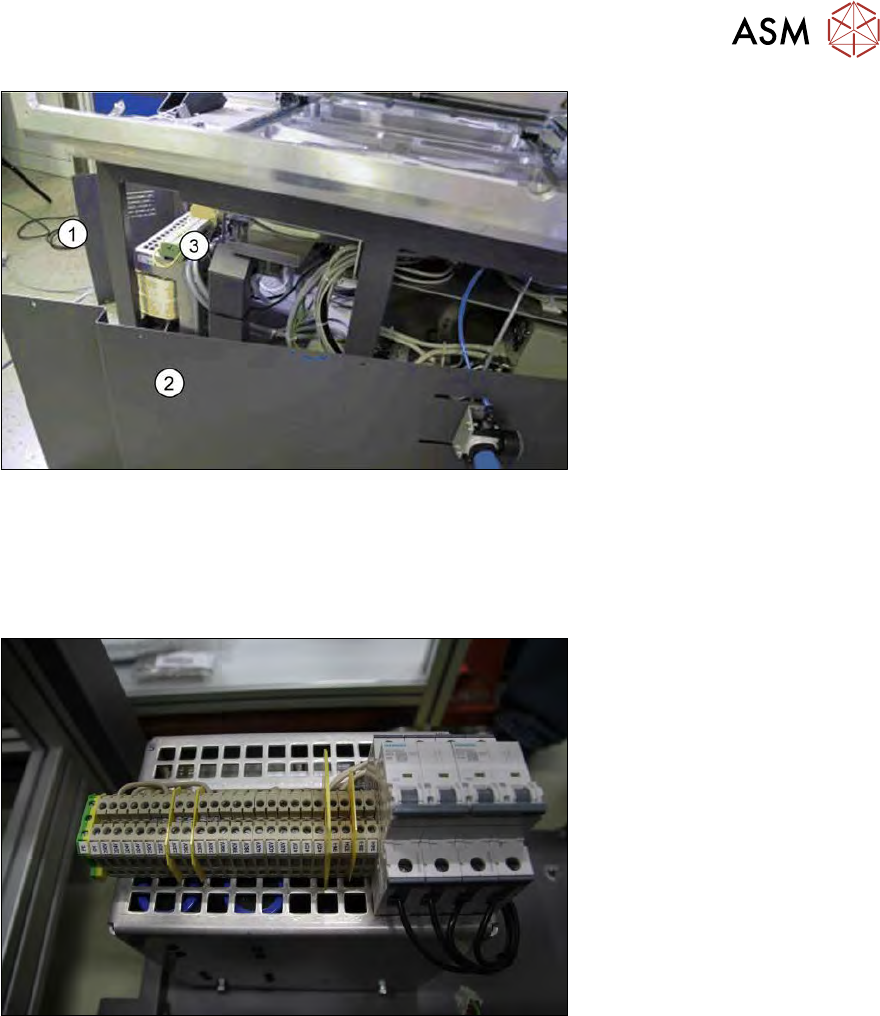
Fig.129:
1. Front cover
2. Side cover (unplug air connections from manometer → observe assignment)
3. Terminal block input voltage for transformer
► Remove the side and front covers
Fig.130: Terminal block input voltage for transformer viewed from the front
► Wire the incoming lines at the terminal block input voltage for the transformer in accordance
with the input voltage specifications (observe the correct wiring assignment L1-L2-L3 → see
circuit diagram).
6 Supply unit
6.3 Settings
118 Service Manual SIPLACE Wafer System (SWS) 11/2018
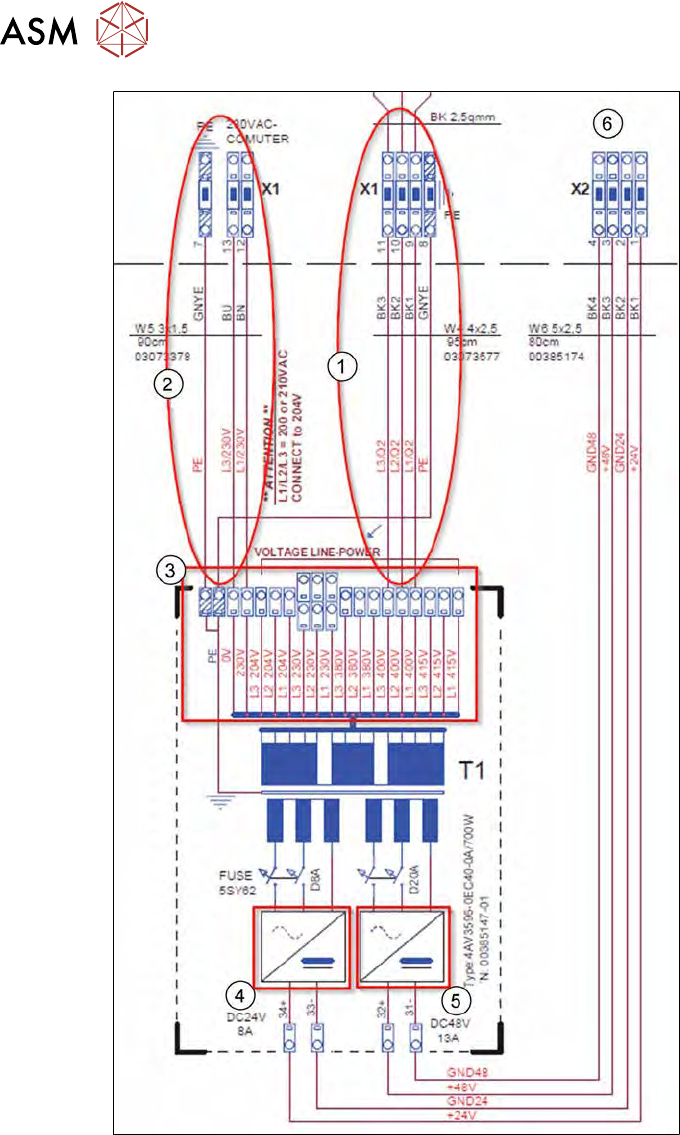
Fig.131: Connection input for transformer
1. Power input from terminal panel X1
2. Output PC
3. Terminal block input voltage for transformer
4. Fuse 24V
5. Fuse 48V
6. Output voltage to terminal panel X2
► Connect the pneumatic hoses to the manometer (observe assignment).
► Fit the side and front covers.
► Fit the SWS into the machine.
7 Die ejector
7.1 Overview of main assemblies
Service Manual SIPLACE Wafer System (SWS) 11/2018 119
7 Die ejector
According to the location there are two different variants that only differ in their mirrored arrange-
ment of the modules.
●
Die ejector SWS12 (1/3) [00387913-xx]
●
Die ejector SWS12 (2/4) [00387881-xx]
7.1 Overview of main assemblies
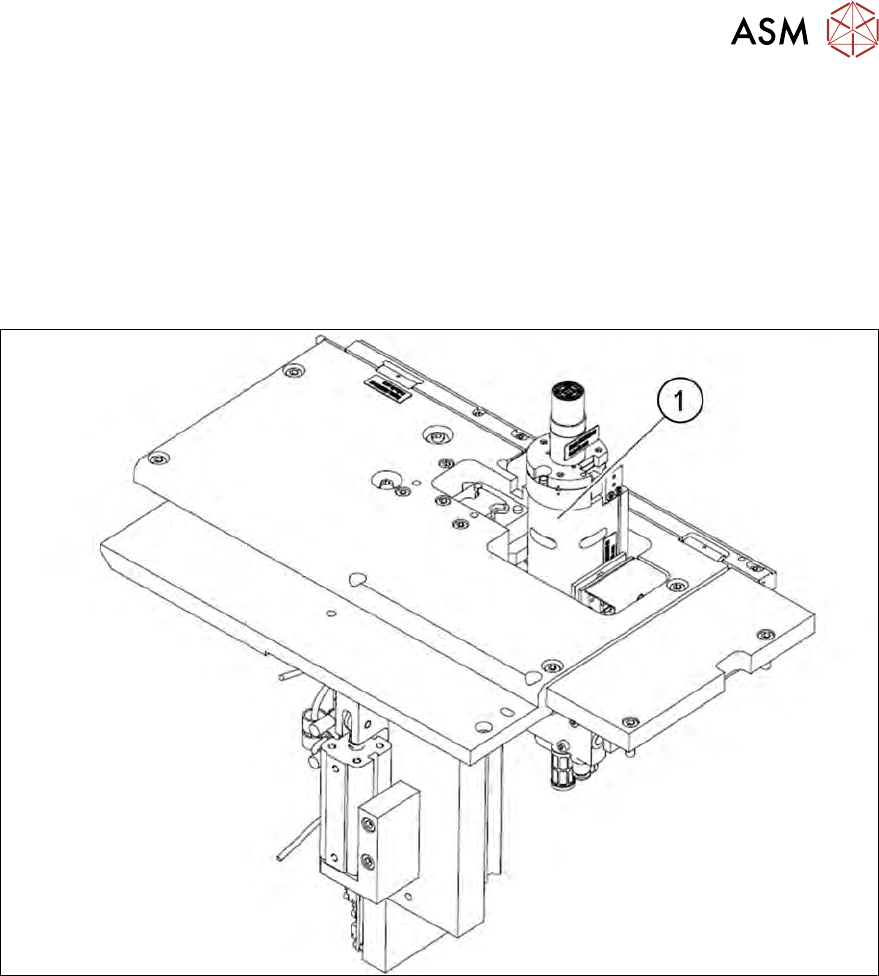
Fig.132: Main die ejector assemblies
1. Z axis die ejector