00195982-03_SM_SWS_EN.pdf - 第294页
12 Wafer stretcher 12.6 Fitting the wafer stretcher 294 Service Manual SIPLACE Wafer System (SWS) 11/2018 12.6.2 Fitting the wafer stretcher to the guide trolley Fig.414: ► Dismantle and remove the clamping cylinder (1)…
12 Wafer stretcher
12.5 Overview of wafer stretcher parts
Service Manual SIPLACE Wafer System (SWS) 11/2018 293
12.5 Overview of wafer stretcher parts
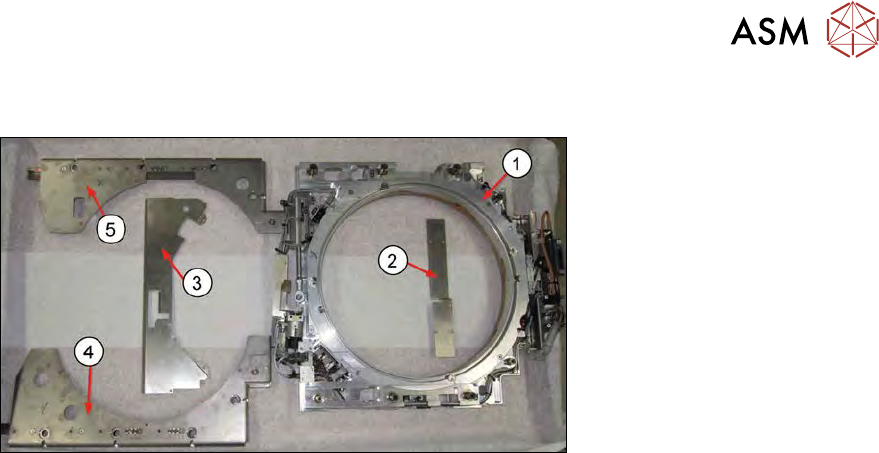
Fig.413:
The following wafer stretcher parts were removed:
1. Wafer stretcher frame (here: 12")
2. Cover plate board
3. Cover plate clamping and lifting cylinder
4. Downholder plate, left
5. Downholder plate, right
The above mentioned parts are needed for installation. All the screws and fastenings required are
provided with the delivery.
12.6 Fitting the wafer stretcher
The installation is shown using the example of a 12" wafer stretcher. The procedure for an 8" wafer
stretcher is identical.
If the wafer stretcher fitted is a retrofit, refer to chapter 12.4 "Removing the wafer stretcher" [}279].
Identical installation steps will be clearly indicated. This makes it easier to understand the installa-
tion process.
12.6.1 Preparations for fitting the wafer stretcher
The following conditions need to be fulfilled in order for the wafer stretcher to be fitted:
●
A wafer table has been removed.
●
Another wafer stretcher has been removed.
Make sure that the die ejector is in a low position.
For an overview of the wafer stretcher parts, refer to section 12.5 "Overview of wafer stretcher
parts" [}293].
12 Wafer stretcher
12.6 Fitting the wafer stretcher
294 Service Manual SIPLACE Wafer System (SWS) 11/2018
12.6.2 Fitting the wafer stretcher to the guide trolley
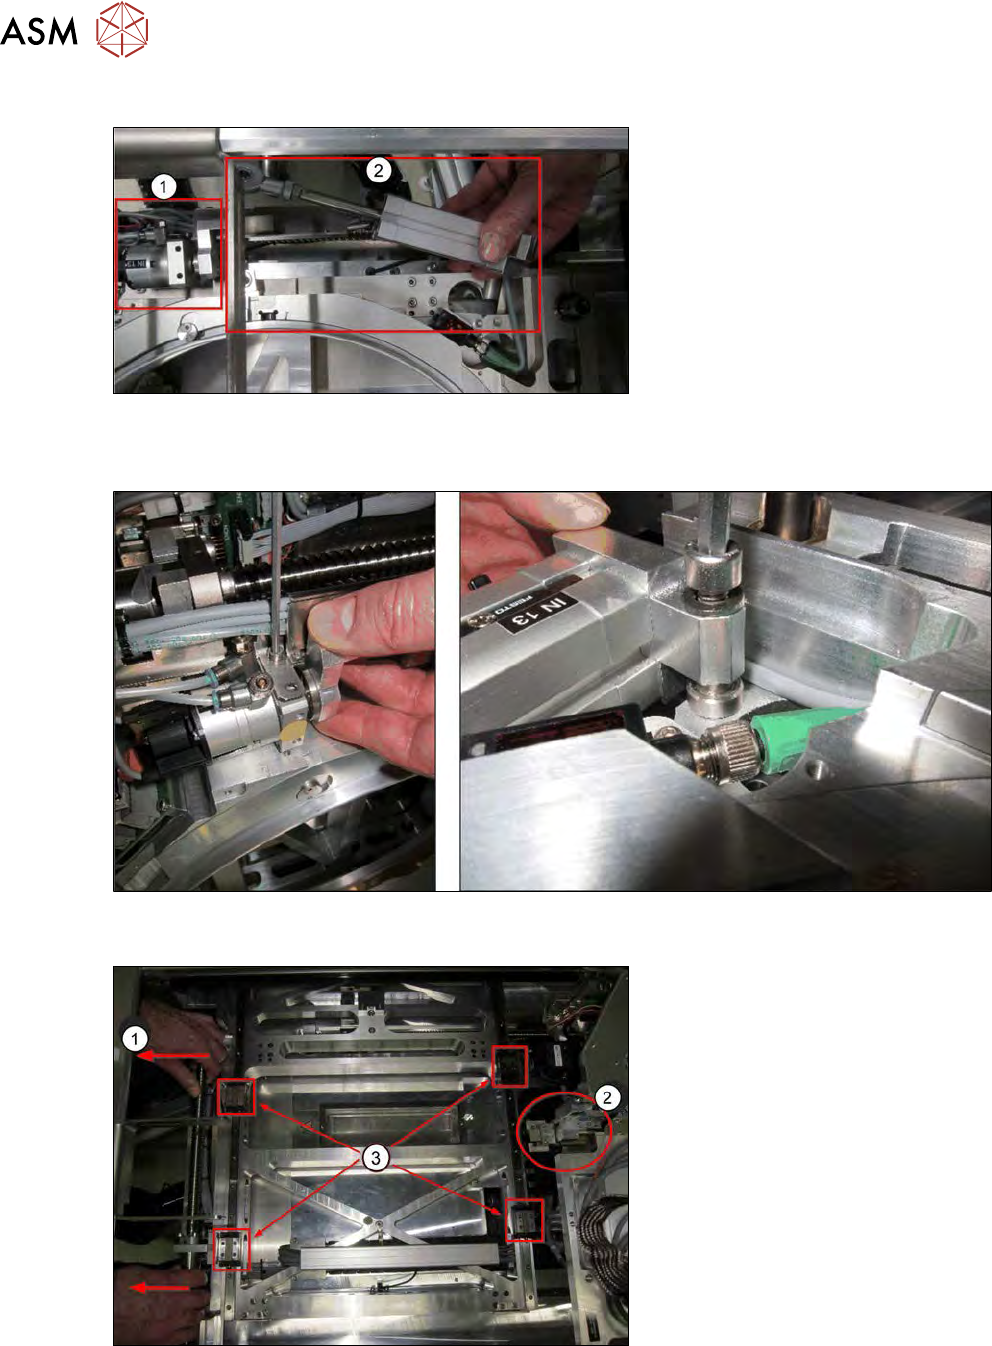
Fig.414:
► Dismantle and remove the clamping cylinder (1) and the lifting cylinder (2) from the wafer
stretcher. The diagram is only an example, as it shows the dismantled state in the SWS!
Fig.415:
► To dismantle, remove the two screws on the cylinders.
Fig.416:
► Pull the X/Y table fully over to the wafer lift side (1).
► Position the wafer changer (gripper) right at the back (2).
► Clean the surface of the guide trolleys (3).
► First position the guide trolleys roughly over the fastening holes in the wafer stretcher.
12 Wafer stretcher
12.6 Fitting the wafer stretcher
Service Manual SIPLACE Wafer System (SWS) 11/2018 295
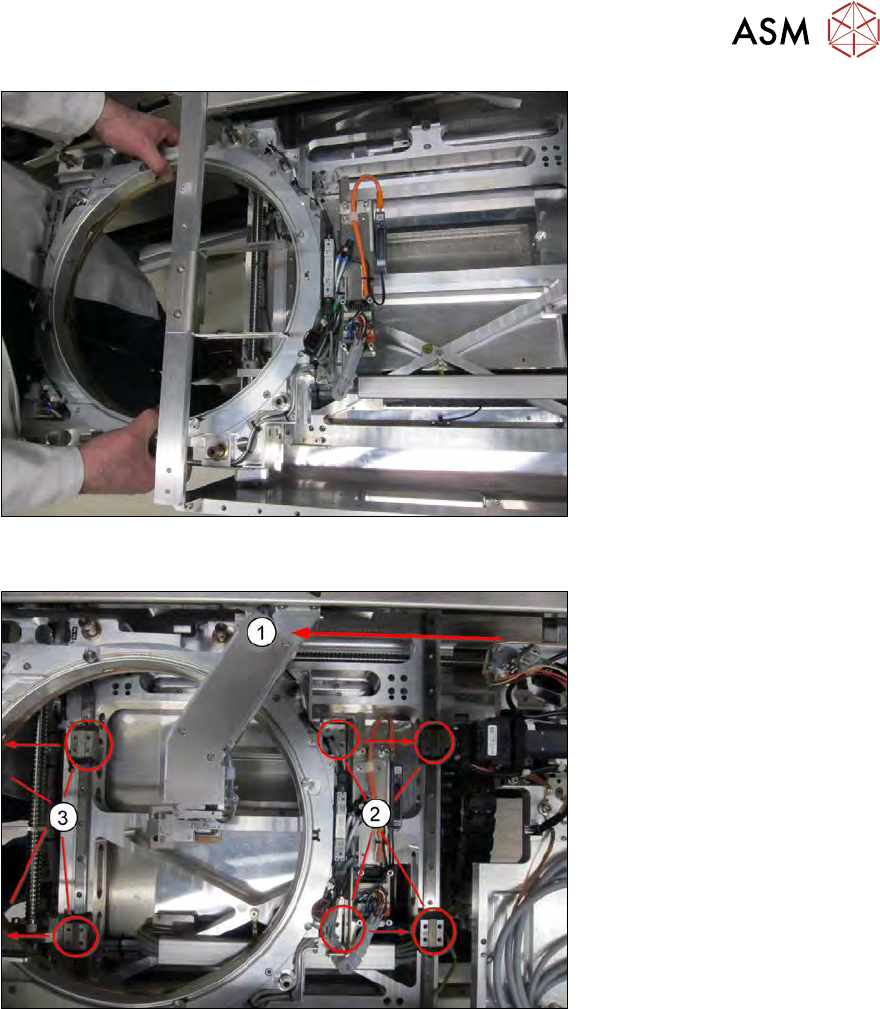
Fig.417:
► Now carefully lift the wafer stretcher onto the X/Y table.
Fig.418:
► Place the wafer stretcher about 2/3 onto the X/Y table.
► Pull the wafer changer (gripper) into the middle of the wafer stretcher (1).
► Align the guide trolleys to the fastening holes in the wafer stretcher (2 and 3).