00195982-03_SM_SWS_EN.pdf - 第275页
12 Wafer stretcher 12.2 Detailed description of "wafer stretching" procedure Service Manual SIPLACE Wafer System (SWS) 11/2018 275 Fig.377: ● The clamping ring (R) is moved downwards again. ● The wafer foil is…
12 Wafer stretcher
12.2 Detailed description of "wafer stretching" procedure
274 Service Manual SIPLACE Wafer System (SWS) 11/2018
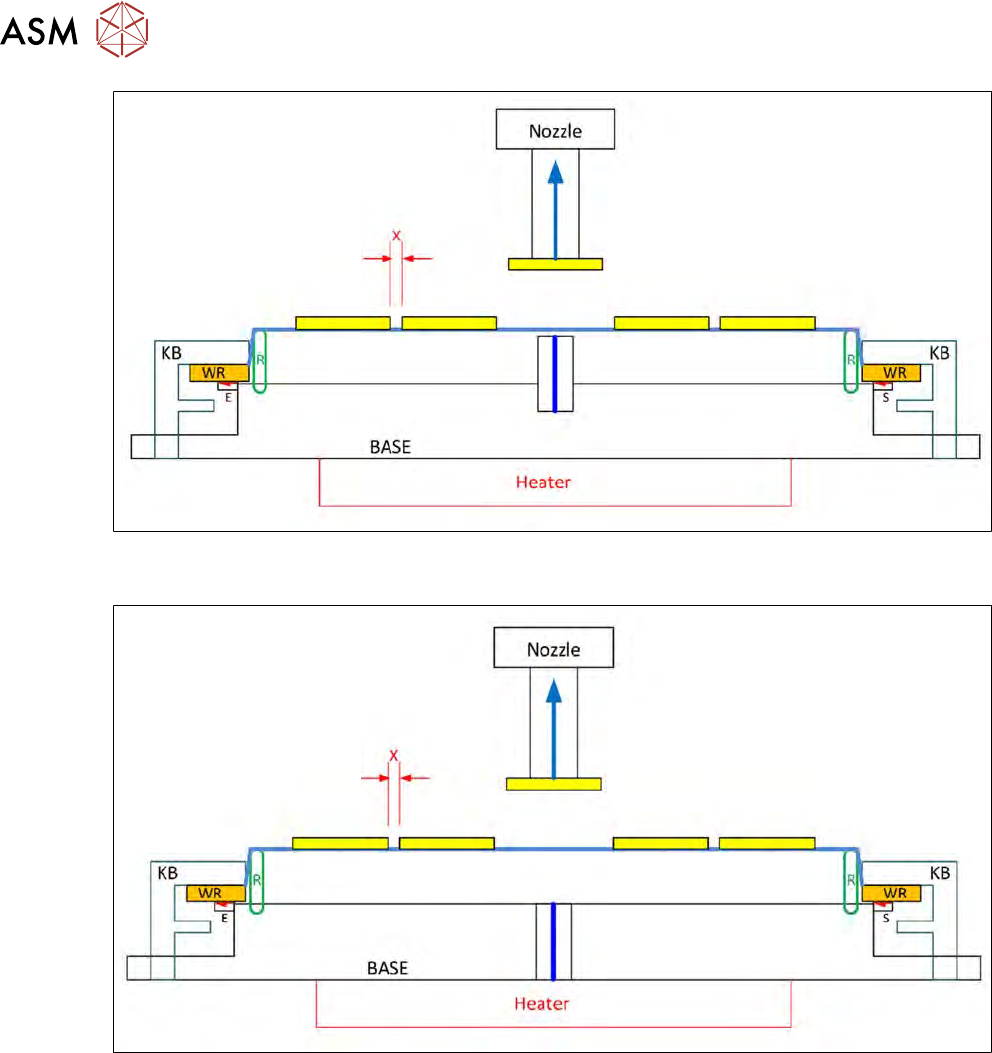
Fig.375:
●
The die ejector needle is moved in.
Fig.376:
●
The die ejector is moved back into the base (BASE).
12 Wafer stretcher
12.2 Detailed description of "wafer stretching" procedure
Service Manual SIPLACE Wafer System (SWS) 11/2018 275
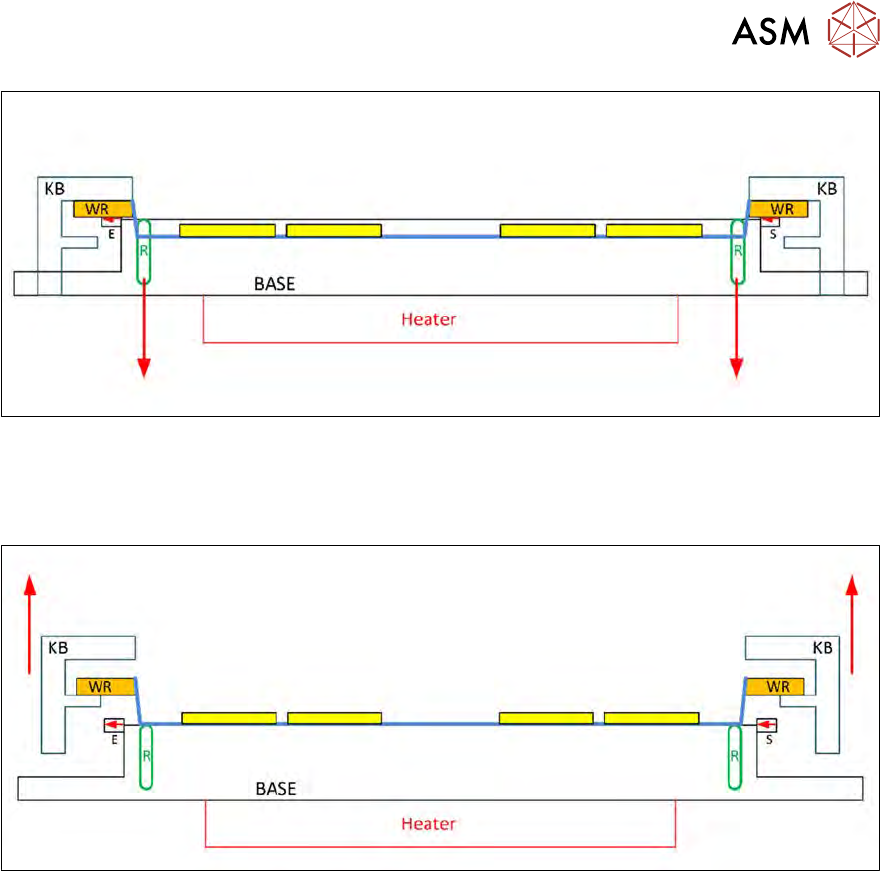
Fig.377:
●
The clamping ring (R) is moved downwards again.
●
The wafer foil is now sagging. (Actually, it is concave but for technical drawing purposes it is
straight.)
Fig.378:
●
The clamping plate (KB) is moved upwards again.
●
The wafer frame (WR) is positioned again on the support strip of the clamping plate (KB).
●
The wafer foil is still sagging. (Actually, it is concave but for technical drawing purposes it is
straight.)
12 Wafer stretcher
12.2 Detailed description of "wafer stretching" procedure
276 Service Manual SIPLACE Wafer System (SWS) 11/2018
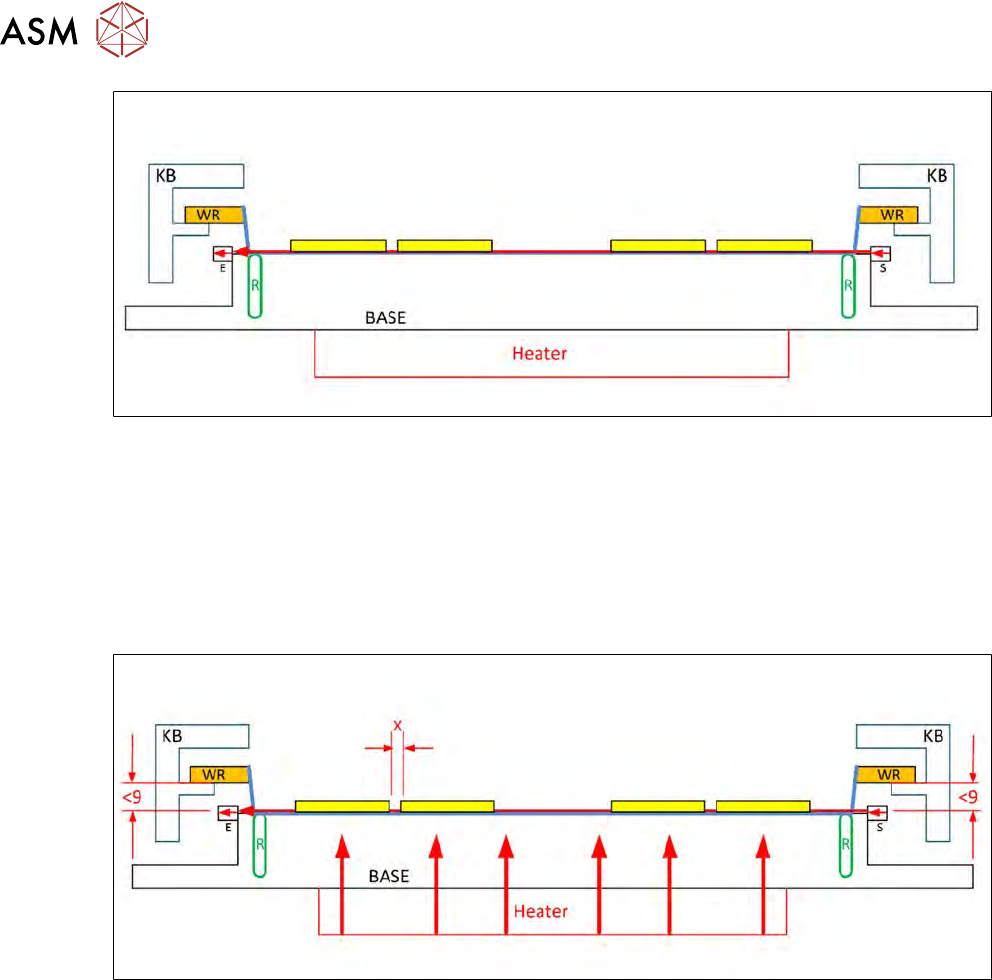
Fig.379:
●
The sag sensor IN19 (S = transmitter / E = receiver) is switched on.
●
The light beam is sent from the transmitter to the receiver.
●
If a light is received by the receiver, this means that the foil is not sagging so much that it
would rub against the base (BASE) when the wafer frame is pulled back in the wafer lift,
thereby breaking the wafer foil!
●
The top diagram shows that the light beam has been interrupted due to excessive sagging of
the wafer foil.
Fig.380:
●
The heating (heater) is switched on.
●
This warms the wafer foil, which then shrinks together again.
●
This reduces the stretch.
●
The space between the dies is reduced (X).
●
The wafer foil sag is also reduced.
●
If the sag is still more than 9 mm, the sag sensor IN 19 will not emit a signal.