00195982-03_SM_SWS_EN.pdf - 第145页
7 Die ejector 7.3 Replacing spare parts Service Manual SIPLACE Wafer System (SWS) 11/2018 145 SWS 1/3 Fig.178: ► Lift the base plate slightly and turn this by approx. 90° to the right (clockwise). ► Carefully lower the …
7 Die ejector
7.3 Replacing spare parts
144 Service Manual SIPLACE Wafer System (SWS) 11/2018
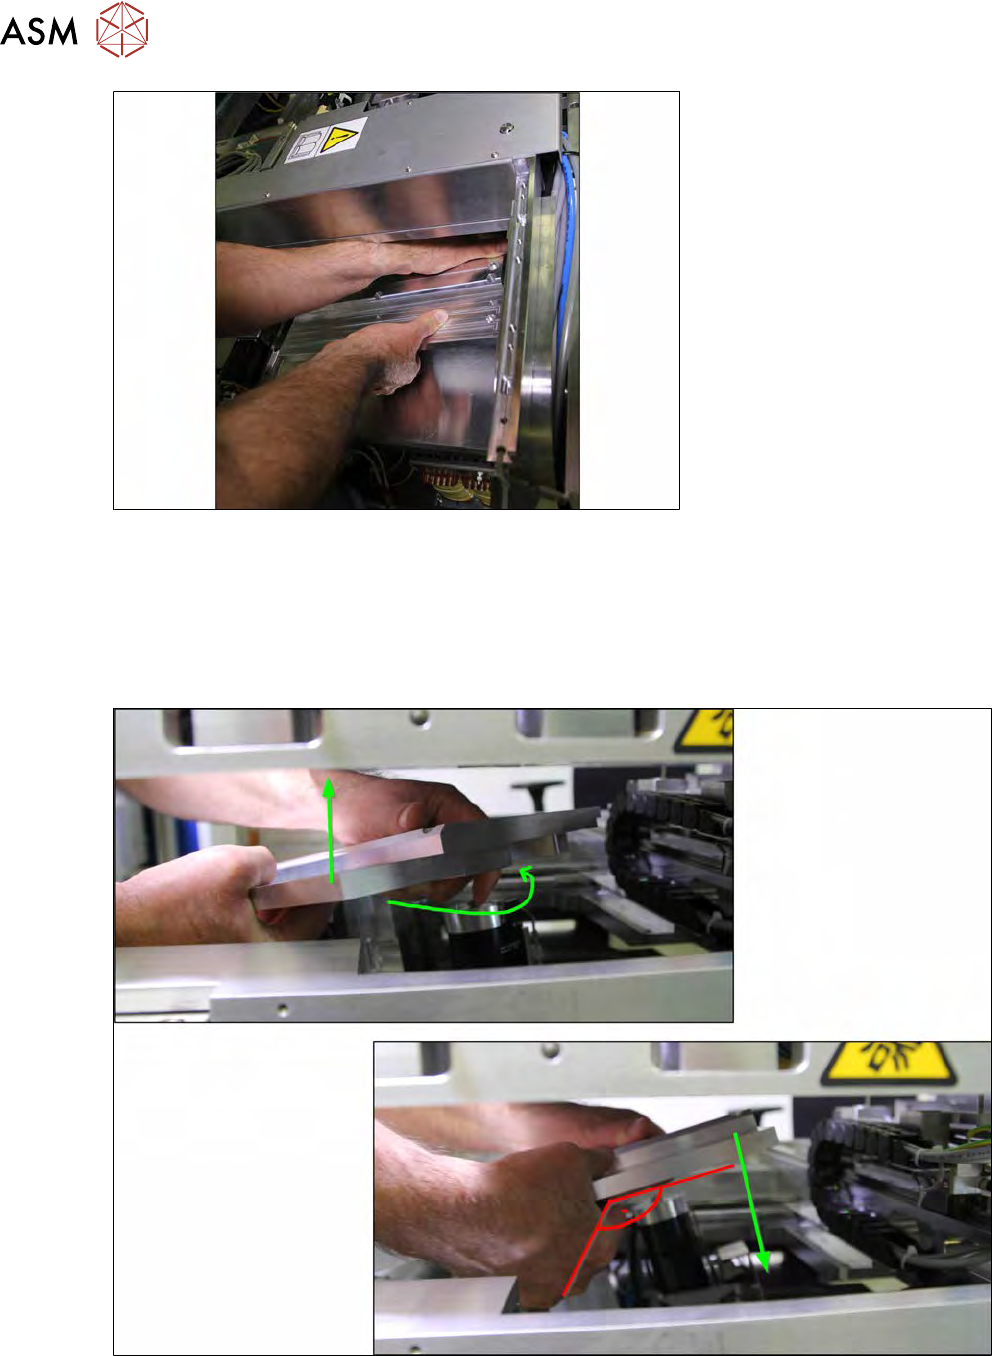
Fig.176: Die ejector (example of SWS 2/4 shown)
► Insert the left hand into the die ejector recess, lift it gently and put the right hand under the
front side.
The diagram is for a die ejector with an SWS 2/4.
When using an SWS 1/3, you need to insert the right hand into the recess and hold the front
side with the left hand.
SWS 2/4
Fig.177:
► Lift the base plate slightly and turn this by approx. 90° to the left (anticlockwise).
► Carefully lower the base plate.
7 Die ejector
7.3 Replacing spare parts
Service Manual SIPLACE Wafer System (SWS) 11/2018 145
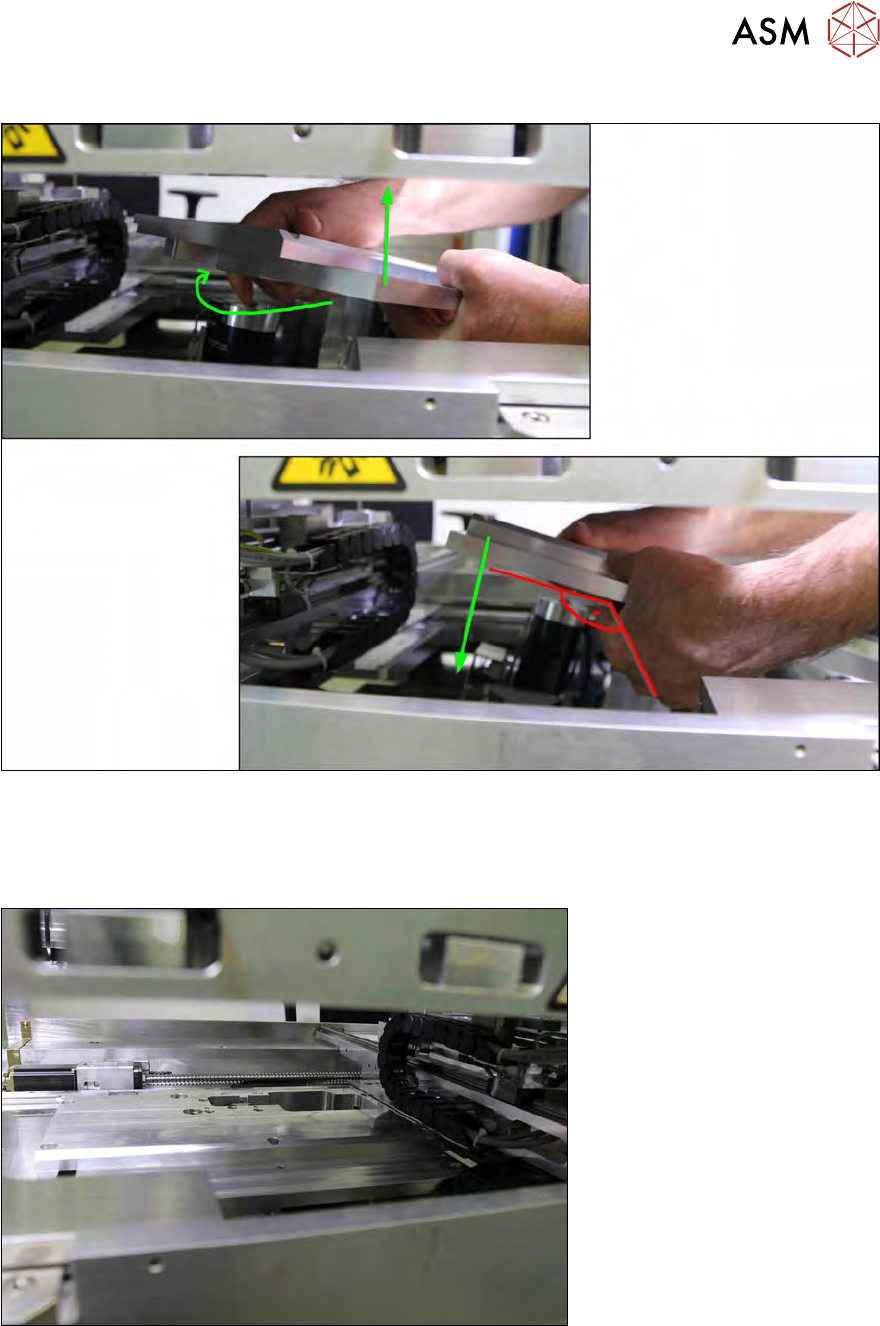
SWS 1/3
Fig.178:
► Lift the base plate slightly and turn this by approx. 90° to the right (clockwise).
► Carefully lower the base plate.
Fig.179: SWS base plate
7 Die ejector
7.3 Replacing spare parts
146 Service Manual SIPLACE Wafer System (SWS) 11/2018
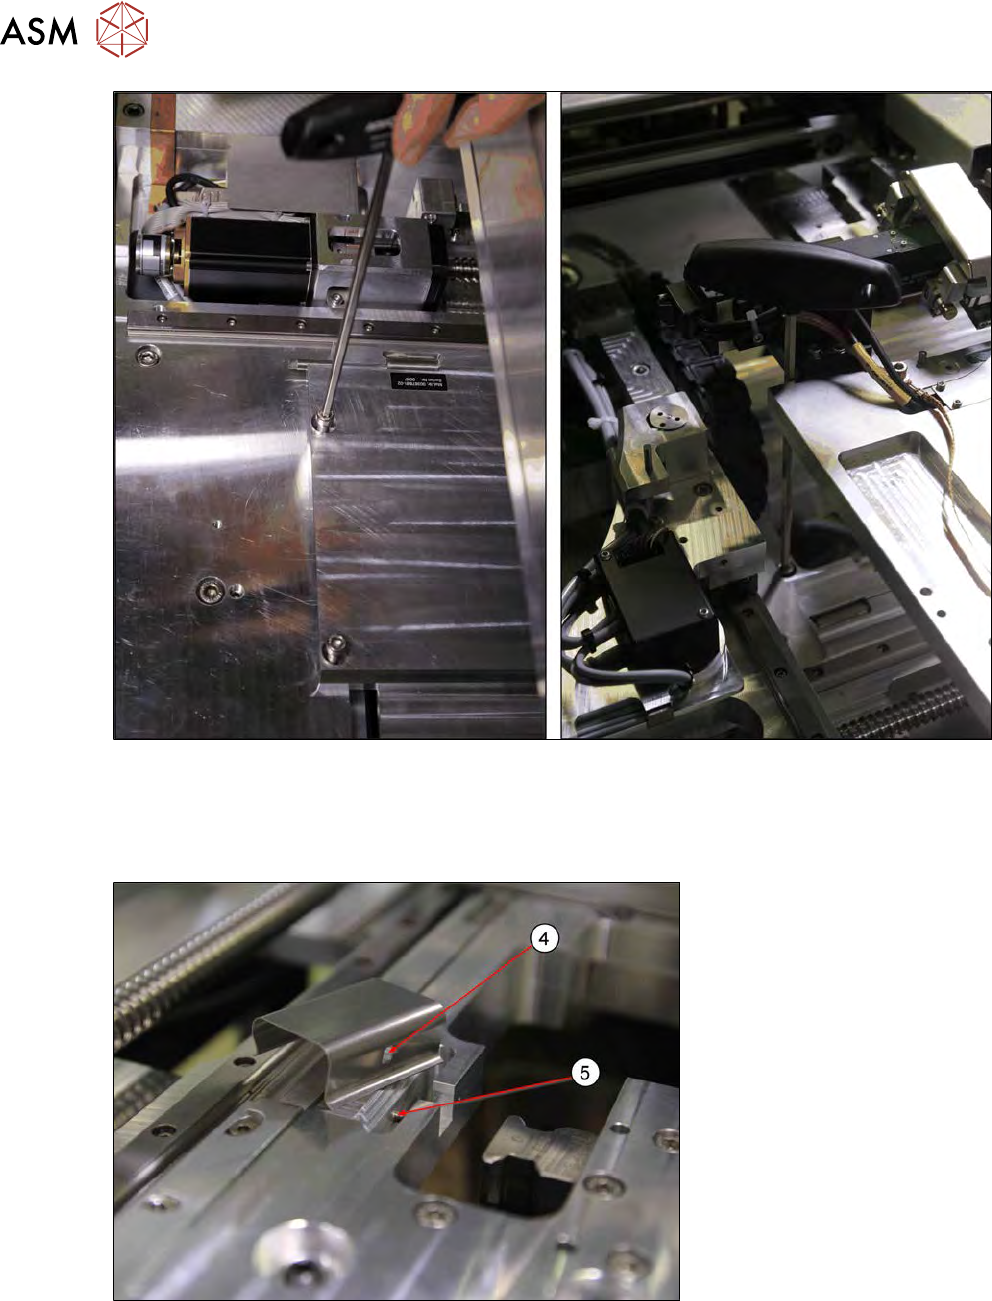
Fig.180:
► Insert the four screws fastening the base plate.
Only tighten these screws slightly to begin with, so that the base plate remains flexible for ad-
justing its alignment.
The two rear screws (towards the wafer lift) are difficult to access.
Fig.181:
► Insert the omega spring. The hole (4) drilled in the omega spring is guided onto the holder
pin(5) in the recess.