00195982-03_SM_SWS_EN.pdf - 第198页
9 Wafer change system 9.1 Magazine lift 198 Service Manual SIPLACE Wafer System (SWS) 11/2018 9.1.1.7 Door switch The door switch checks whether the supply door for the wafer lift is closed. The door switch is loc- ated …
9 Wafer change system
9.1 Magazine lift
Service Manual SIPLACE Wafer System (SWS) 11/2018 197
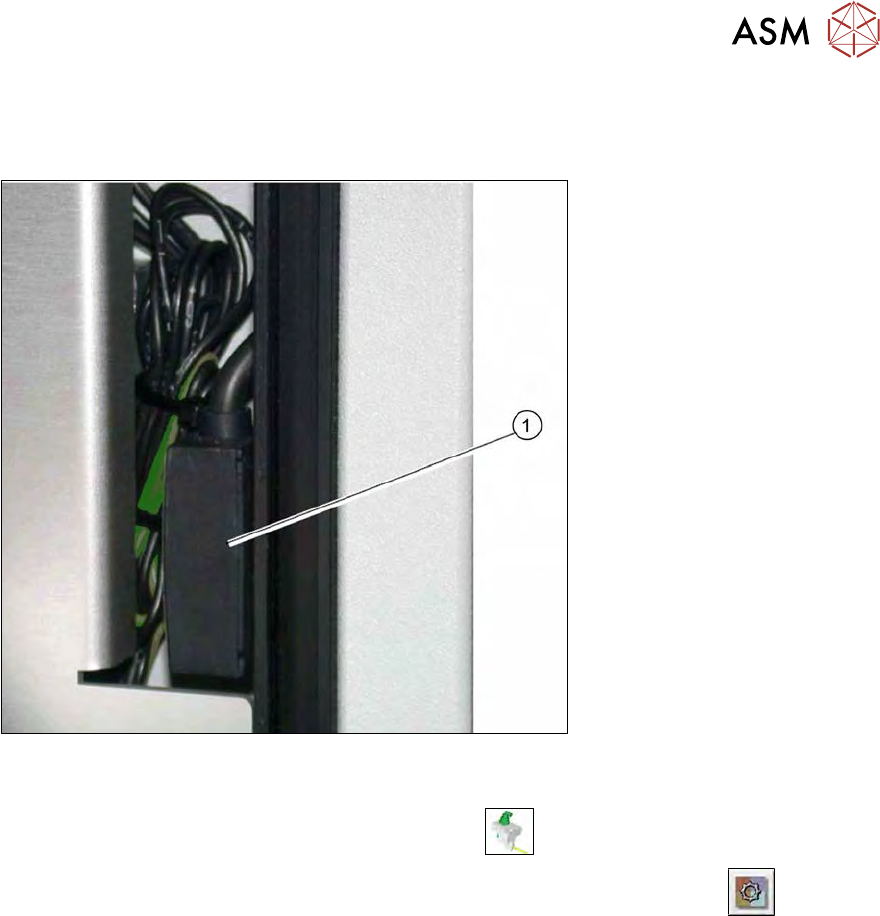
9.1.1.6 Cover switch
The cover switch checks whether the wafer lift cover is closed. The cover switch is located on the
right side of the wafer lift.
Fig.256: Cover switch on the magazine lift
► Check the input signals for the proximity switch.
► In the toolbar, select the button Manual Settings
.
► Go to the Manual Settings view and select the button Manual Subsystems
and then
select IOs (see 14.2 "Manual settings" [}358]).
► Select the Wafer Changertab .
ð The display shines:
– DI27 Wafer lift hood: closed
The connection cables are run to the protective contactor combination and connected there (see
9.1.2 "Electrical system" [}200]).
9 Wafer change system
9.1 Magazine lift
198 Service Manual SIPLACE Wafer System (SWS) 11/2018
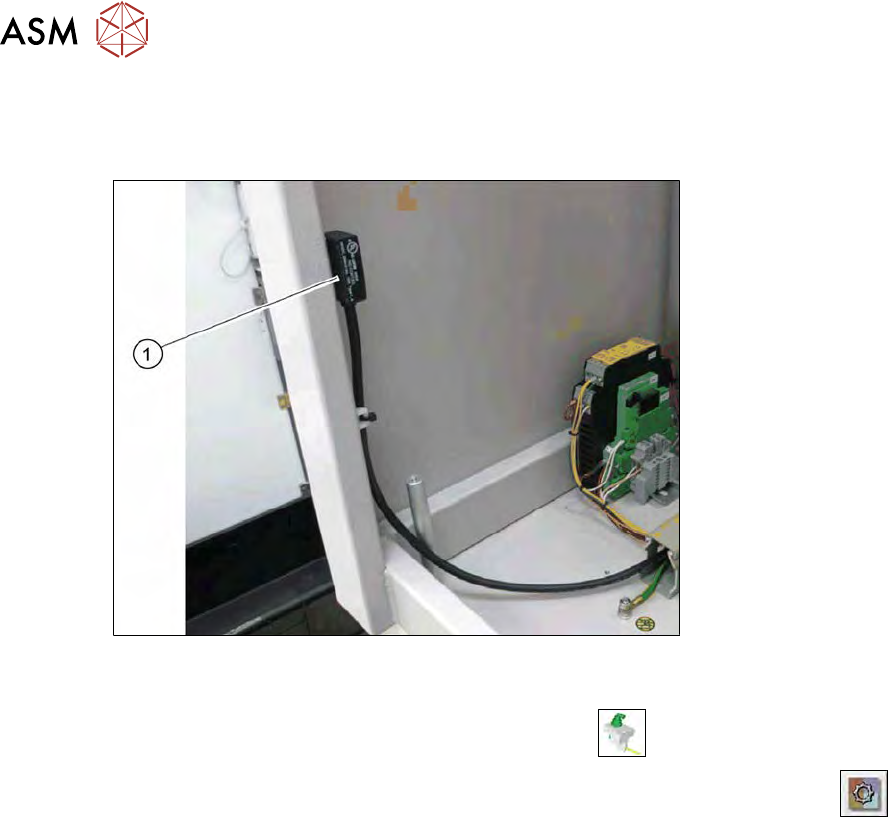
9.1.1.7 Door switch
The door switch checks whether the supply door for the wafer lift is closed. The door switch is loc-
ated on the left side of the wafer lift.
Fig.257: Door switch on the magazine lift
► Check the input signals for the proximity switch.
► In the toolbar, select the button Manual Settings
.
► Go to the Manual Settings view and select the button Manual Subsystems
and then
select IOs (see 14.2 "Manual settings" [}358]).
► → Select the Wafer Changer tab.
ð The display shines:
– DI27 Wafer lift hood: closed
The connection cables are run to the protective contactor combination and connected there (see
9.1.2 "Electrical system" [}200]).
9 Wafer change system
9.1 Magazine lift
Service Manual SIPLACE Wafer System (SWS) 11/2018 199
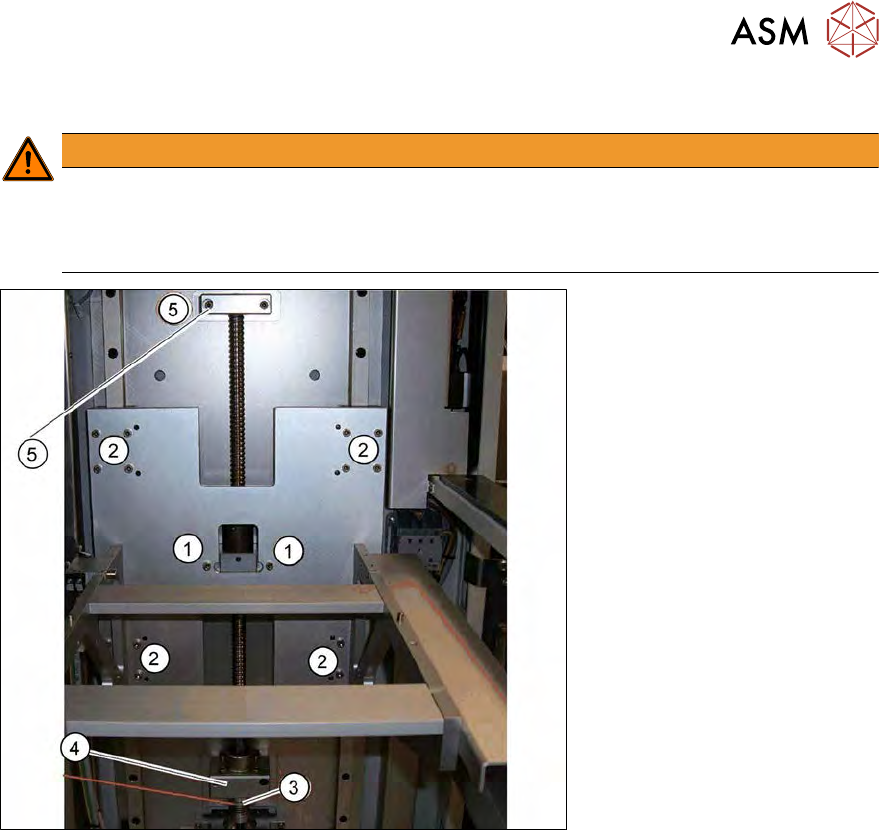
9.1.1.8 Wafer lift - replacing the recirculating ball screw
WARNING
Only for experienced service technical from ASM Assembly Systems GmbH & Co.KG
Replacement of the recirculating ball screw and the corresponding settings required may
only be performed by experienced service technicians from ASM Assembly Systems GmbH
& Co.KG.
Fig.258: Wafer lift - replacing the recirculating ball screw
► Remove both screws (1).
► Remove the sixteen screws (2) and then remove the unit. The unit is fitted to the Passstifte.
► Remove the screw on the coupling (3).
► Remove the two screws on the fixed bearing part (4).
► Remove the two screws on the top spindle bearing (5) and then remove the recirculating ball
screw.
► Tighten the clamping screw for the coupling with a torque of 1.0 Nm.