00195982-03_SM_SWS_EN.pdf - 第302页
12 Wafer stretcher 12.6 Fitting the wafer stretcher 302 Service Manual SIPLACE Wafer System (SWS) 11/2018 12.6.4 Fitting the cover plate and the downholder plates Fig.432: ► Position the wafer stretcher towards the wafe…
12 Wafer stretcher
12.6 Fitting the wafer stretcher
Service Manual SIPLACE Wafer System (SWS) 11/2018 301
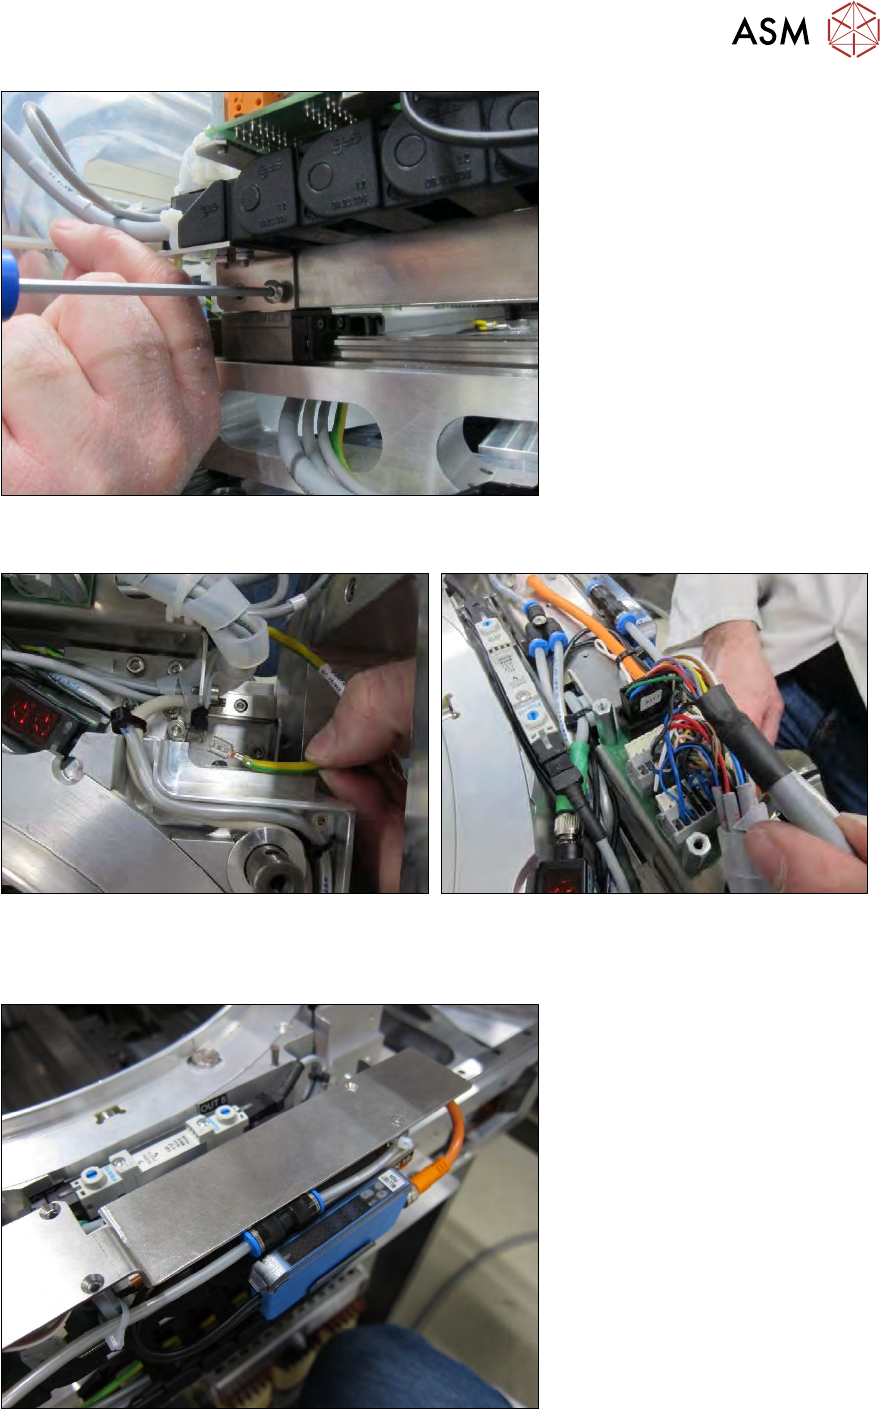
Fig.429:
► Fit the cable duct with the two pan-head screws.
Fig.430:
► Connect the ground cable.
► Connect connector X11.
Fig.431:
► Fit the cover plate with the six screws.
Run the pneumatic connection as shown in the diagram.
12 Wafer stretcher
12.6 Fitting the wafer stretcher
302 Service Manual SIPLACE Wafer System (SWS) 11/2018
12.6.4 Fitting the cover plate and the downholder plates
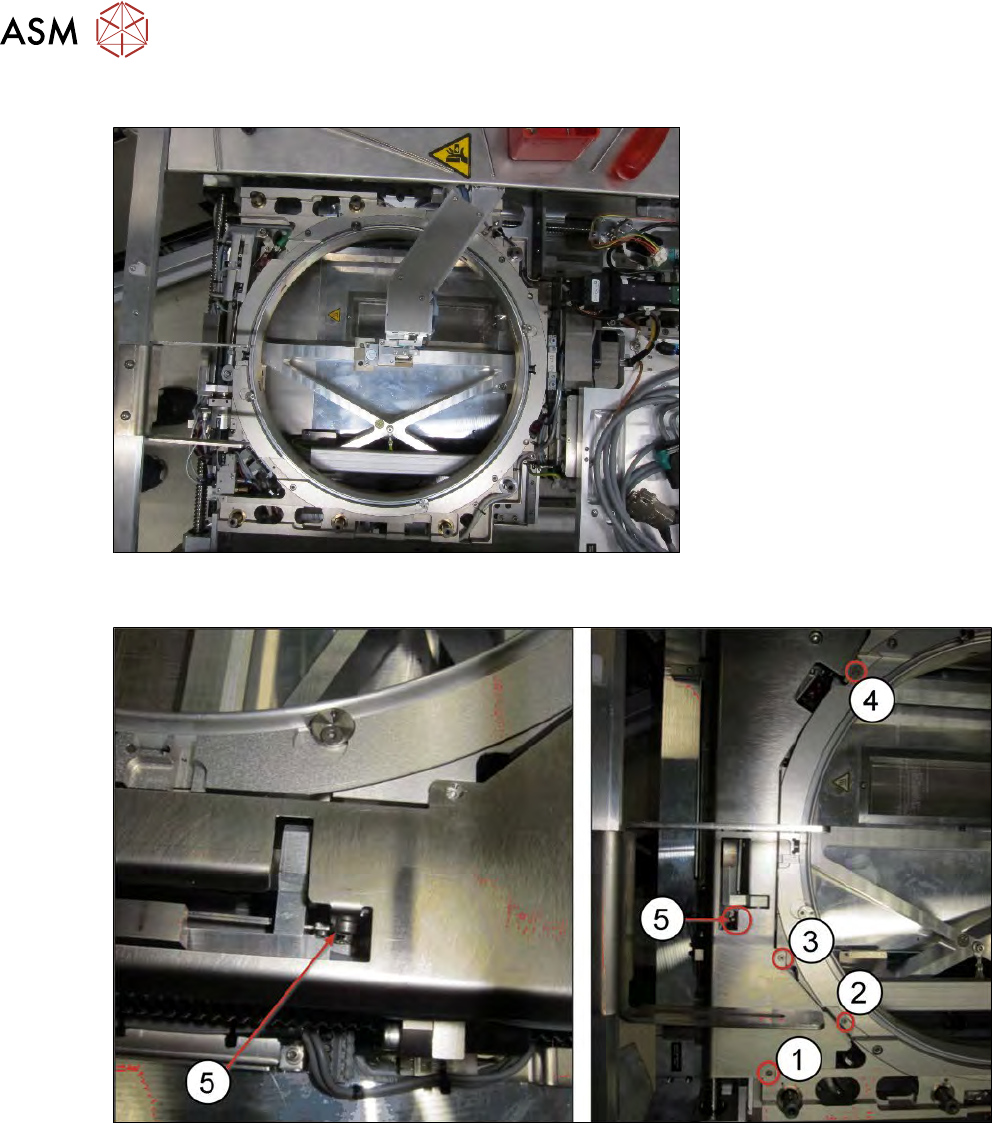
Fig.432:
► Position the wafer stretcher towards the wafer lift side.
Fig.433:
► Fit the cover plate with the four Phillips screws (1) to (4) and the Allen screws to the clamping
cylinder (5).
12 Wafer stretcher
12.6 Fitting the wafer stretcher
Service Manual SIPLACE Wafer System (SWS) 11/2018 303
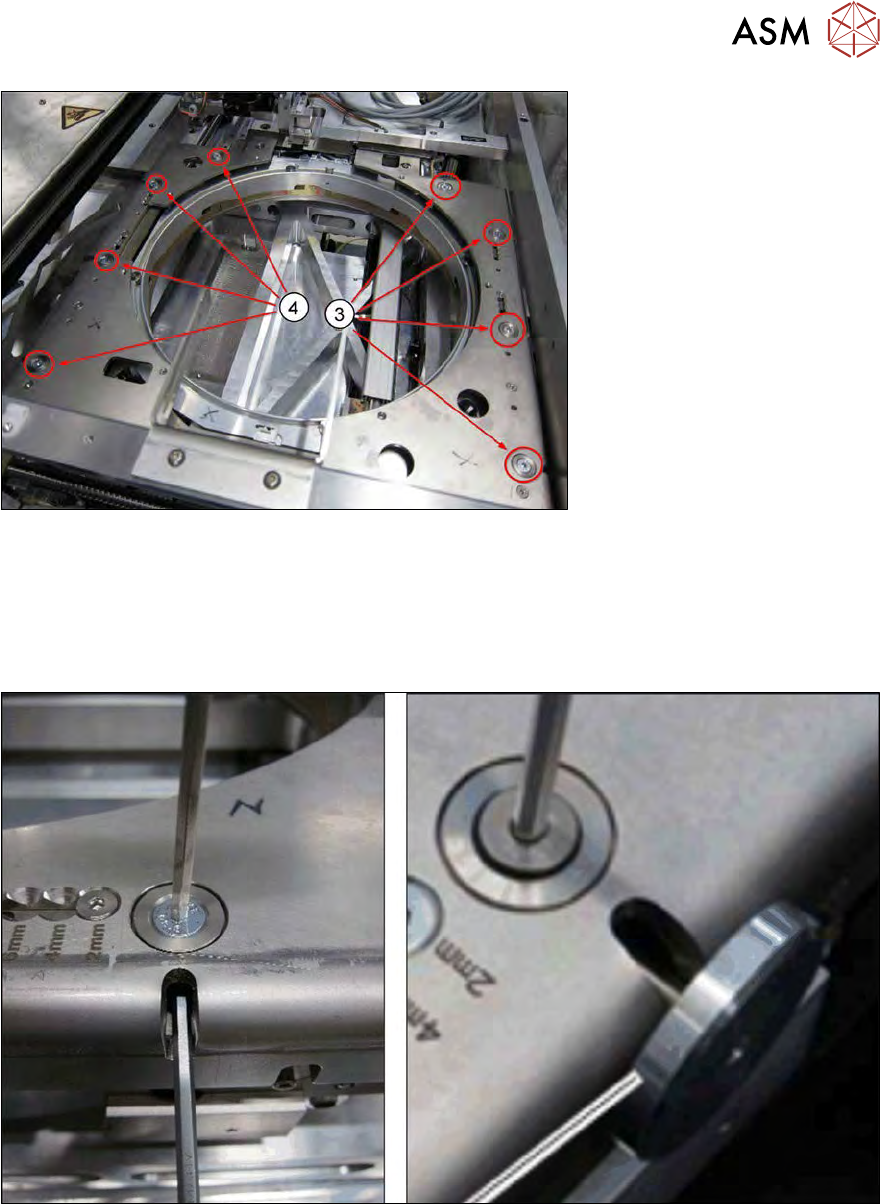
Fig.434:
► Now fit the left (3) and right downholder plates (4) with the four screws in each case, including
the conical fixing disk.
First only tighten the screws slightly.
► Align the downholder plates.
Tighten the screws as follows:
Fig.435:
► Use the mushroom-shaped tool or an Allen key for tightening, to stop the lifting piston turning.