00195982-03_SM_SWS_EN.pdf - 第163页
7 Die ejector 7.5 Mechanical adjustment of the die ejector unit in the Z direction (focus) Service Manual SIPLACE Wafer System (SWS) 11/2018 163 Fig.210: ► Loosen or remove the grub screw (1) (Allen key 1.5) fixing the …
7 Die ejector
7.5 Mechanical adjustment of the die ejector unit in the Z direction (focus)
162 Service Manual SIPLACE Wafer System (SWS) 11/2018
7.5.1.5 Replacing the sealing unit and the O-ring on the die ejector centering unit
The following description is explained using the new needle ejector unit (magnetic). The procedure
is identical for the needle ejector unit with the bayonet fastening.
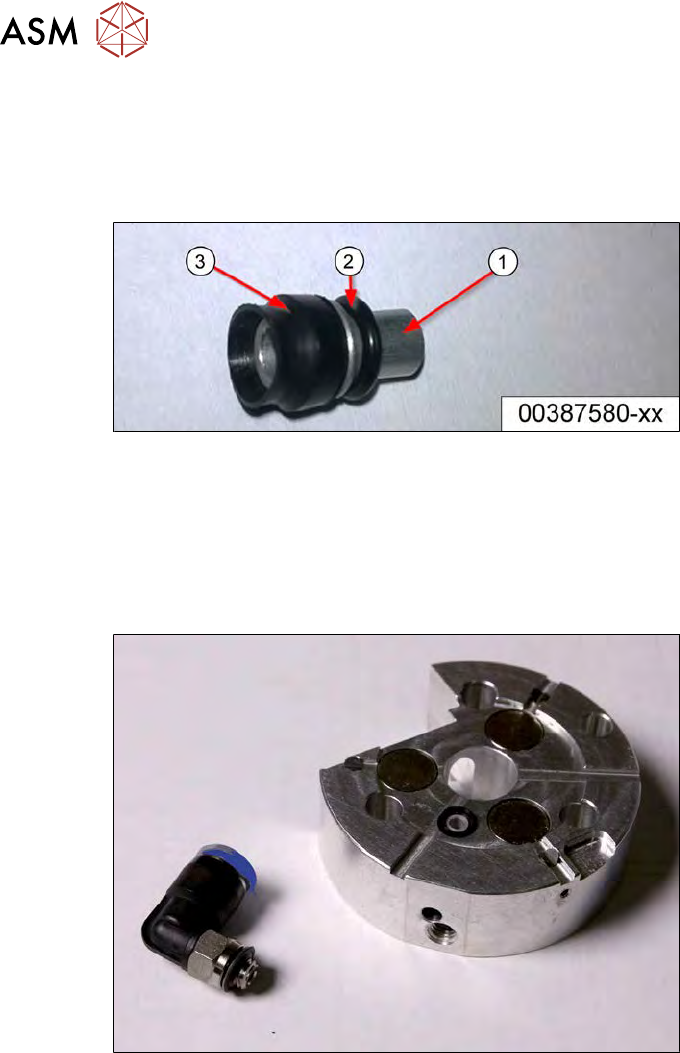
Parts
Fig.208:
The following spare parts are available:
●
[00387580-xx] Sealing unit
(suction adapter (1) incl. vacuum suction unit (2) and O-ring (3) prefitted)
●
[00201141-xx] O-ring 3*1 NBR 70 B (defined as maintenance/wear part)
Procedure
Fig.209:
► Remove the pneumatic connection using a fork wrench. Pay attention to the seals.
7 Die ejector
7.5 Mechanical adjustment of the die ejector unit in the Z direction (focus)
Service Manual SIPLACE Wafer System (SWS) 11/2018 163
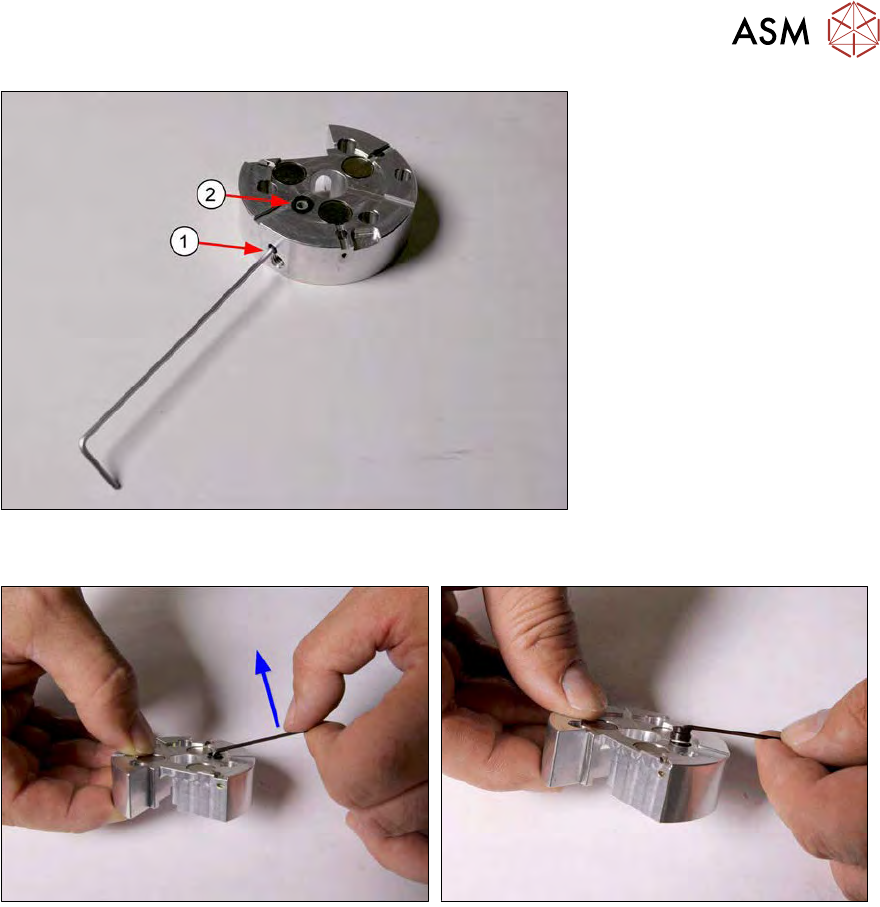
Fig.210:
► Loosen or remove the grub screw (1) (Allen key 1.5) fixing the sealing unit(2).
Fig.211:
► Pull the sealing unit up and out.
If it is not possible to pull the sealing unit out, clamp a small Allen key into the sealing unit
drilled hole and try to pull it up.
► It should then be possible to remove the sealing unit.
► Take the new compete sealing unit and grease the O-ring with UNISILCON L250L (thin layer
of lubricant).
7 Die ejector
7.5 Mechanical adjustment of the die ejector unit in the Z direction (focus)
164 Service Manual SIPLACE Wafer System (SWS) 11/2018
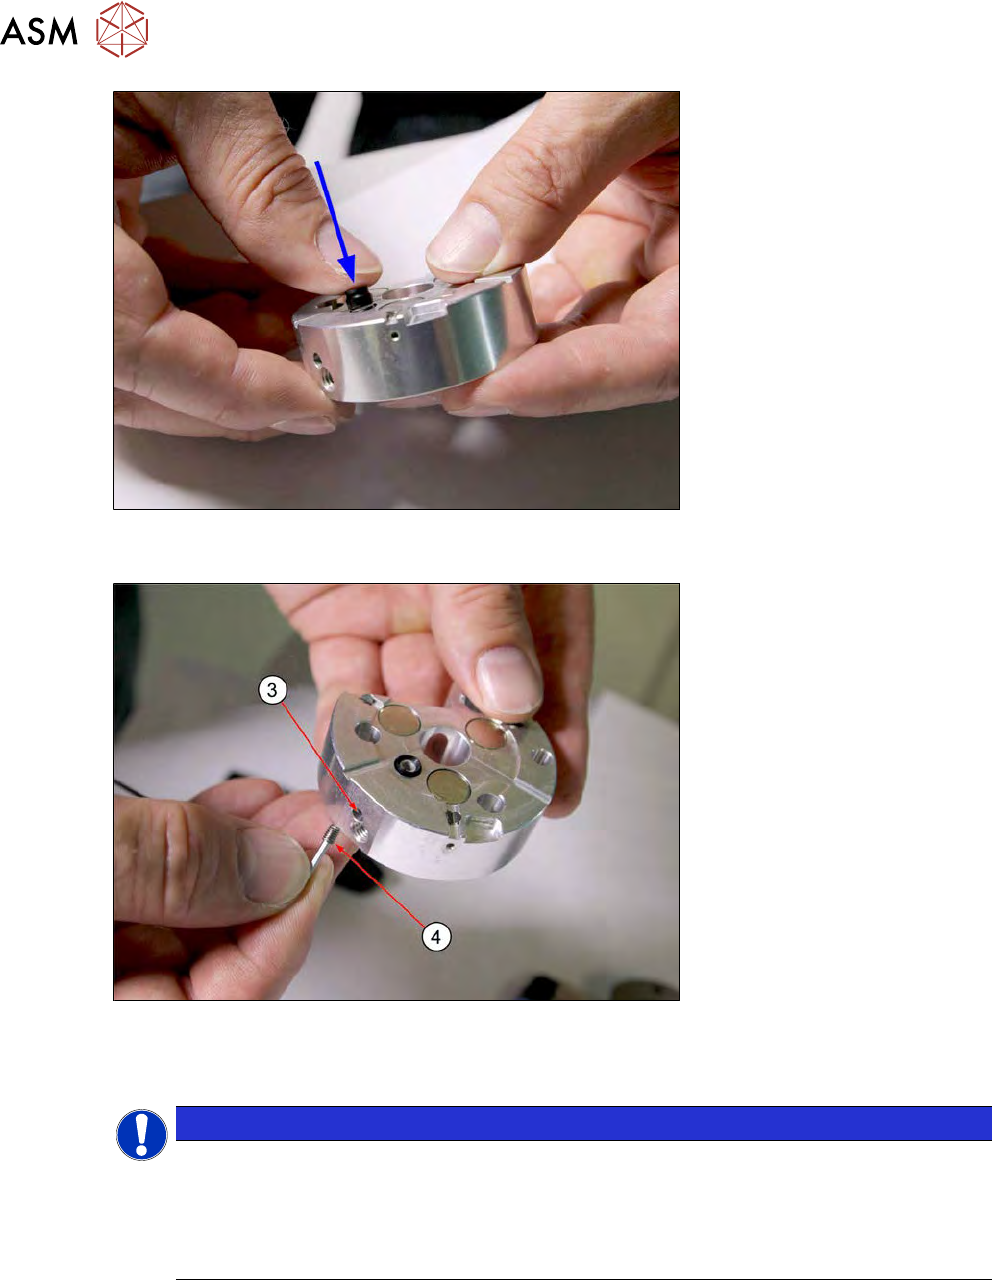
Fig.212:
► Place the new sealing unit incl. O-ring into place and push down as far as the stop.
Fig.213:
► Screw the grub screw (4) into the threaded hole provided (3) and fix the sealing unit into place
(tighten with care).
NOTICE
Old needle ejector unit with bayonet fastening
► If the side Allen screw on the centering unit is difficult to access, you may need to
remove the four screws fastening the lock ring and remove this ring.
► Place the lock ring back and fix into place, before tightening the Allen screw on the
side.
► Complete the die ejector.