00195982-03_SM_SWS_EN.pdf - 第296页
12 Wafer stretcher 12.6 Fitting the wafer stretcher 296 Service Manual SIPLACE Wafer System (SWS) 11/2018 Fig.419: ► Roll out the cable chain and fix into place with the cables to an upper assembly. This makes it easier…
12 Wafer stretcher
12.6 Fitting the wafer stretcher
Service Manual SIPLACE Wafer System (SWS) 11/2018 295
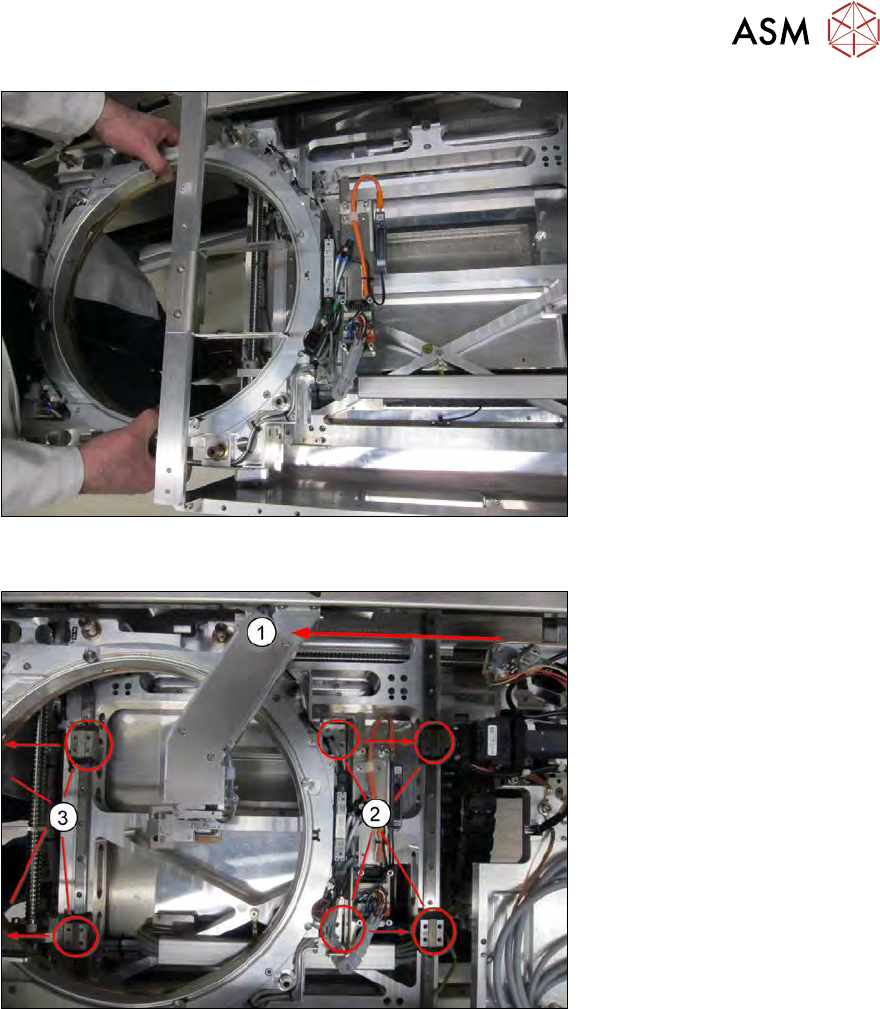
Fig.417:
► Now carefully lift the wafer stretcher onto the X/Y table.
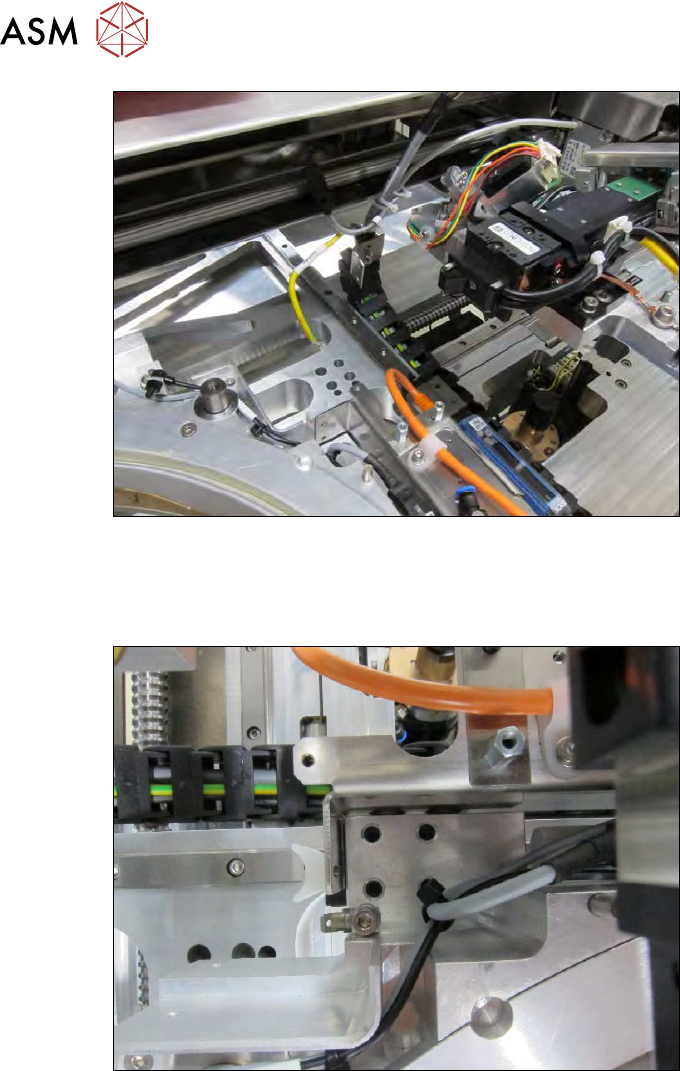
Fig.418:
► Place the wafer stretcher about 2/3 onto the X/Y table.
► Pull the wafer changer (gripper) into the middle of the wafer stretcher (1).
► Align the guide trolleys to the fastening holes in the wafer stretcher (2 and 3).
12 Wafer stretcher
12.6 Fitting the wafer stretcher
296 Service Manual SIPLACE Wafer System (SWS) 11/2018
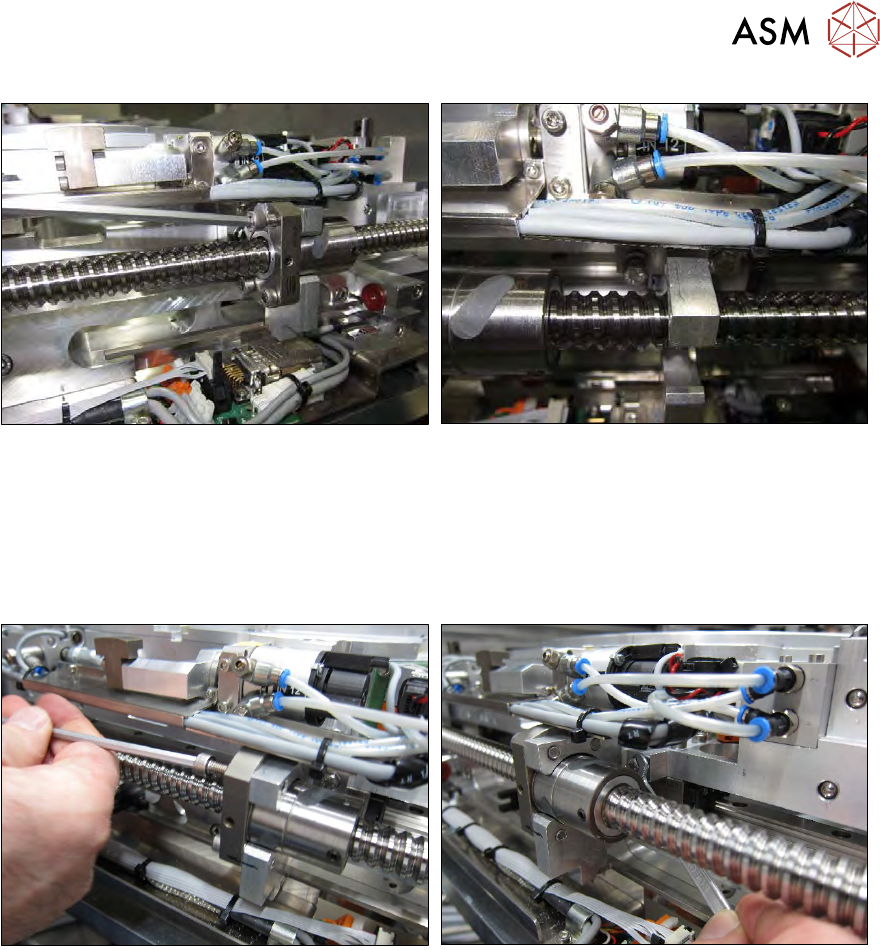
Fig.419:
► Roll out the cable chain and fix into place with the cables to an upper assembly.
This makes it easier to fit the wafer stretcher onto the guide trolleys, as you do not need to lift it
over the rolled-up cable chain.
Fig.420:
► Now carefully lift the wafer stretcher onto the four guide trolleys.
► Position the four guide trolleys so that the fastening holes in the wafer stretcher are in a line
with the threaded holes in the guide trolleys.
► Screw all four guide trolleys tightly into place.
You now need to establish the connection between the wafer stretcher and the drive spindle in the
X direction as follows:
12 Wafer stretcher
12.6 Fitting the wafer stretcher
Service Manual SIPLACE Wafer System (SWS) 11/2018 297
Fig.421:
The X axis spindles are located on the wafer lift side.
► Remove the four Allen screws from the spindle nut from the drive block.
► Disconnect the drive block from the spindle nut.
► Fasten the drive block to the threaded holes provided and hand-tighten the two hexagonal
screws.
Fig.422:
► Move the drive block and the wafer stretcher assembly to the spindle nut and screw the unit
into place with the four Allen screws.
► Tighten the two hexagonal screws.
ð The connection between the wafer stretcher and the X axis spindle has now been estab-
lished!
Next, fit the two lifting cylinders for the stretcher movement as follows: