00195982-03_SM_SWS_EN.pdf - 第78页
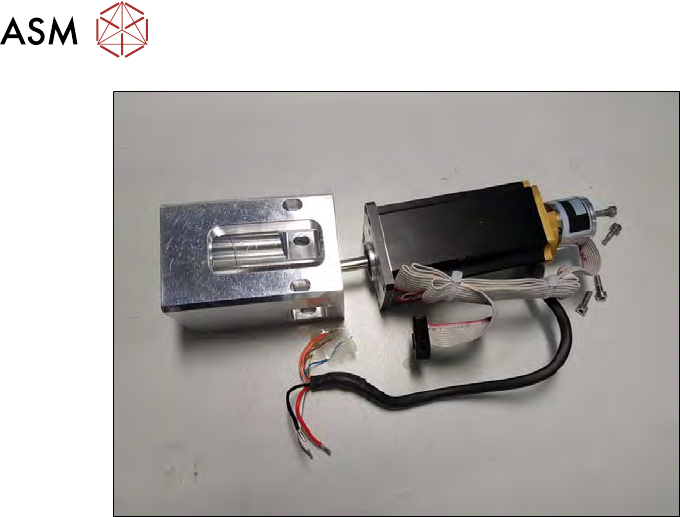
5 Basic frame – X/Y unit 5.3 Replacing parts 78 Service Manual SIPLACE Wafer System (SWS) 11/2018 Fig.61: The Y motor and coupling plate are now separate. Pay attention to the position.
5 Basic frame – X/Y unit
5.3 Replacing parts
Service Manual SIPLACE Wafer System (SWS) 11/2018 77
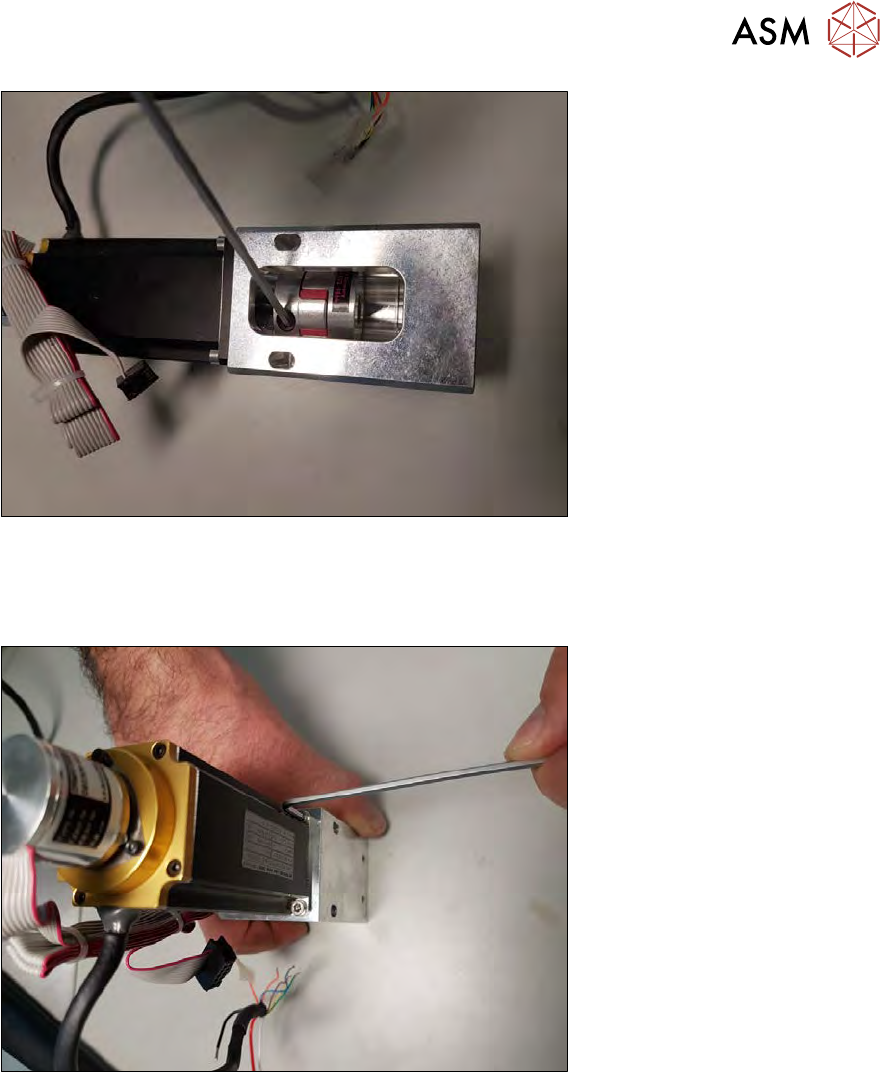
Fig.59:
► Remove the coupling clamping screw for the motor shaft.
You might need to widen the coupling clamp with a screwdriver.
► Pull the coupling off the motor shaft.
Fig.60:
► Remove the four screws fastening the motor to the coupling plate.
5 Basic frame – X/Y unit
5.3 Replacing parts
78 Service Manual SIPLACE Wafer System (SWS) 11/2018
Fig.61:
The Y motor and coupling plate are now separate.
Pay attention to the position.
5 Basic frame – X/Y unit
5.3 Replacing parts
Service Manual SIPLACE Wafer System (SWS) 11/2018 79
5.3.1.2 Removing the Y motor (alternative, without coupling)
Special tool
●
T Allen key 2.5mm (not contained in the standard set of tools)
Procedure
The motor can, in certain circumstances, be replaced more easily. To do so, proceed as follows:
► Unplug the cable connections from the adapter board.
► Remove the coupling clamping screw for the motor shaft.
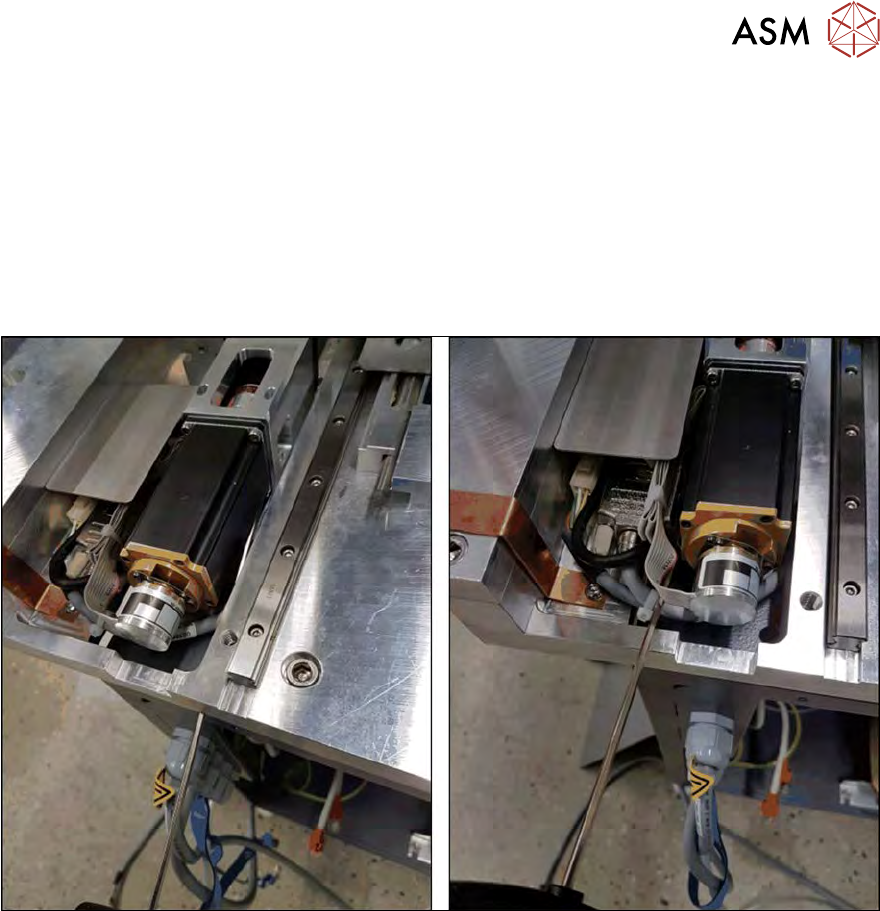
Fig.62:
► Take a long T Allen key and open the four screws fastening the motor on the coupling plate!
The access to the two lower screws could vary (e.g. underneath the base plate).
► Remove the motor!