00195982-03_SM_SWS_EN.pdf - 第121页
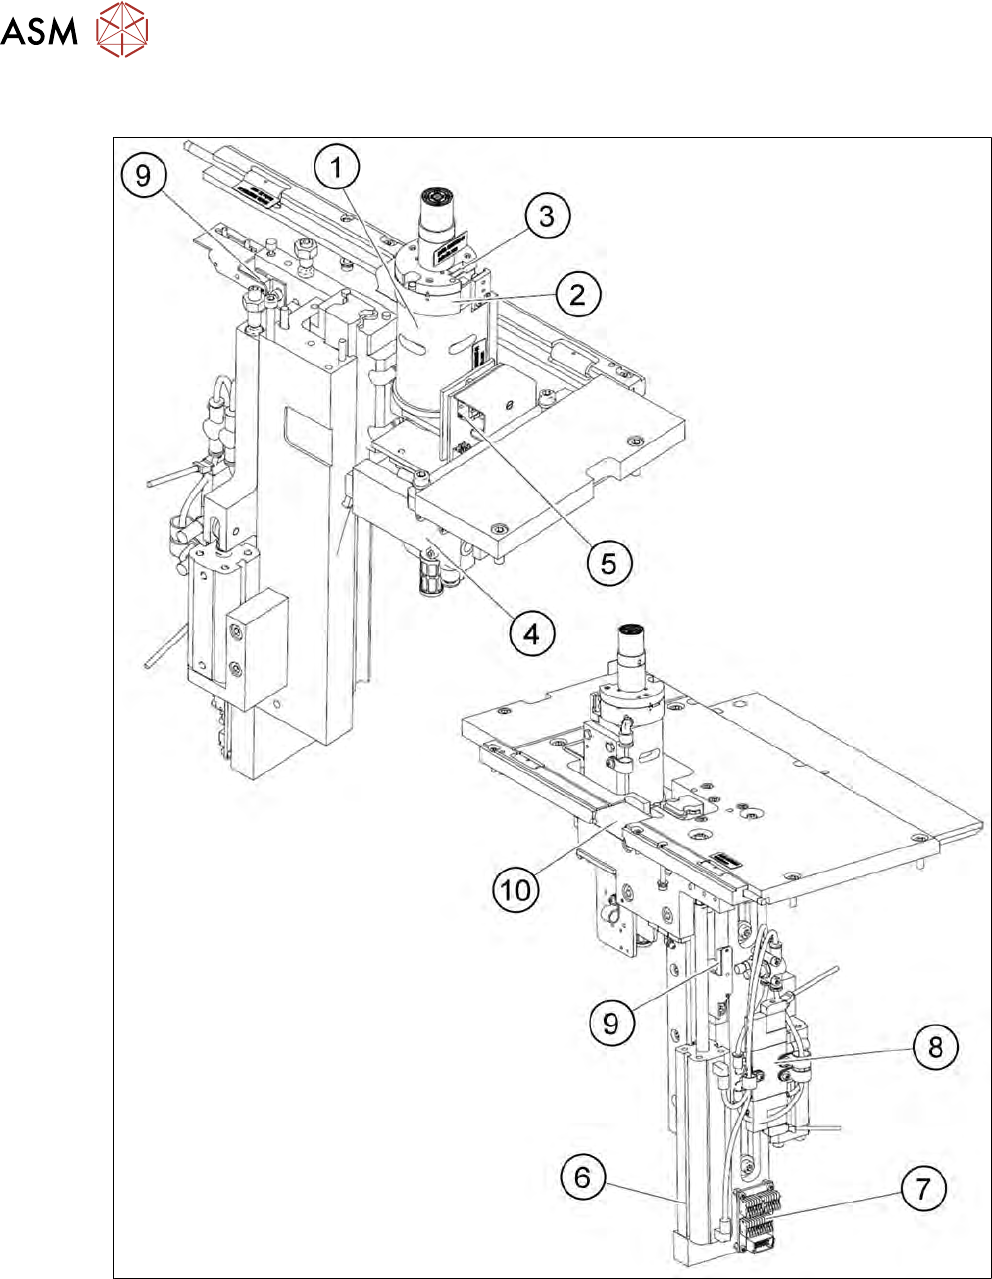
7 Die ejector 7.3 Replacing spare parts Service Manual SIPLACE Wafer System (SWS) 11/2018 121 Item Item no. Spare part 1 03098367-xx 03098236-xx Z axis die ejector (2/4), magnetic Z axis die ejector (1/3), magnetic 2 003…
7 Die ejector
7.2 Overview of spare parts
120 Service Manual SIPLACE Wafer System (SWS) 11/2018
7.2 Overview of spare parts
Fig.133: Die ejector from front and back
7 Die ejector
7.3 Replacing spare parts
Service Manual SIPLACE Wafer System (SWS) 11/2018 121
Item Item no. Spare part
1 03098367-xx
03098236-xx
Z axis die ejector (2/4), magnetic
Z axis die ejector (1/3), magnetic
2 00385741-xx Dual light barrier board 27.5 x14mm
3 00387580-xx Sealing unit
4 03050539-xx Solenoid valve MHE3-M1H-3/2G-1/8
5 00384600-xx AD-MOT Rev.0 Sub-D board = angled
6 03027512-xx Proximity switch SME-8F-DS-24V-K2.5-OE
7 00386142-xx AD board 12-pin connector pin strip 55x35mm MS-E543
8 03075723-xx Solenoid valve CPE10
9 00385053-xx Proximity switch NBN4-F29-E2
00201141-xx O-Ring 3x1mm
10 00387919-xx Omega spring
7.3 Replacing spare parts
7.3.1 Preparatory tasks
To remove the complete die ejector unit from the SWS, proceed as follows:
► Remove the ejection system.
See 7.6 "Converting the bayonet needle ejector unit (old version) to the magnetic needle
ejector unit (current version)" [}168]
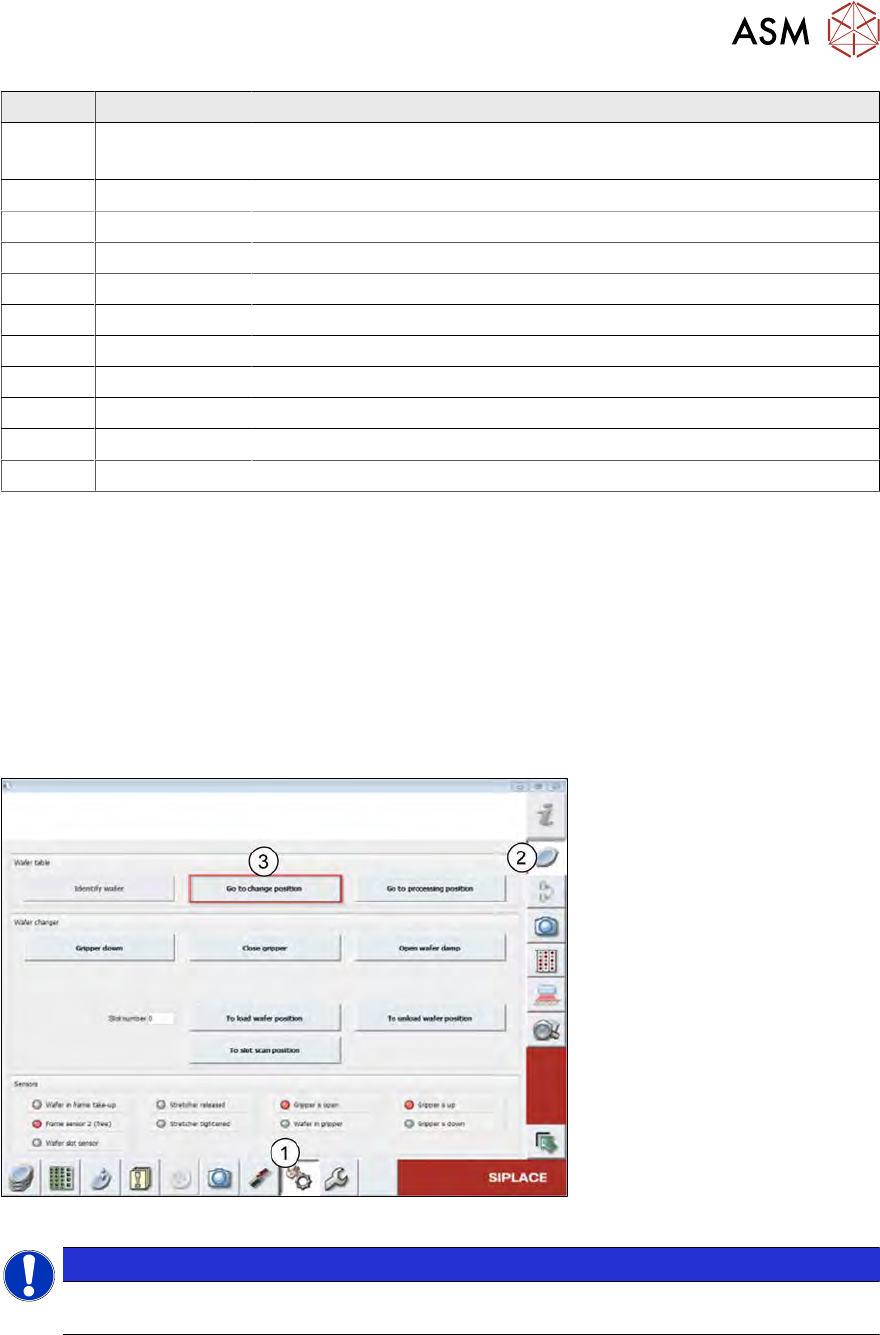
► Move the wafer table to the change position so that you have access to the base plate of the
die ejector.
Fig.134:
NOTICE
The wafer table should, if possible, be moved with the software (see diagram). This is the
only guarantee that the die ejector is then in a low and secure position.
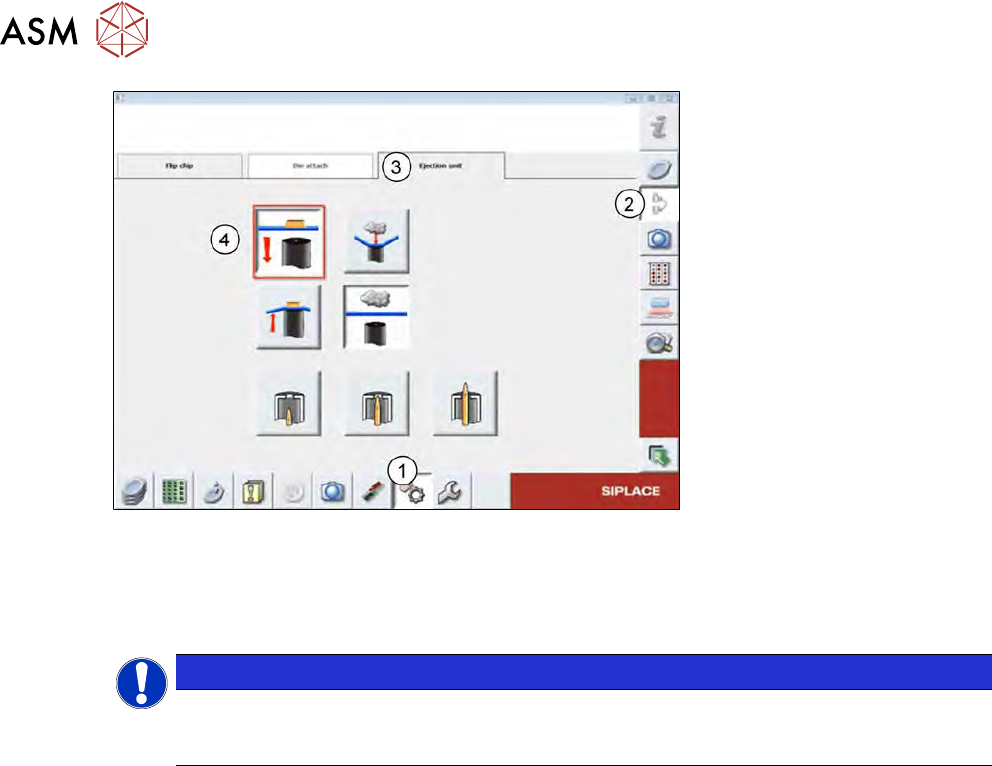
► However, if the die ejector is in the top position, it will need to be moved with the software to
the secure, lower position:
7 Die ejector
7.3 Replacing spare parts
122 Service Manual SIPLACE Wafer System (SWS) 11/2018
Fig.135:
► Shut down the SWS software.
► Switch off the SWS on main switch.
► Dismantle and remove the SWS (see 4.1 "Removing the SWS" [}59]).
NOTICE
► If, after removal of the SWS from the CA machine, you still find that the die ejector is
in the "top" position, read this section 17.1 "Moving the Z axis for die ejector down-
wards in the switched off and removed SWS" [}471]).
7.3.2 Removing the complete die ejector unit from the SWS
Necessary tools
●
Standard hexagonal screwdriver set
●
T Allen key, size 5
●
Small screwdriver
Preconditions
●
SWS removed from machine-
●
SWS disconnected from the power supply