RS-1_instruction manual.pdf - 第110页
Part 1 B asic O peration Chapter 1 Overv iew of the Machine 1- 92 Remov ing the hard ware in safety This is the fun ction for re m oving a dev ice connected t o the USB connect or in safety . A removal err or may occ ur …
Part 1 Basic Operation Chapter 1 Overview of the Machine
1-91
File Management
This command uses the Explorer function of Windows to handle a file.
This command allows you to create/delete a folder or create/delete a file.
1) Starting up Explorer
Press the “Startup” button from the main menu, and then the [File Management (Explorer)]
command to start up Explorer.
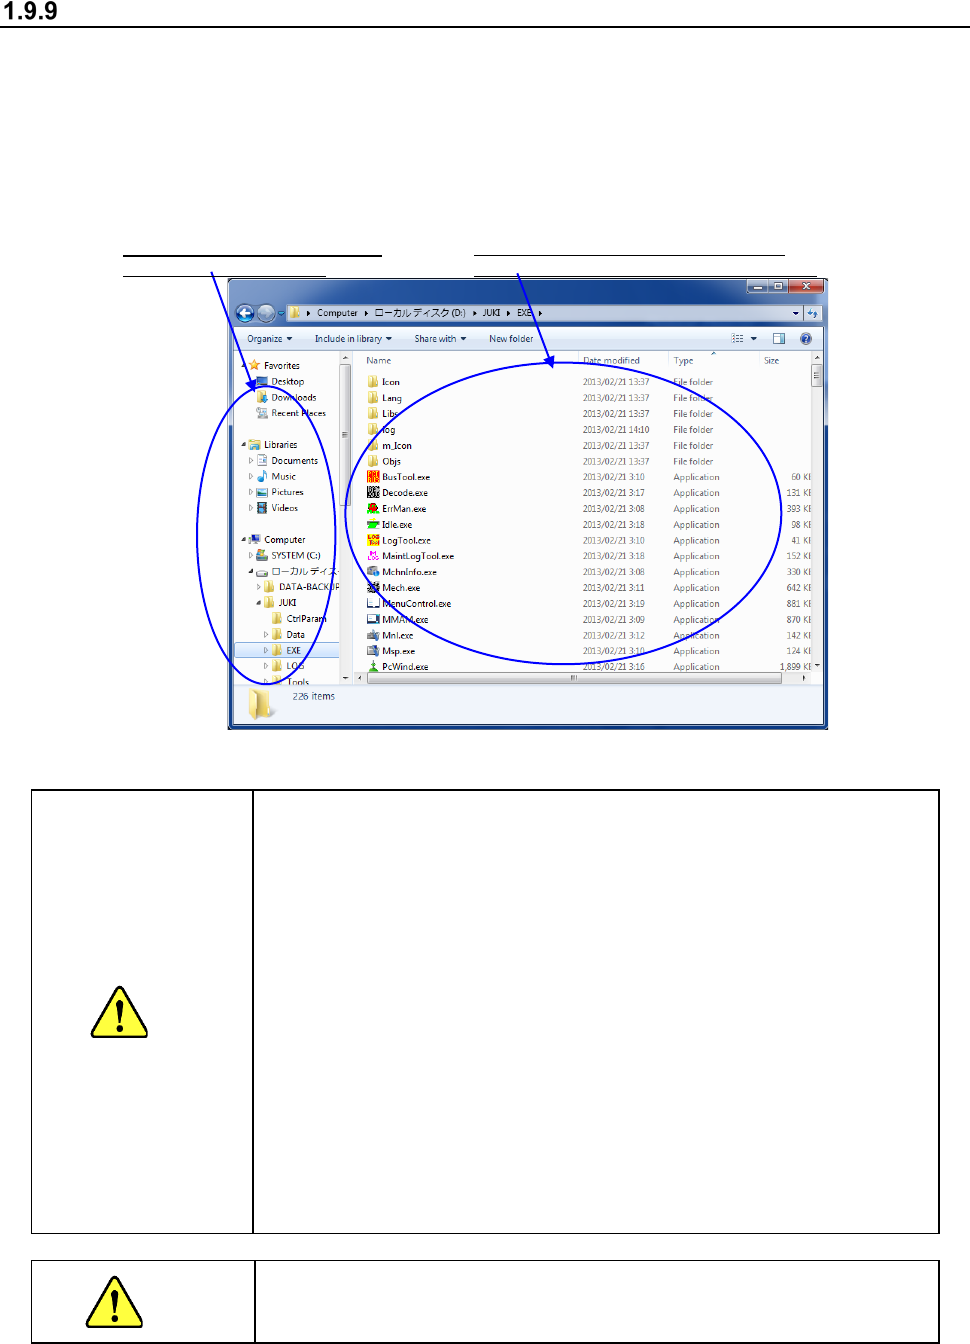
2) Explorer menu organization
Note: The Windows standard functions are used.
CAUTION
Do not create any folder on the drive C.
Since the drive C is set as ROM, a folder is erased at restart of
the machine even though you create it.
Do not save any file on the drive C.
When you try to save a file on the drive C that is created as ROM,
the save operation is emulated with the main memory.
Therefore, if you save a file on the drive C, the amount of the
used memory increases, and then it weighs down the system. If
you repeat saving files on the drive C, the amount of the memory
becomes insufficient, and the system displays the error. You
may have to restart the machine.
Explorer allows you to delete or move a file other than a
production program. However, if you delete or move a file other
than a production program, you may not be able to restart the
machine. Never delete nor move files other than those in the
PRG folder.
If you change the extension of a production program, the
machine cannot recognize the production program. Never
change the extension of any production program.
WARNING
Never delete or move folders other than a folder you created to save a
production program. If you delete or move any folder, the system
may not start up or be out of control.
The contents of the folder
selected on
the
left side are displayed on the right side.
The hierarchical organization is
displayed on the left side.
Part 1 Basic Operation Chapter 1 Overview of the Machine
1-92
Removing the hardware in safety
This is the function for removing a device connected to the USB connector in safety.
A removal error may occur at a USB memory device. Even in such a case, you can remove the
device unless any file is not being read or written. When the USB memory device is equipped with
the access lamp, check the access lamp to make sure that the device is not being accessed before
removing the device.
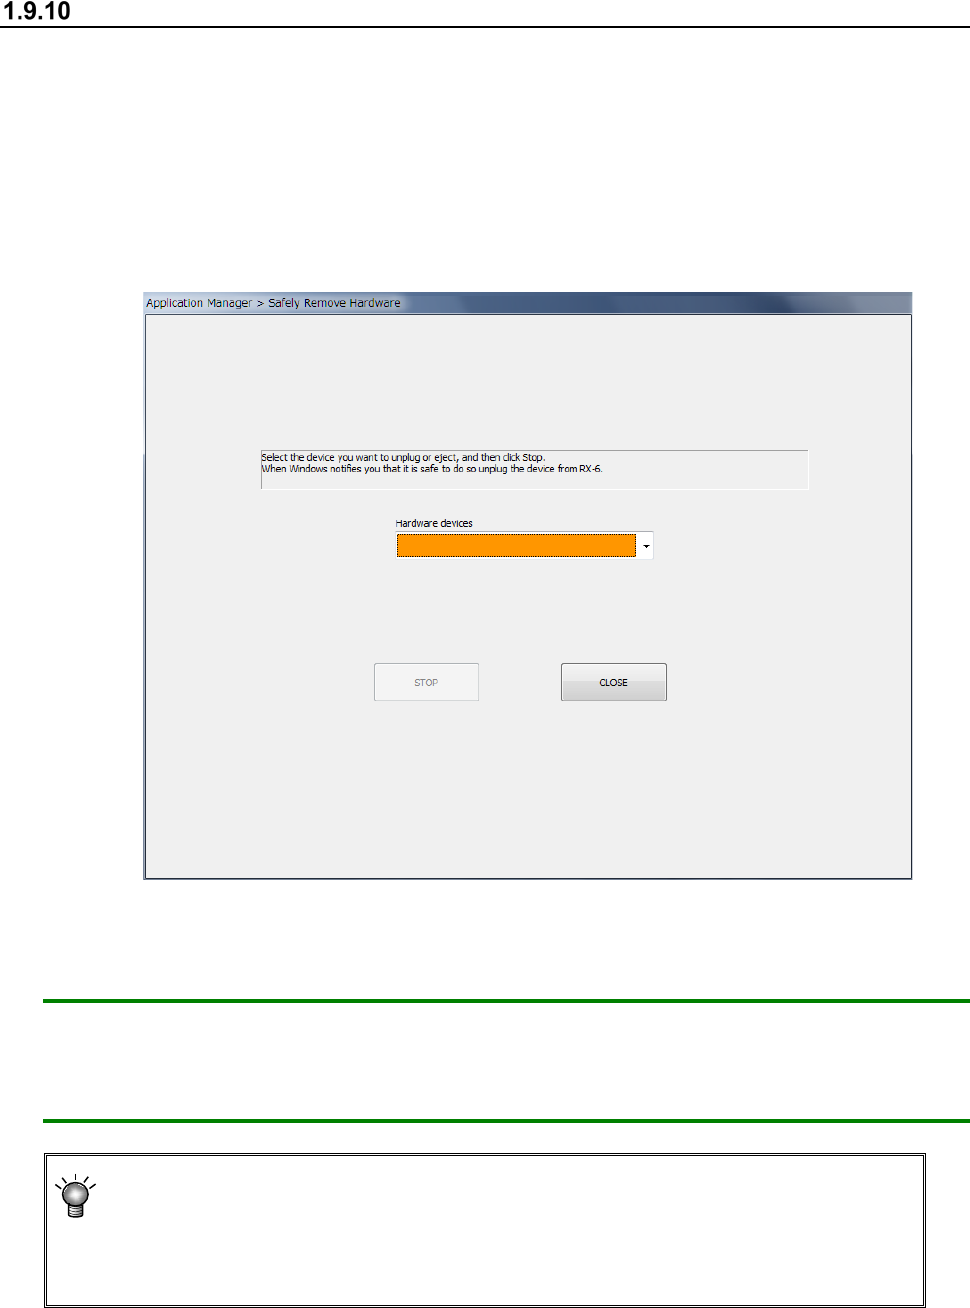
(1) Select the [Safely Remove Hardware] command from the “Startup” menu.
The following “Safely Remove Hardware” dialog box appears on the screen.
(2) Click the <Stop> button.
The system allows you to remove the device in safety automatically.
CAUTION: When you want to remove a device connected to the USB connector although the
machine is turned on, be sure to stop the function of the device on the “Safely
Remove Hardware” dialog box before removing it. (Do not connect any device to
the USB connector during PWB production.)
When you connect a device to the USB connector, the “Find new hardware” dialog
box may appear on the screen.
Although the system asks you to restart the machine depending on the device you
connected, you have to restart it only after updating the drive C (see Section 1.10).
Part 1 Basic Operation Chapter 1 Overview of the Machine
1-93
Updating the Drive C
The machine uses the Enhanced Write Filter (EWF) to create the drive C, which Windows uses as
ROM, in order to protect the OS.
Therefore, to change the information of the OS, update the dive C by following the instructions
below.
Be sure to perform this operation after you add the function requiring a driver such as a printer or
after you set up the network.
If you happen to turn off the machine even though you have not performed this operation, the
information you set is erased.
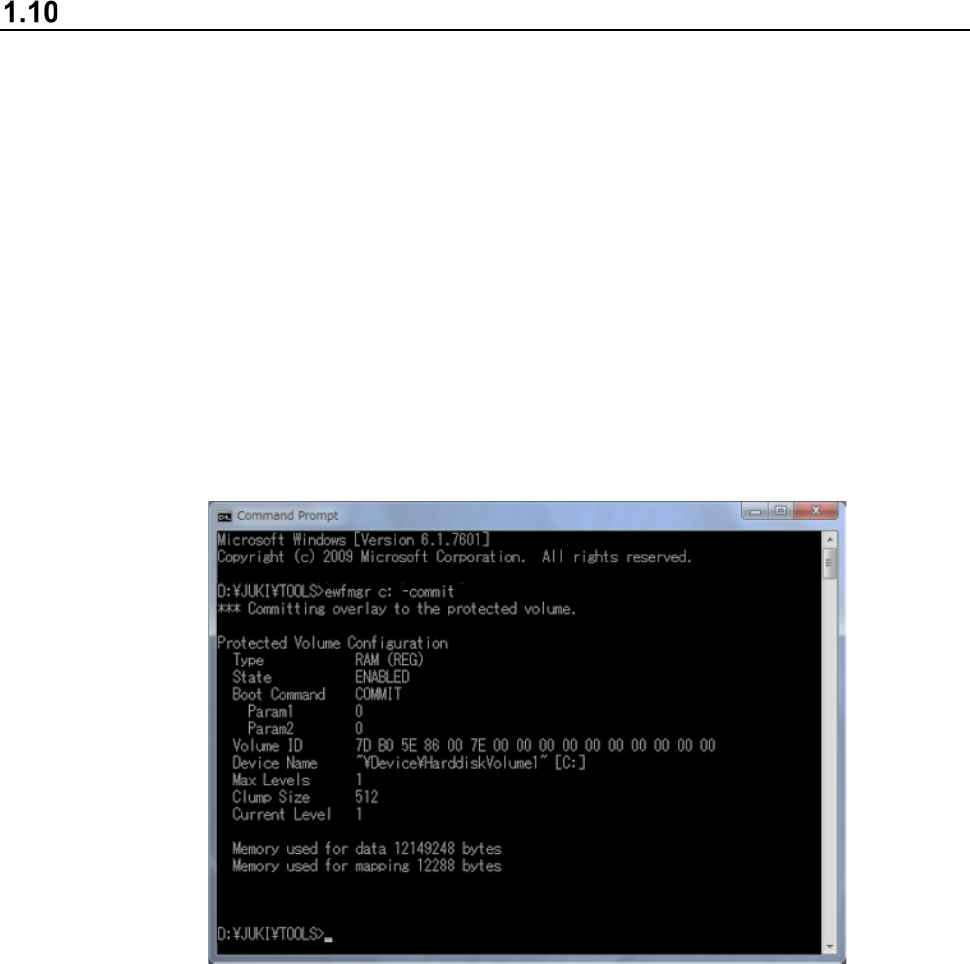
(1) Start up the command prompt.
(Start up the command prompt from Explorer, by executing
“C:¥Windows¥System32¥cmd.exe”).
(2) Enter “ewfmgr C: -commit” on the console window (DOS screen).
The screen like the one shown below appears.
(3) Shut down Windows, and then start up the machine again.
Information emulated with the main memory during the shutdown process is written onto the
drive C.