RS-1_instruction manual.pdf - 第789页
Part 2 D etaile d Descript ion of E ach Functi on Chapter 9 M anual Control 9- 17 9.4.1 .2 Control t ab: A uto w idth adjustment W hen you press t he < Aut o width contro l > button, the follow ing scree n appear s…
Part 2 Detailed Description of Each Function Chapter 9 Manual Control
9-16
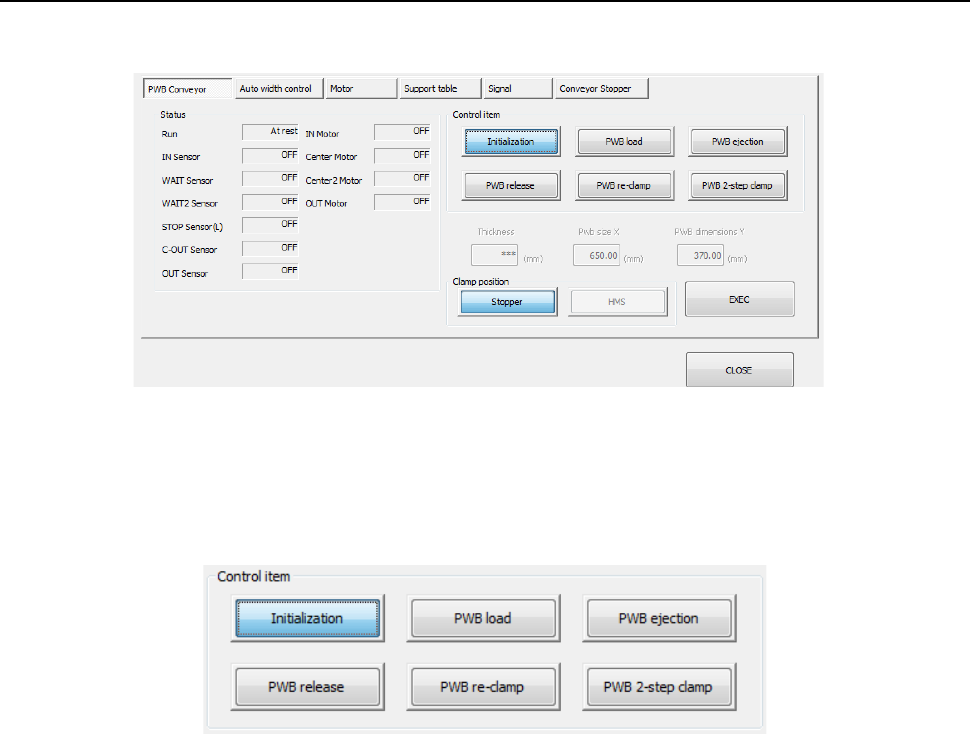
9.4.1.1 Control tab: PWB Conveyor
When the <PWB Conveyor> button is pressed, the following screen appears.
(1) Status
The status of each conveyor motor/sensor, ON or OFF, is displayed here.
(2) Control item
Select a control item by radio button.
When you press the <EXEC> button, control for the selected item is started.
1) Initialization
This button initializes the conveyor.
2) PWB load
A board is loaded according to the “Board stop setting” selected on the “PWB conveyor 2”
tab of the “PWB” data screen.
When a value set in the “Pwb size X” supports a long-sized board, you can select the
positon from which the board is loaded with each of the <Clamp position> buttons displayed
below.
3) PWB ejection
This button ejects a board.
4) PWB release
This button releases the clamped board.
5) PWB re-clamp
A board on the transfer path is clamped again according to the “Board stop setting” selected
on the “PWB conveyor 2” tab of the “PWB” data screen.
When a value set in the “Pwb size X” supports a long-sized board, you can select the
positon from which the board is re-clamped with each of the <Clamp position> buttons
displayed below.
6) PWB 2-step clamp
This button loads a board to the second clamping position of a long-size board.
This function cannot be used with a machine designed for an extra-large board.
Part 2 Detailed Description of Each Function Chapter 9 Manual Control
9-17
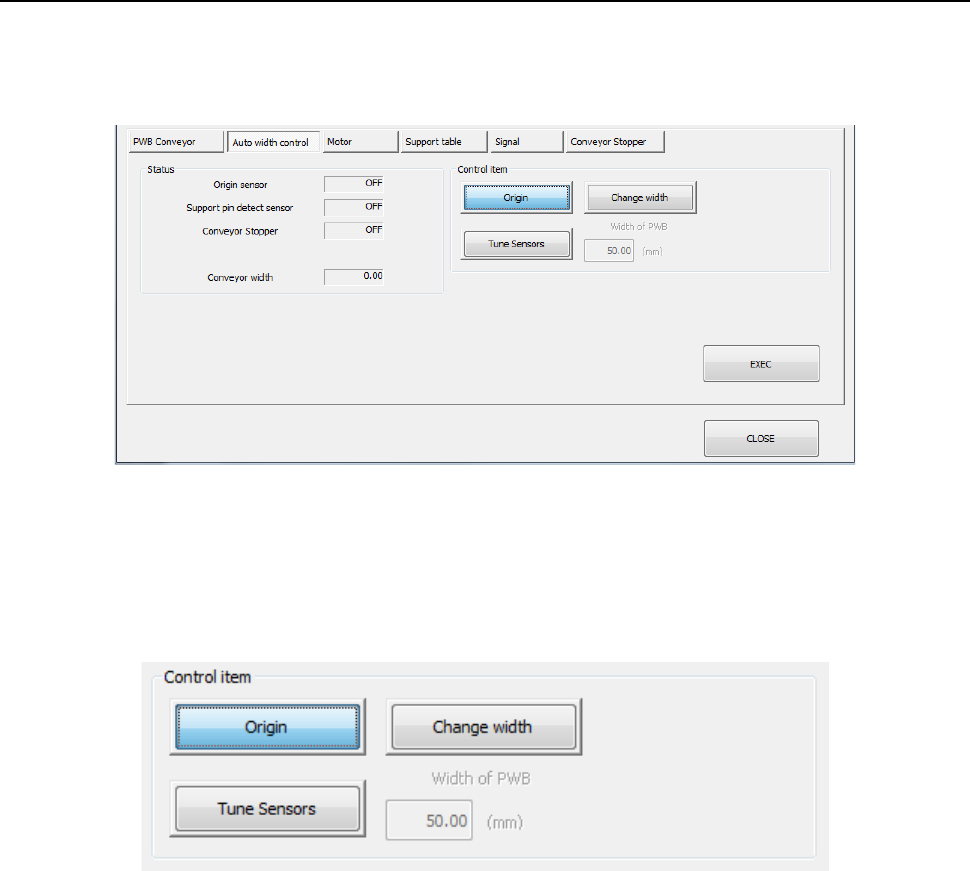
9.4.1.2 Control tab: Auto width adjustment
When you press the <Auto width control> button, the following screen appears.
- “Auto width control” tab
(1) Status
The status of each sensor and the PWB conveyor width are displayed.
(2) Control item
Select each control item by radio button.
When you press the <EXEC> button, control for the selected item is started.
1) Origin
The auto PWB width adjustment is put to the return-to-origin.
2) Change width
The conveyor width is changed into the value entered in the “PWB width” edit box.
3) Tune Sensors
Tuning of a sensor is performed.
* Only when the machine is equipped a conveyor sensor that has to be tuned, this control
item is displayed. Normally, tuning operation is automatically performed.
Part 2 Detailed Description of Each Function Chapter 9 Manual Control
9-18
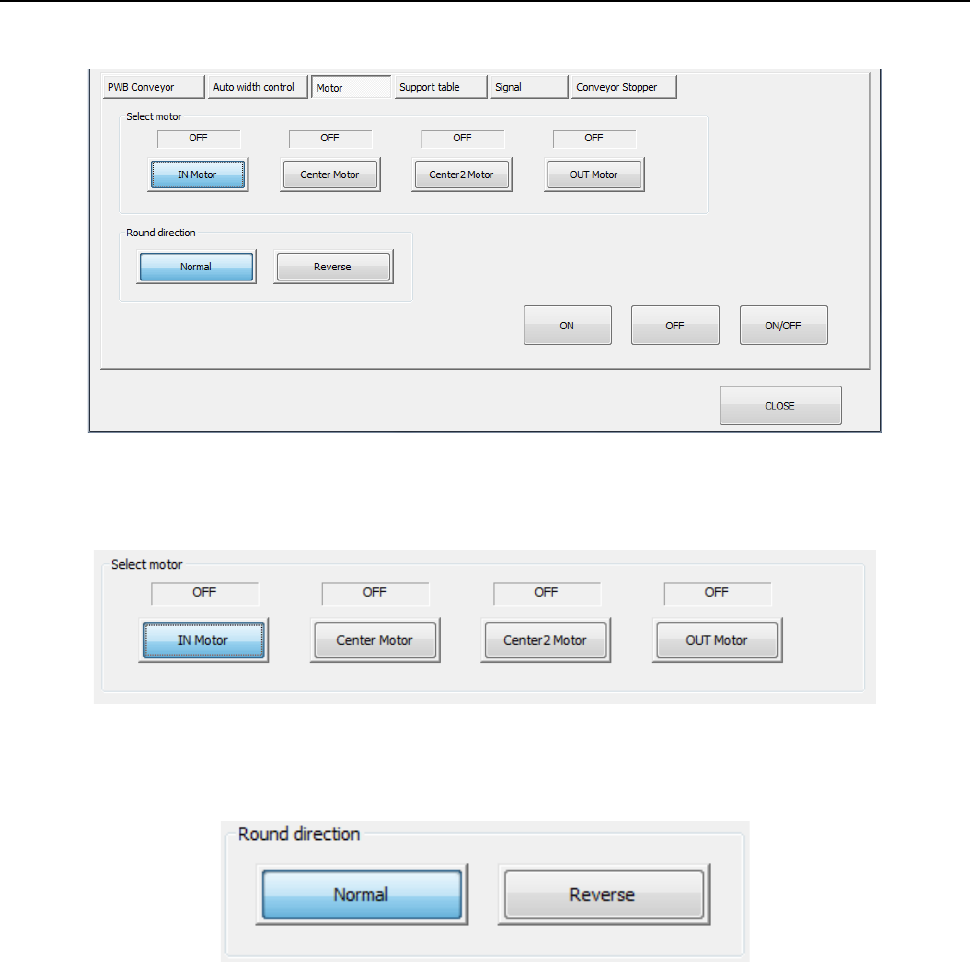
9.4.1.3 Control tab: Motor
When you press the <Motor> button, the following screen appears.
(1) Select motor
Select a control motor by radio button.
(2) Round direction
Select the direction of motor rotation by radio button.
(3) ON/OFF buttons
The ON/OFF status of he selected conveyor motor is controlled by pressing the <ON>
button, <OFF> button, or <ON/OFF> button.